Using the "Scripts" tab, you can create action chain templates for automating processes, such as onboarding and offboarding, as well as use available templates and create your own scripts.
To create a script (action chain template), you need to click the "Create script" button.

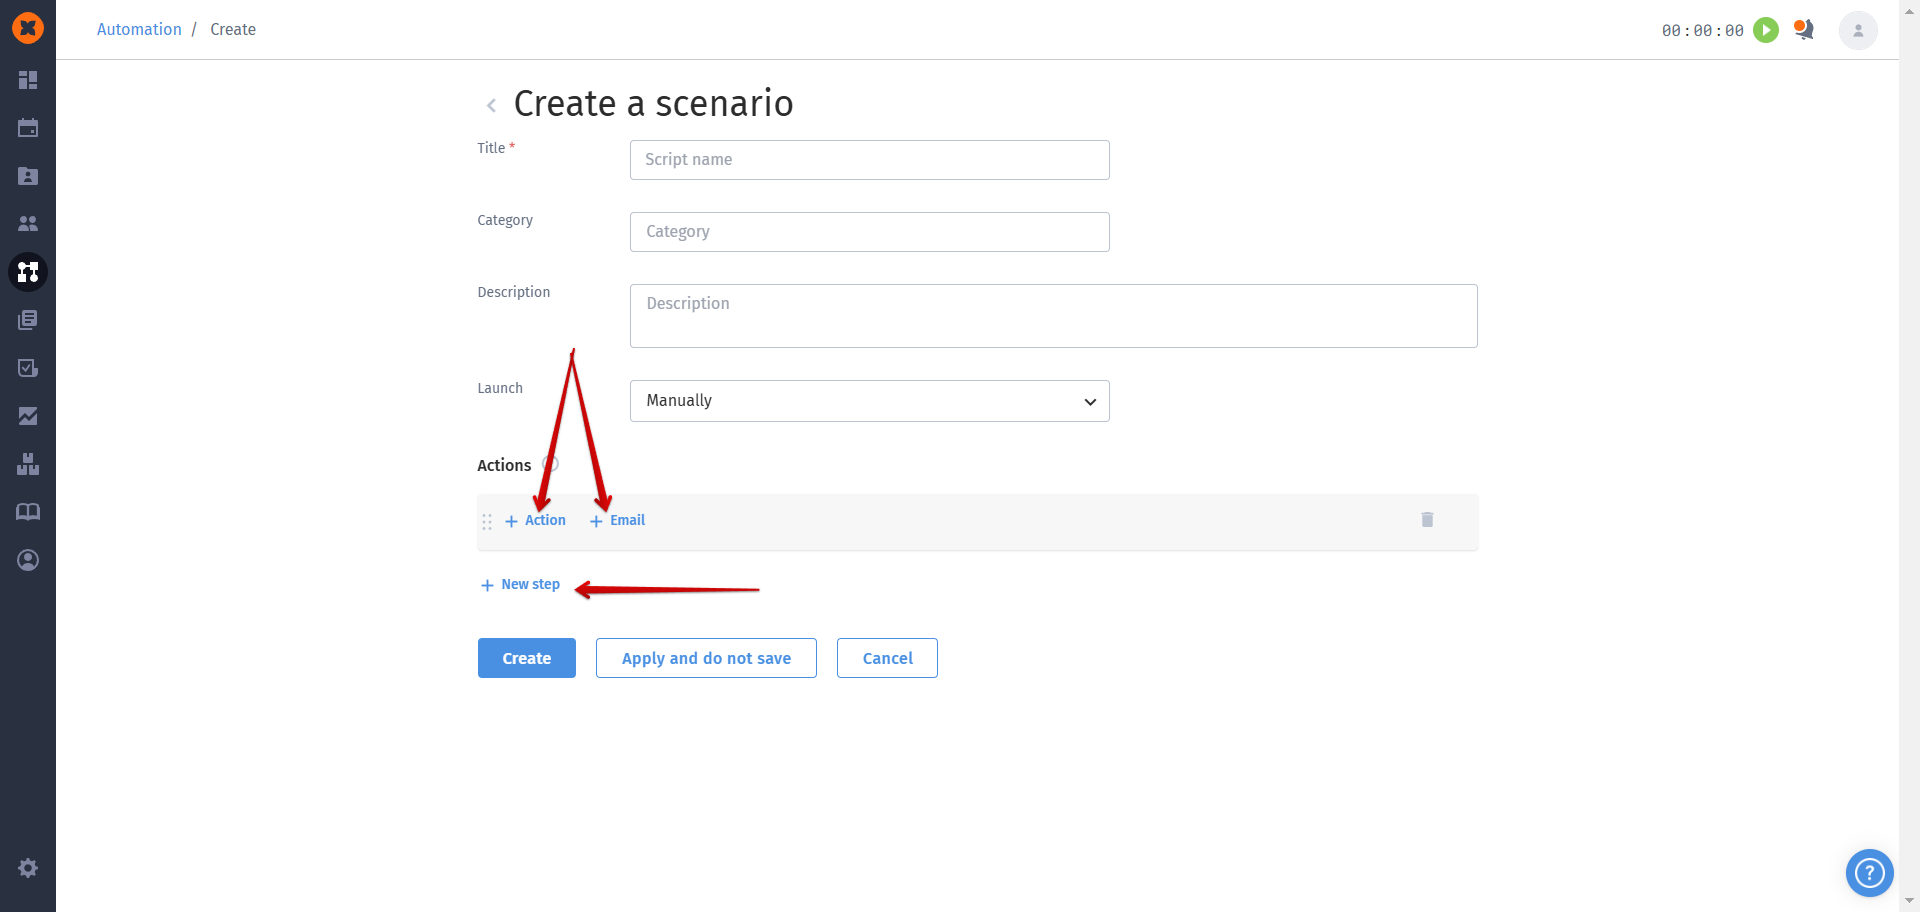
After that, a creation form will open, where you need to specify:

Title - the name of the script (template);
Category - the category of the script (template), which allows filtering of the initiated action chains;
Description - a description of the script (template);
Launch - whether the action chains will be started manually or automatically under certain conditions;
"Actions" Block:
New Step - a button for creating a new block where you can add actions that can be performed in parallel;
+Action - a button for creating a new action.
+ Email - button to add an email.
When creating an action, you need to fill out the corresponding form, where:
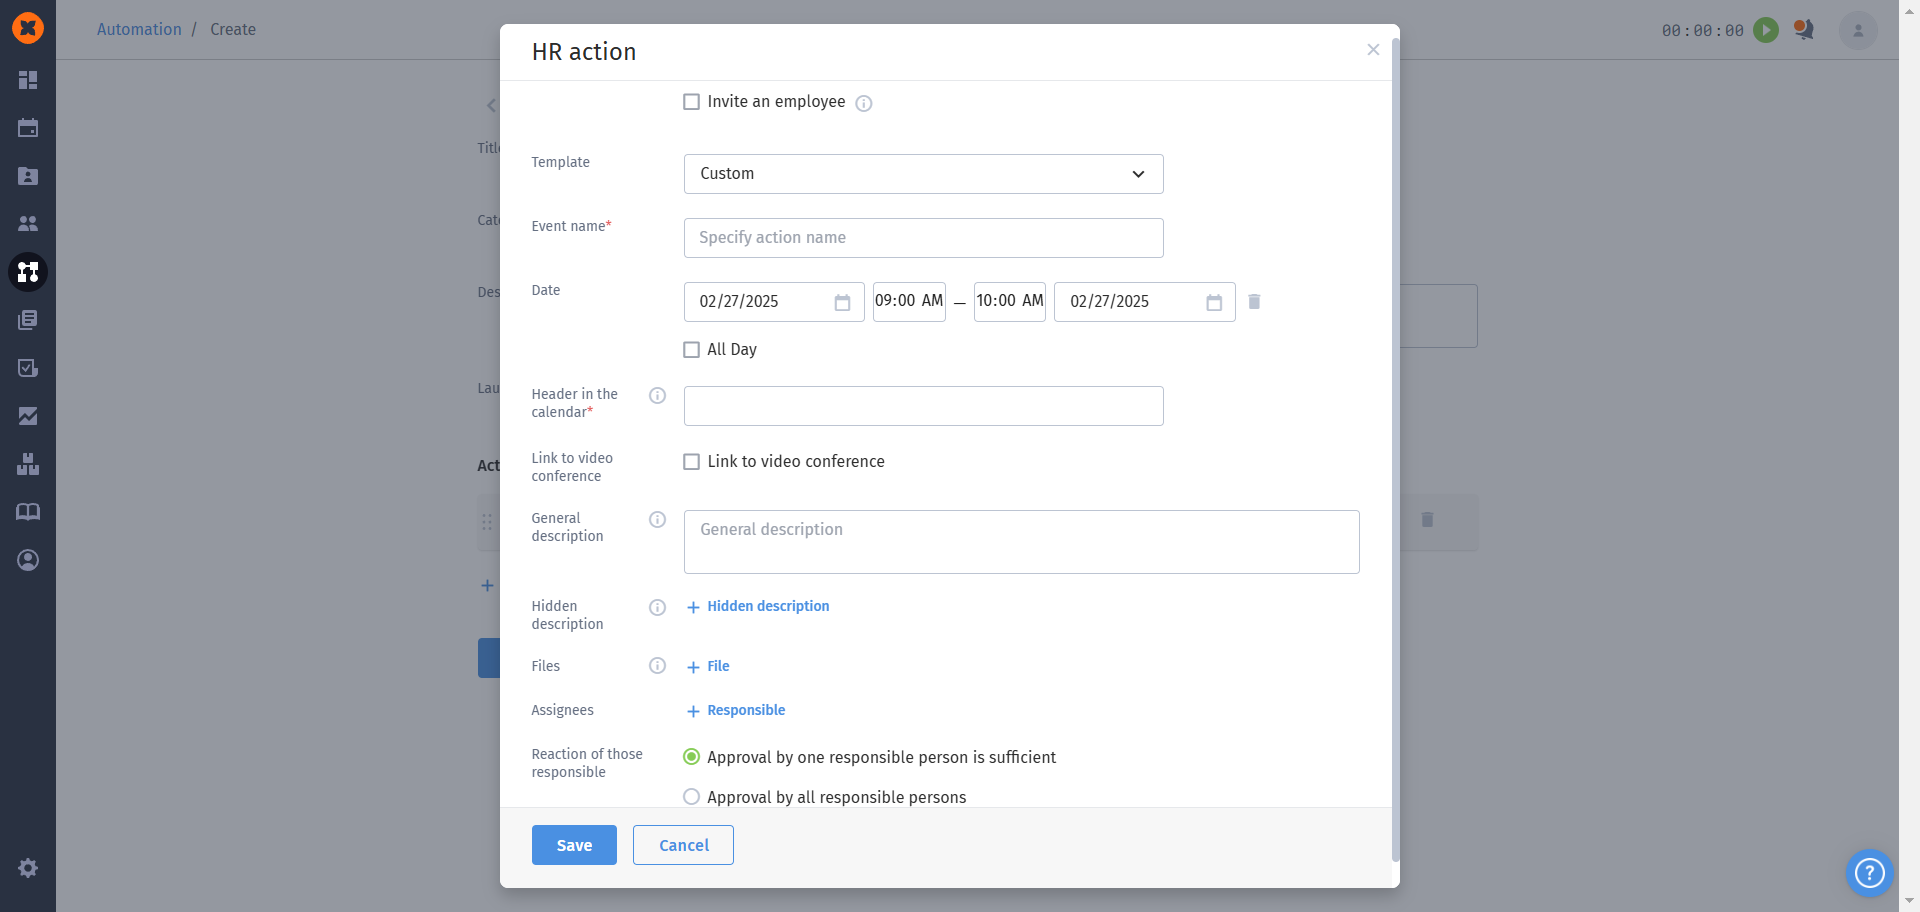
Invite an employee - after the invitation, the employee will receive a notification and see it as an event in the HURMA calendar and in their Google or Microsoft calendar (if the employee has connected the calendar integration);
Template - a field to select an action template (action templates are created in the "Settings" - "Actions" section);
Event name - a field to enter the action name in case the action is not based on a template;
Date - the date and time of the action;
Header in the calendar - the event title in Google, Outlook, and other calendars;
Link to video conference - a meeting isn't always necessary for the action, so to provide better understanding among all participants, you can remove the video conference link if needed;
General description - this field will be visible to all participants in the calendar and in the email invitation;
Hidden description - an internal field with a description for the author and responsible persons;
Files - a block for adding files;
Assignees - employees who should be assigned as responsible for this action;
You can choose dynamic responsible persons (who will depend on which team the employee, for whom the scenario is triggered, belongs to) or fixed responsible persons.

Reaction of those responsible - settings for an action where more than one person is responsible: approval from any one responsible person is sufficient – the task will be considered completed when any responsible person completes it first; approval by all responsible persons – the task will require completion by all responsible persons.
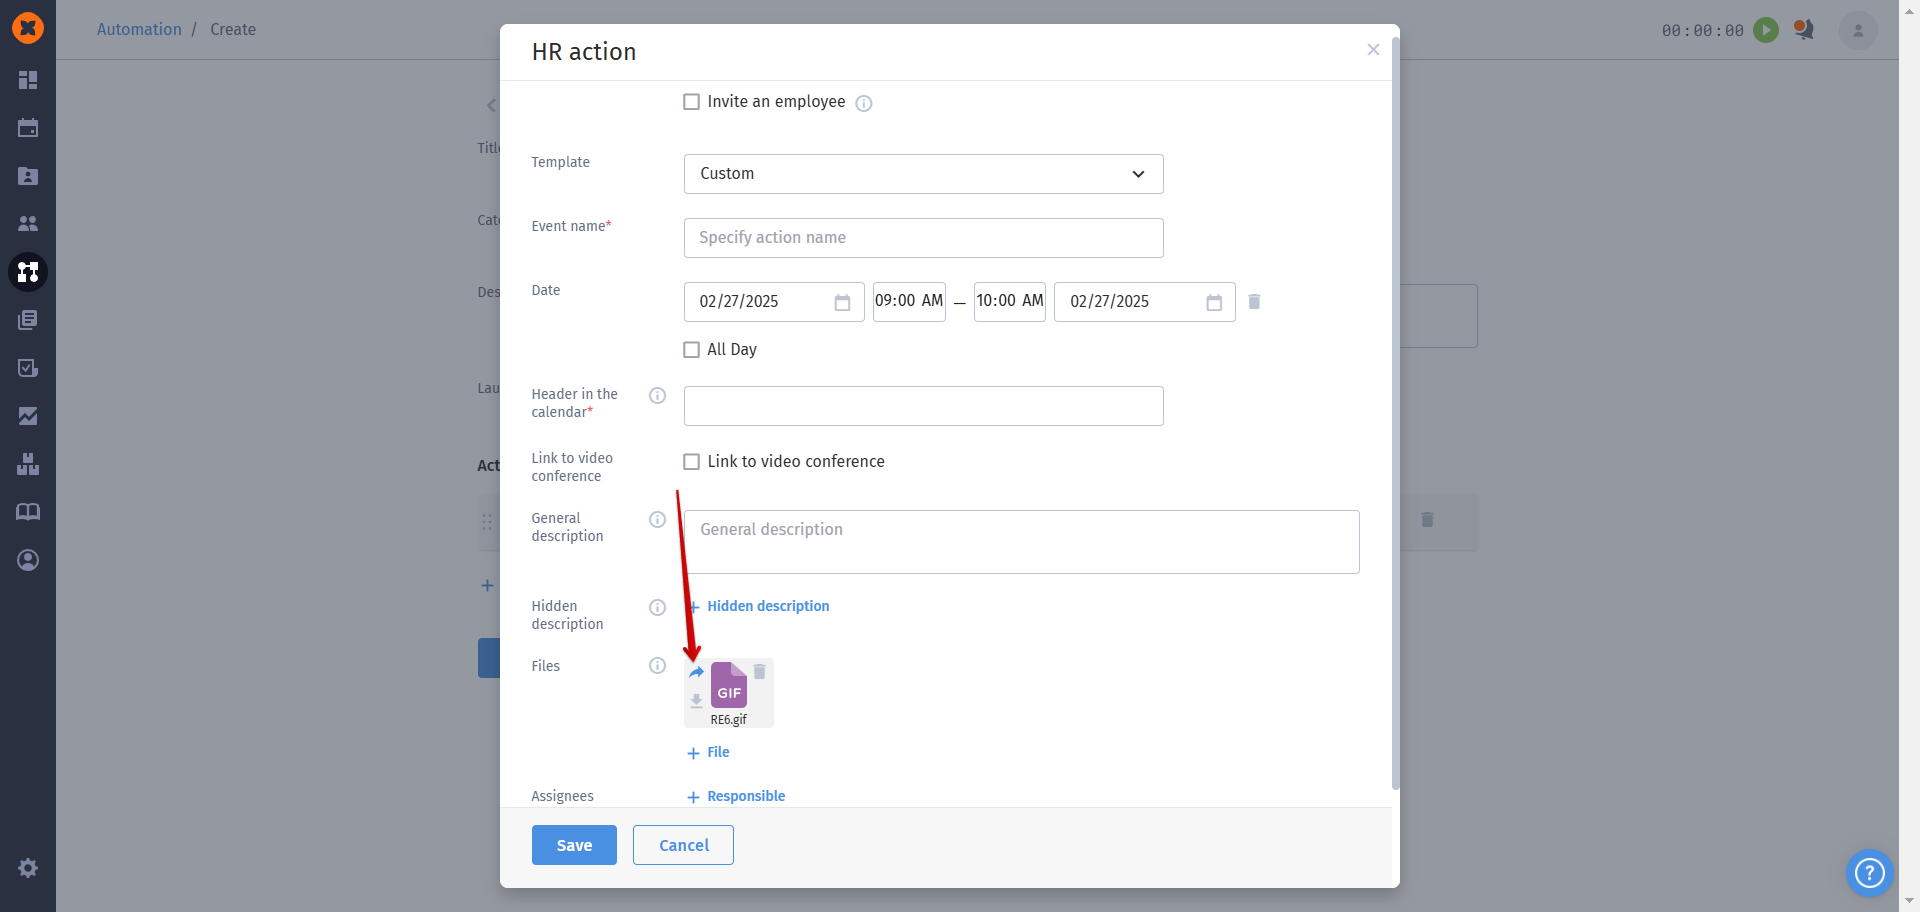
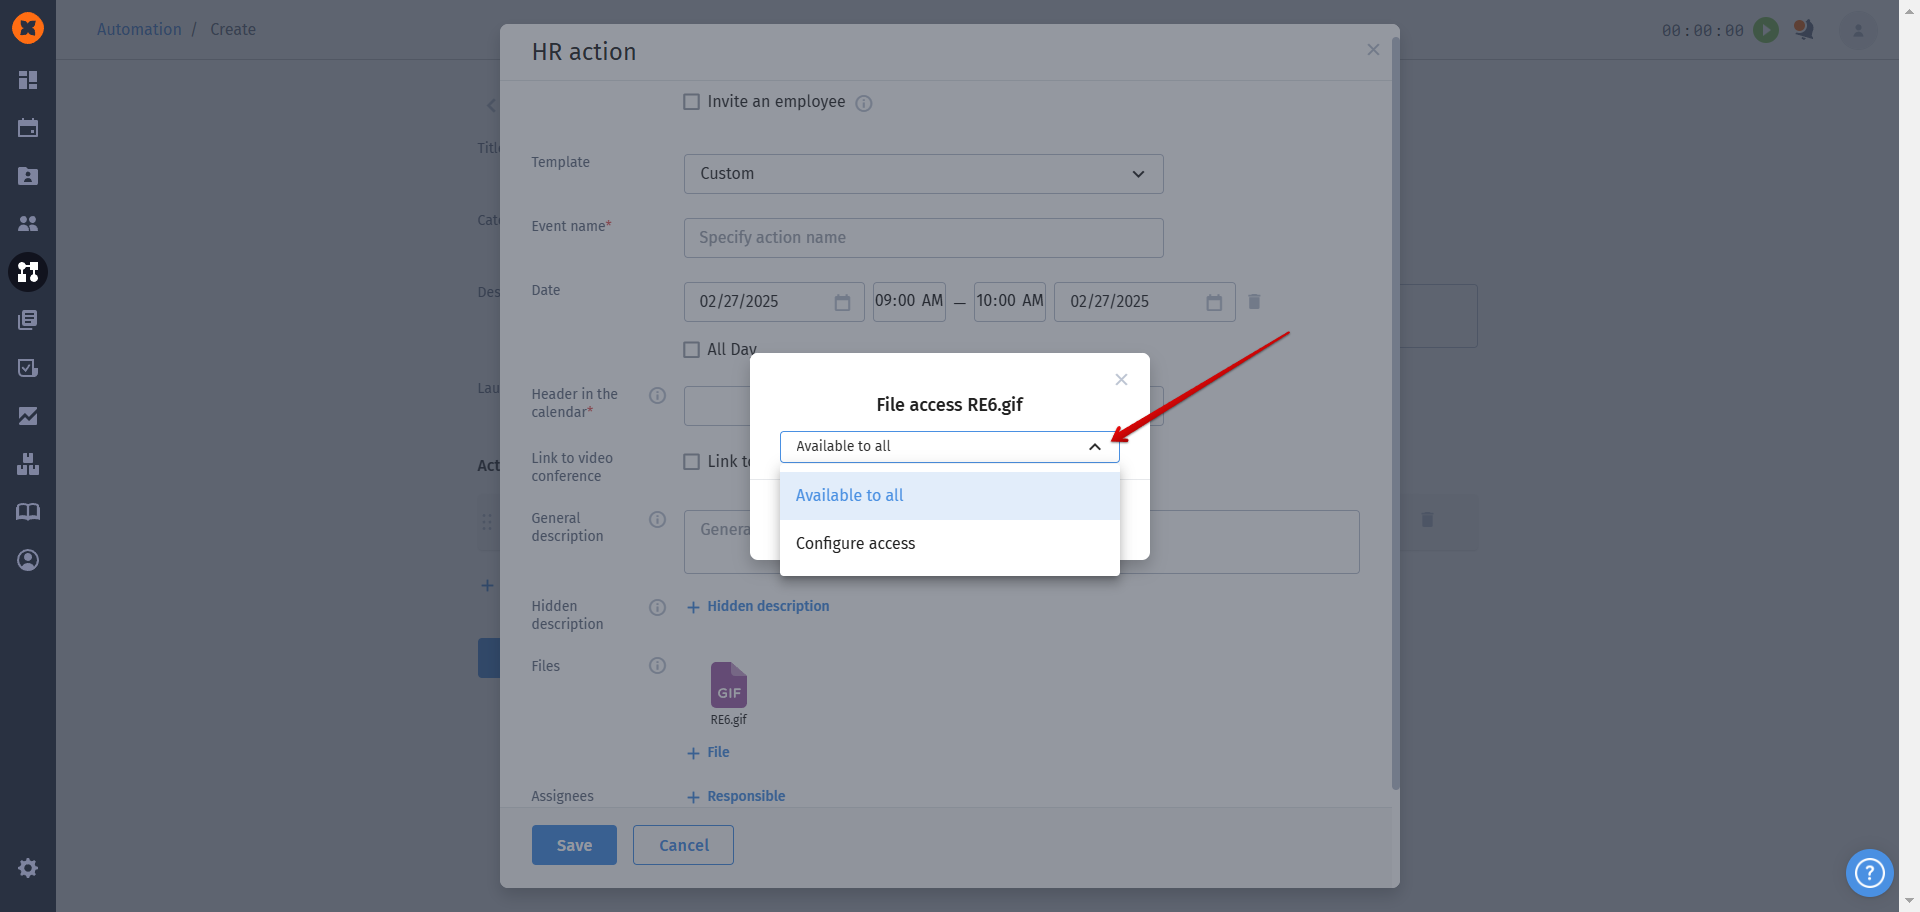
There is also the option to configure access to view the file attached to the action:
When creating an email, you need to fill out the form, where:
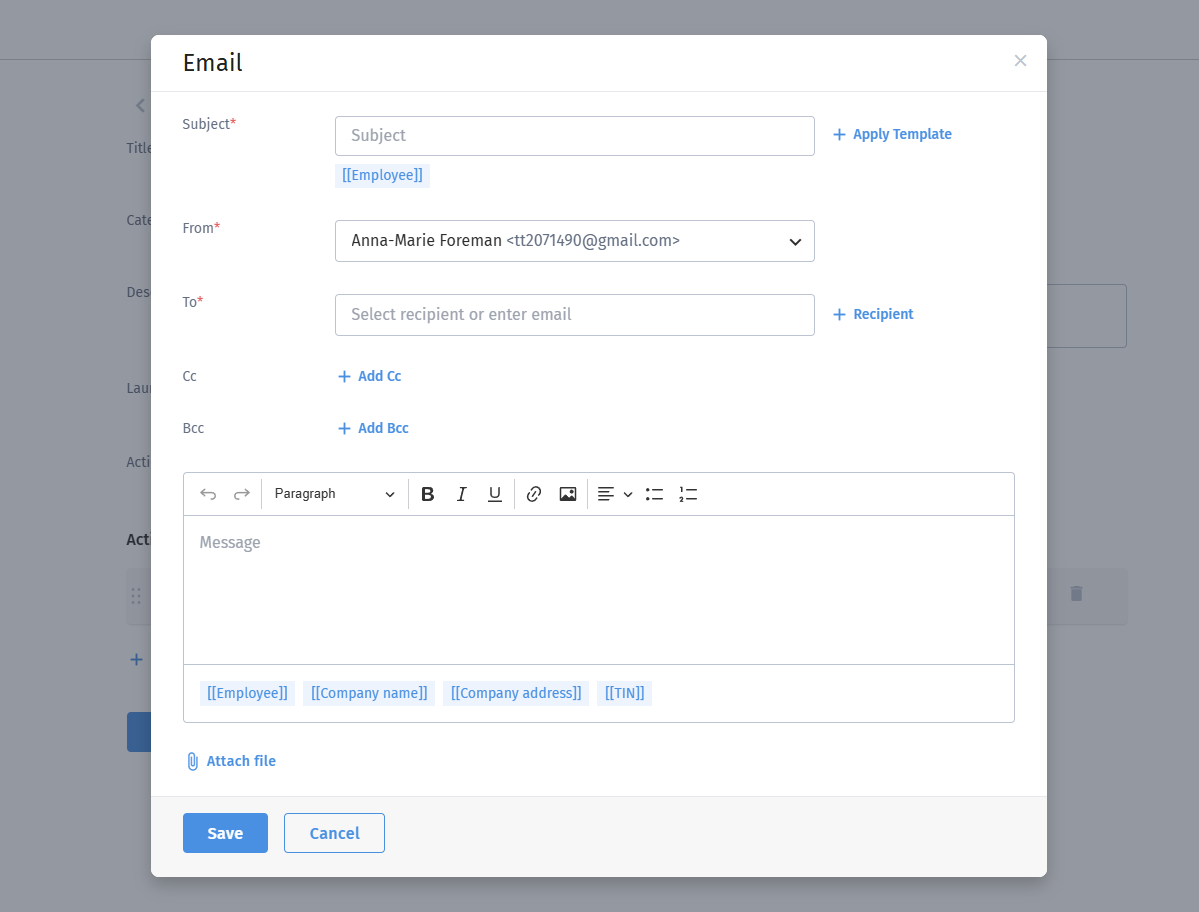
Subject - in this field, you need to specify the subject of the email or apply an existing template;
From - select the account from which the email will be sent;
To - in this field, you can choose the recipient from the list (emails can be sent to both the employee's corporate and personal email) or select dynamic recipients by using the +Recipient option (in this case, the emails will be sent only to the employees' corporate email addresses);
CC - the option to add recipients in the CC field;
BCC - the option to add recipients in the BCC field;
Message body - in this field, you need to fill in the body of the email, also you can use tags and attach files.
The process of manually launching action chains is described in the article "Automation. Assigning action chains to employees (manual launch)"
The action chains can be launched automatically according to the conditions and criteria you have set.
Condition - what needs to happen for the action chains to be triggered;

Criterion - for whom the action chain will be launched.


When adding multiple criteria, you can choose the logic by which they will be considered before launching the action chain. Two logic options are available: "AND" or "OR."

"AND" logic means that all criteria must be met for the action chain to be triggered. For example, based on the screenshot above, this means that an employee profile must be created, the profile must indicate male gender, and the role of "Employee" must be assigned in the system. If these conditions are met, the action chain will be launched automatically.
"OR" logic allows the action chain to be triggered if at least one of the criteria is met. For example, if an employee profile is created and either male gender is selected or the role of "Employee" is assigned in the system, the action chain will be launched automatically.
During the creation of a scenario, you can choose whether this scenario will be active or not.

Active Scenario – a scenario that is triggered automatically as soon as all the conditions and criteria specified in it are met.
Inactive Scenario – a scenario that does not trigger automatically, even if all the conditions and criteria in it are met.
