The system allows you to send emails and automate the process of sending emails to candidates by creating and using ready-made templates in the "Templates" section. This can be done manually or automated to send emails when a job stage changes.
This section also includes pre-made standard email templates that you can edit, or you can create your own. With the use of tags, your emails will be personalized and engaging.
To create a new template, click the "Create" button.
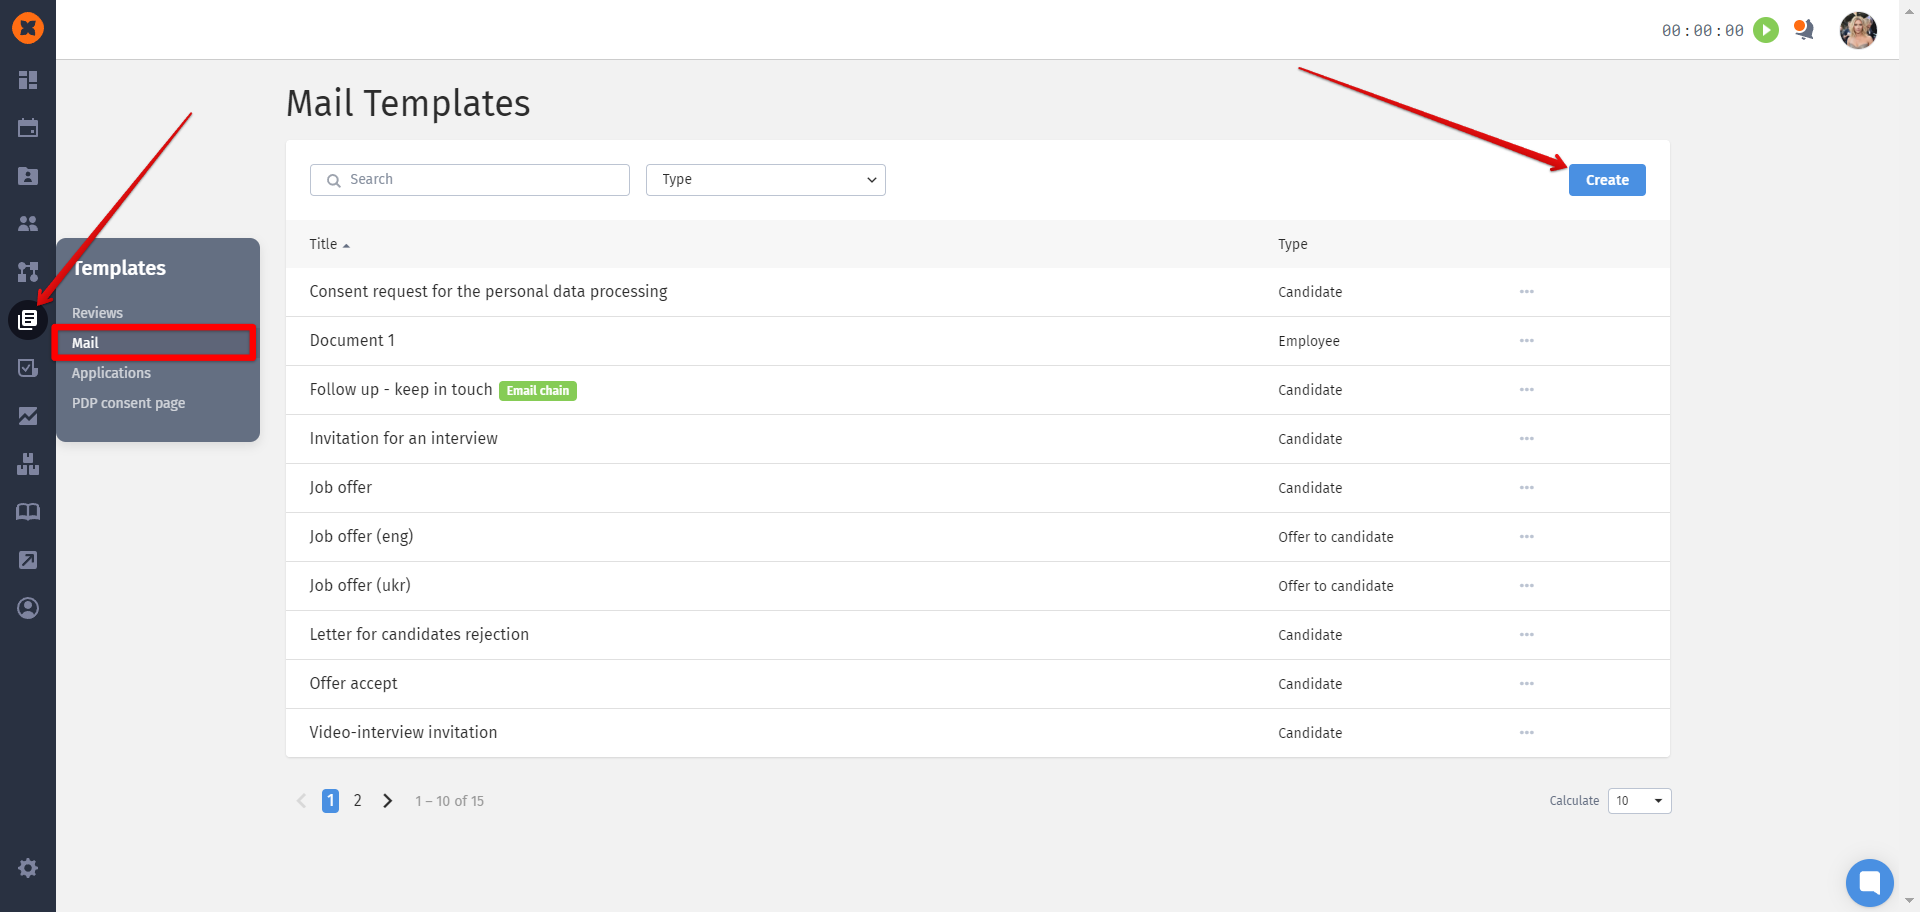
After clicking the "Create" button, a creation form will open where you need to perform the following actions:
Select the template type, fill in the "Template Name" field, and specify the "Subject of the Email";
Fill in the template body with tags, and you can also attach a file if needed;
Save the template by clicking the "Save" button.
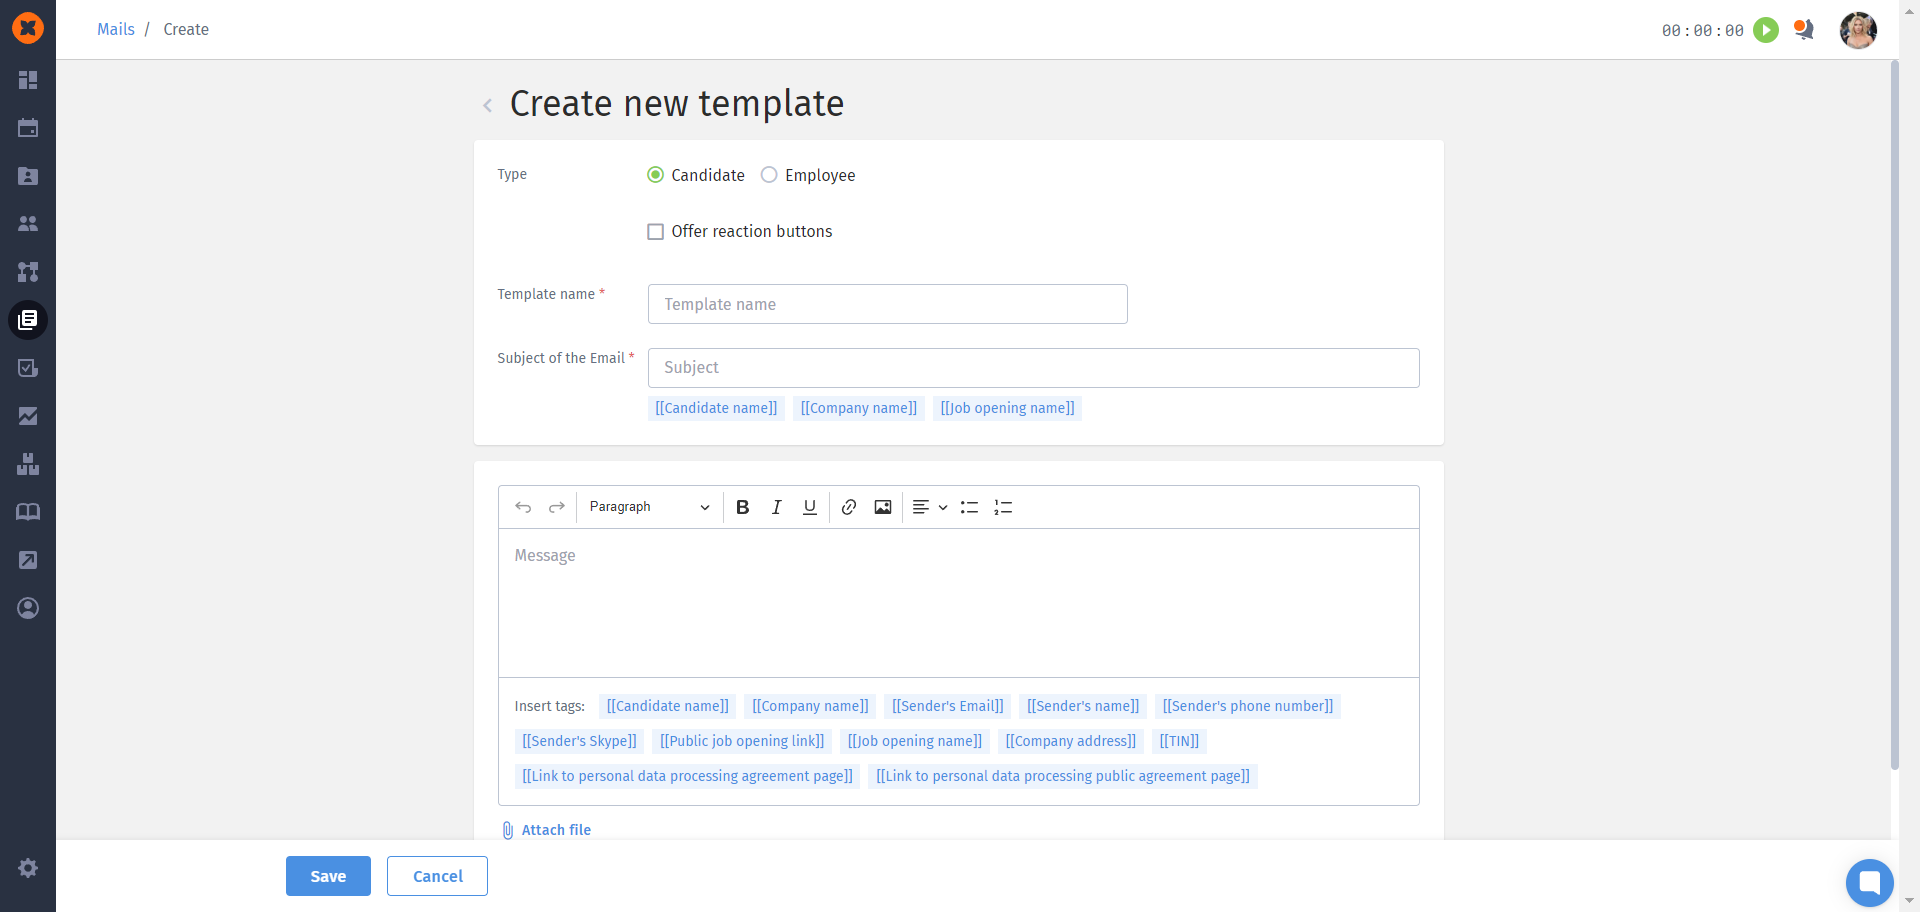
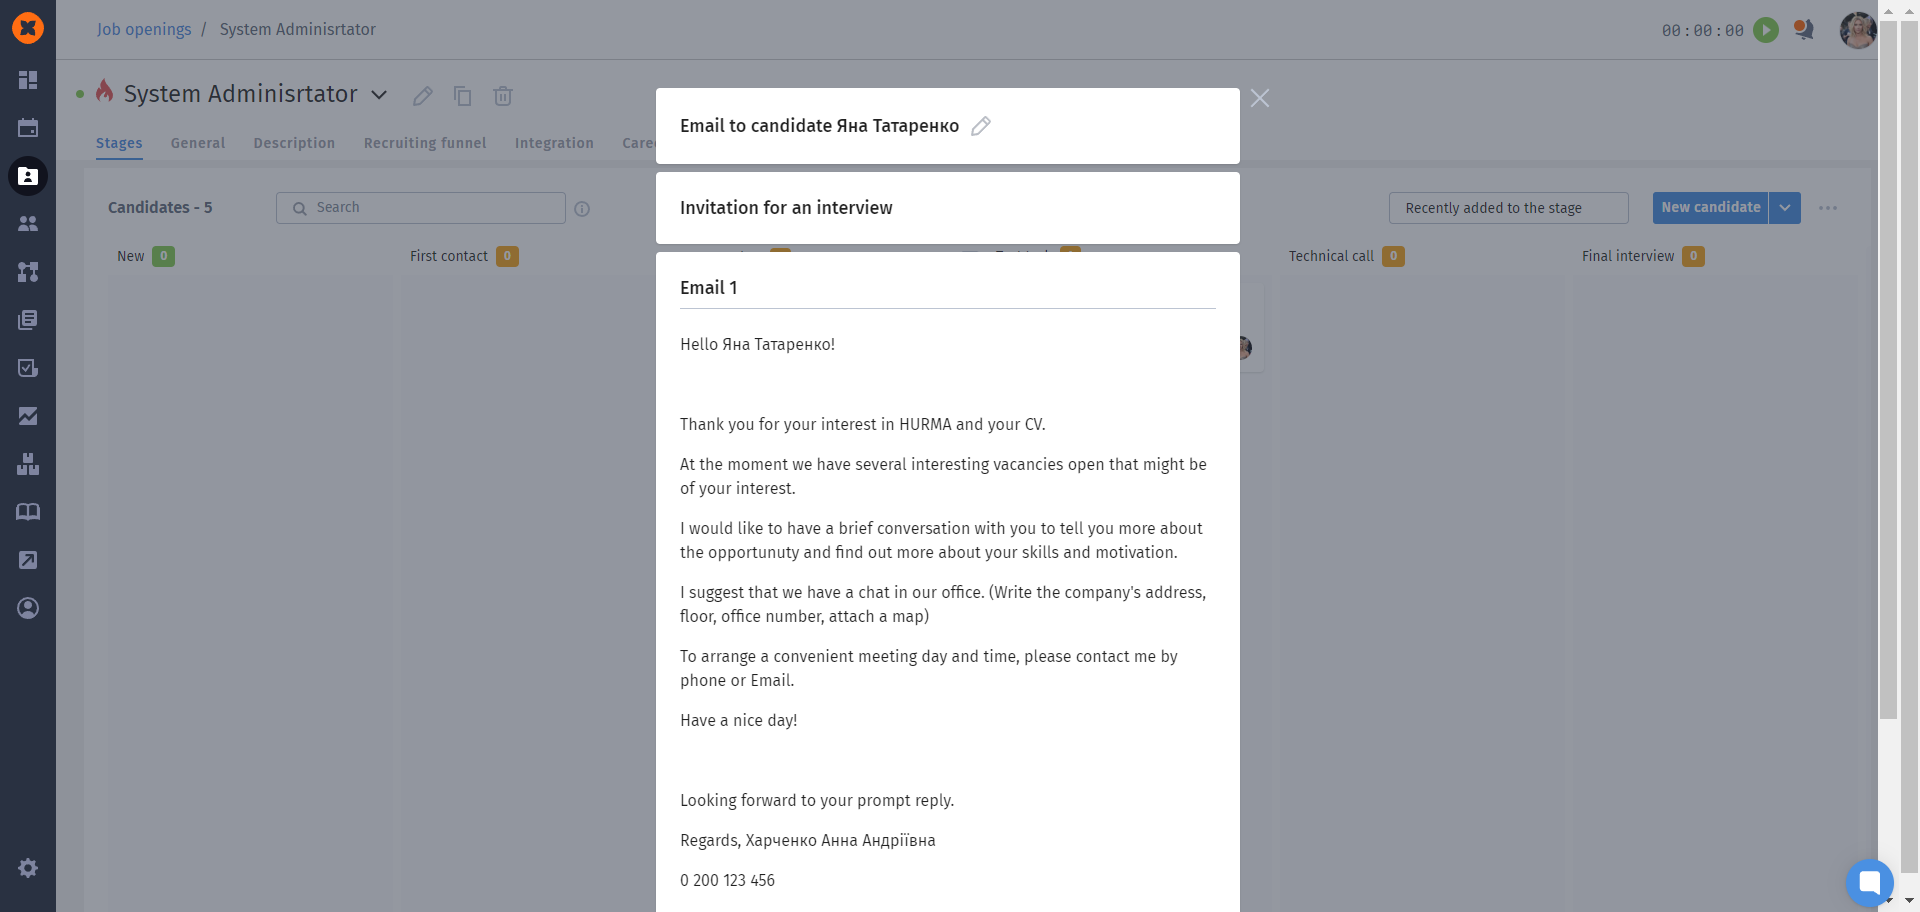
Tags can be inserted in the subject or body of the email, allowing the system to automatically fill in the necessary information - such as the job title, candidate's name, sender's contact details, and more.
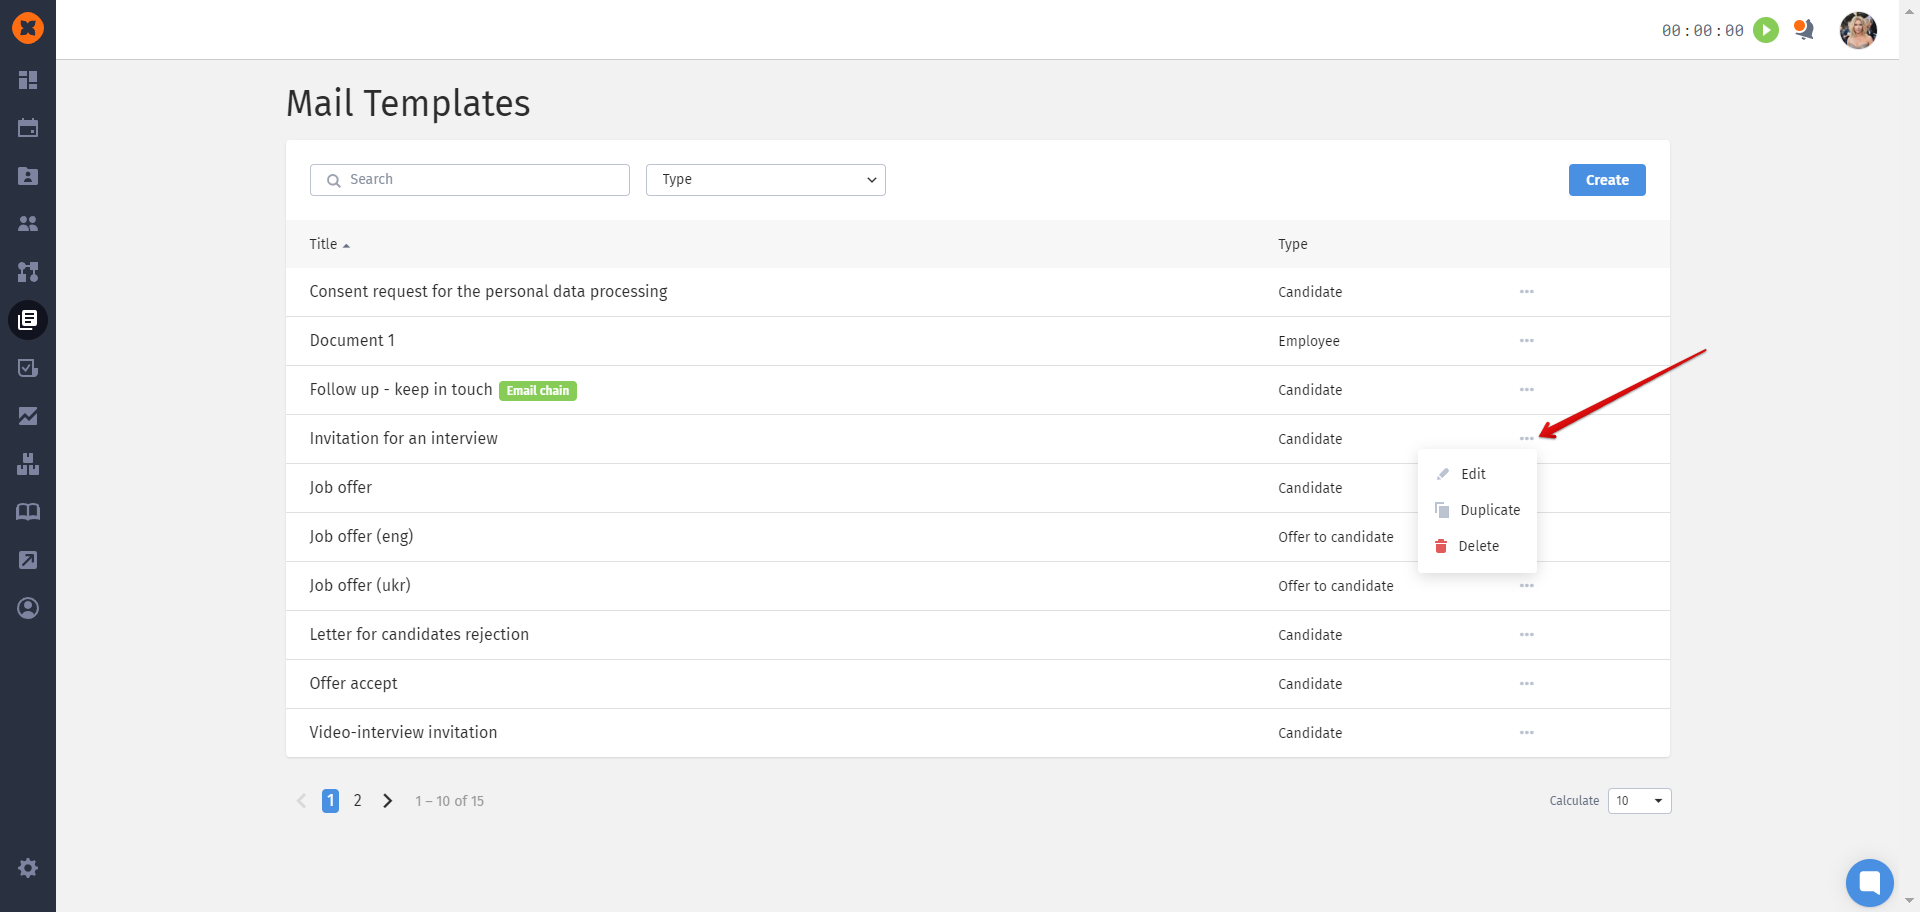
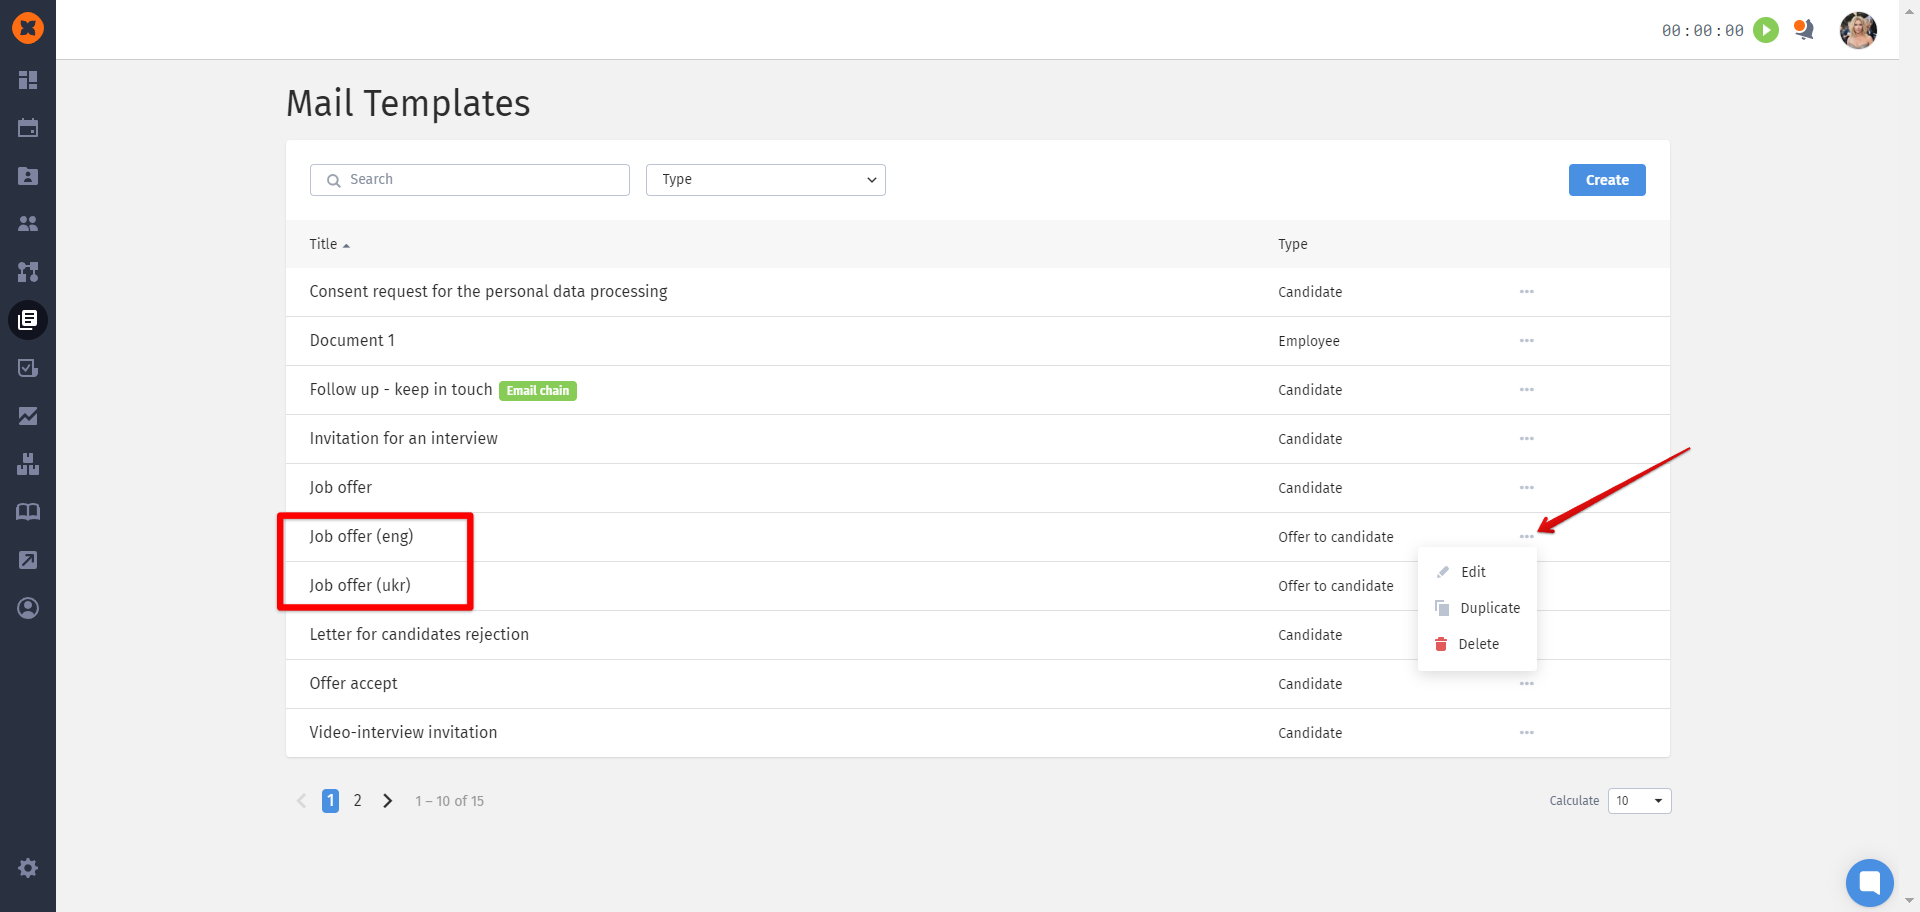
The process for editing a template is identical. To do this, select the appropriate option by clicking on the three dots in the template menu.

[[Candidate name]] – the full name of the candidate as it appears in their profile.
[[Job opening name]] – the title of the job to which the candidate is already attached.
[[Job opening link]] – a link to the public job posting that is attached to the candidate’s profile and has the status "Published" in the "Integration" - "Public" section.
[[Company name]] – the name of the company as specified in "Settings" - "General Settings".
[[Company address]] – the address of the company as specified in "Settings" - "General Settings".
[[TIN]] – the company’s tax identification number as specified in "Settings" - "General Settings".
[[Sender's name]] – the full name from the profile of the employee who sent this email to the candidate.
[[Sender's Email]], [[Sender's pnone number]], [[Sender's Skype]] – the corporate email address, phone number, and Skype ID from the profile of the employee sending this email to the candidate.

sending a template from the candidate's profile;
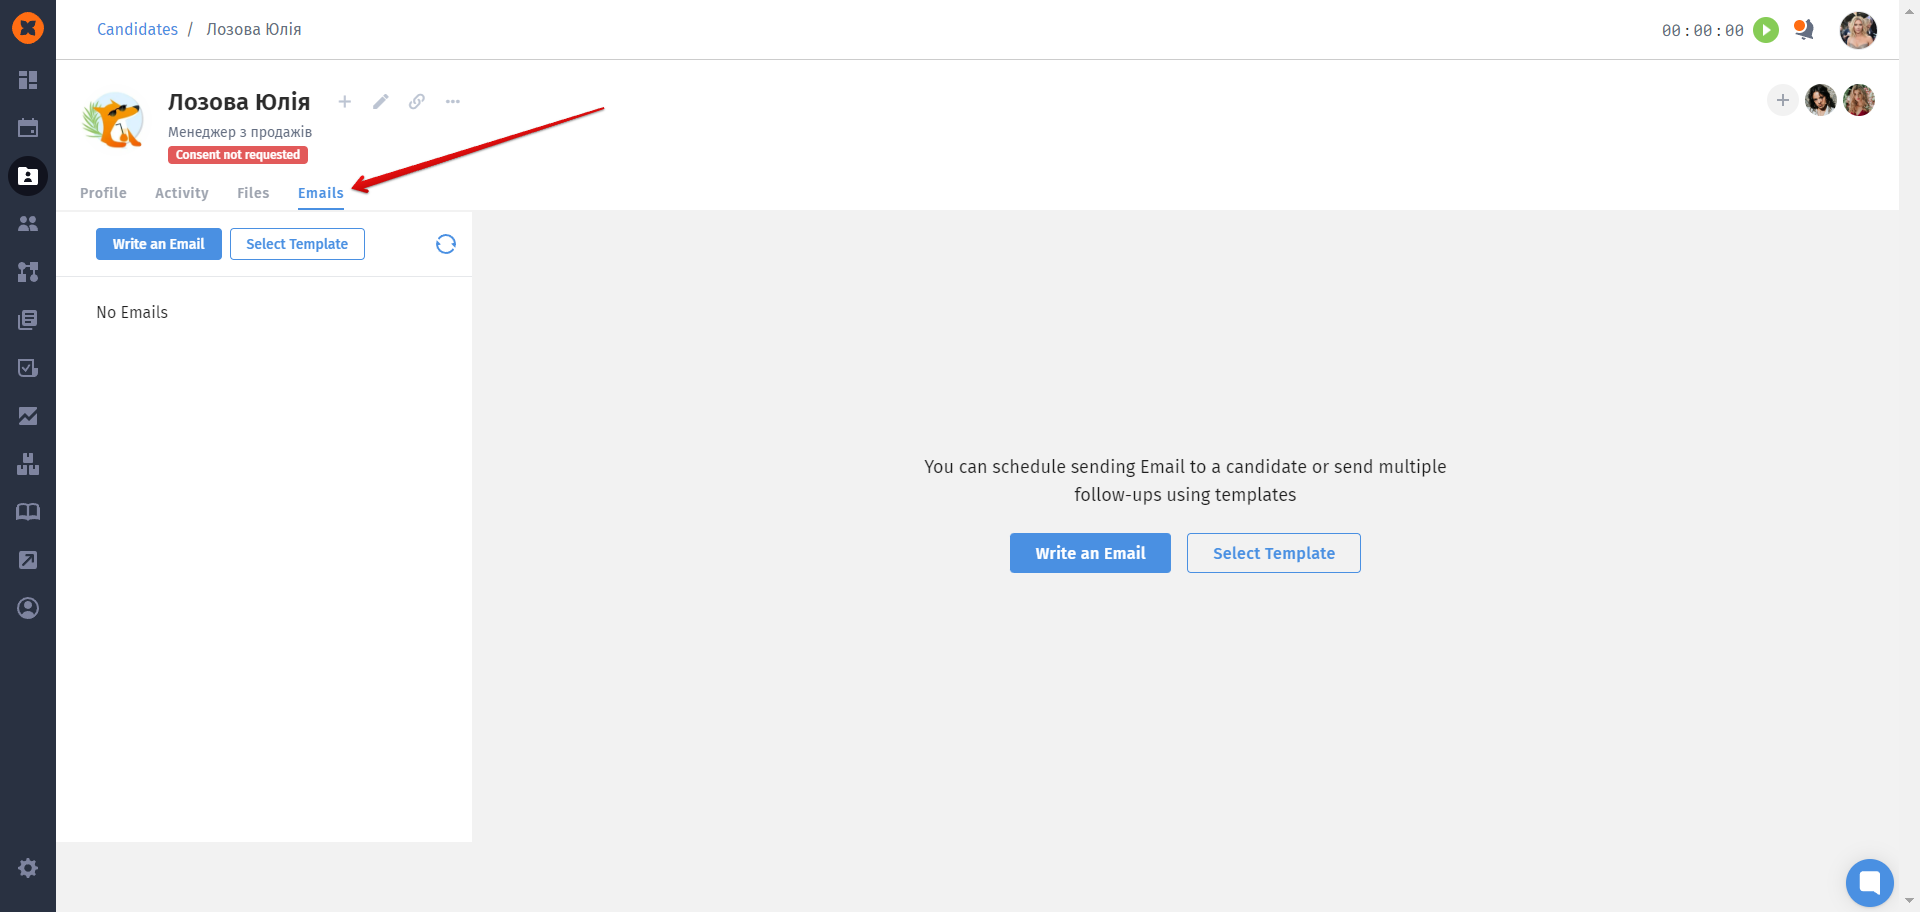
mass sending of an email template to a list of candidates;
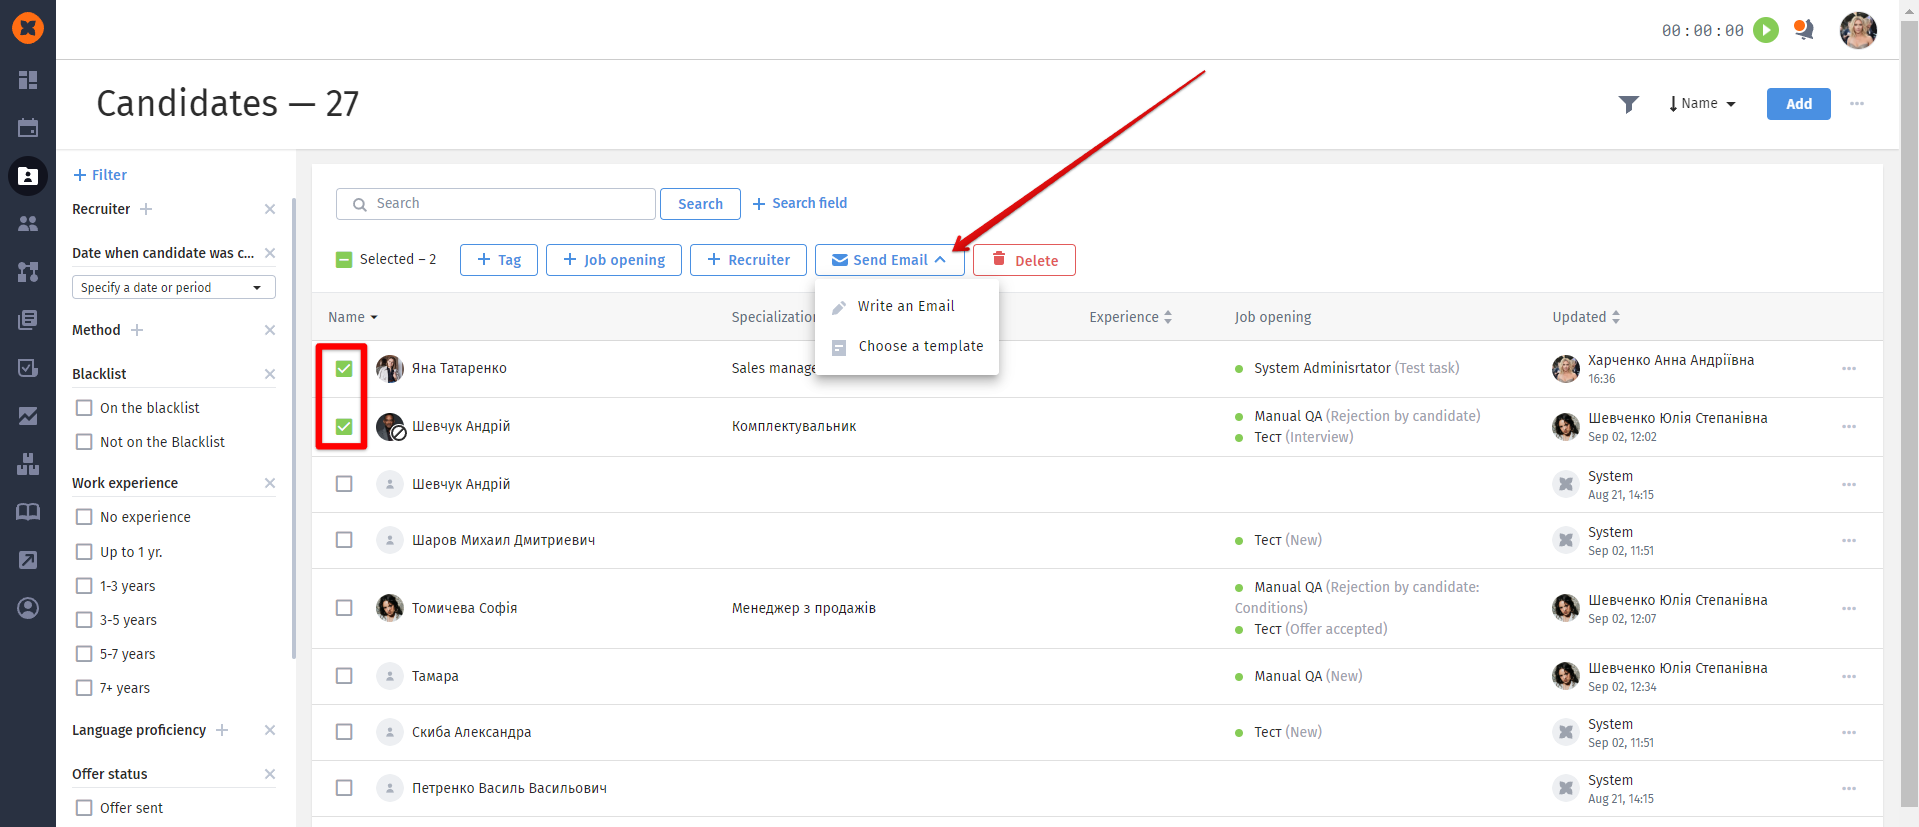
automatic sending of an email when the job stage changes.
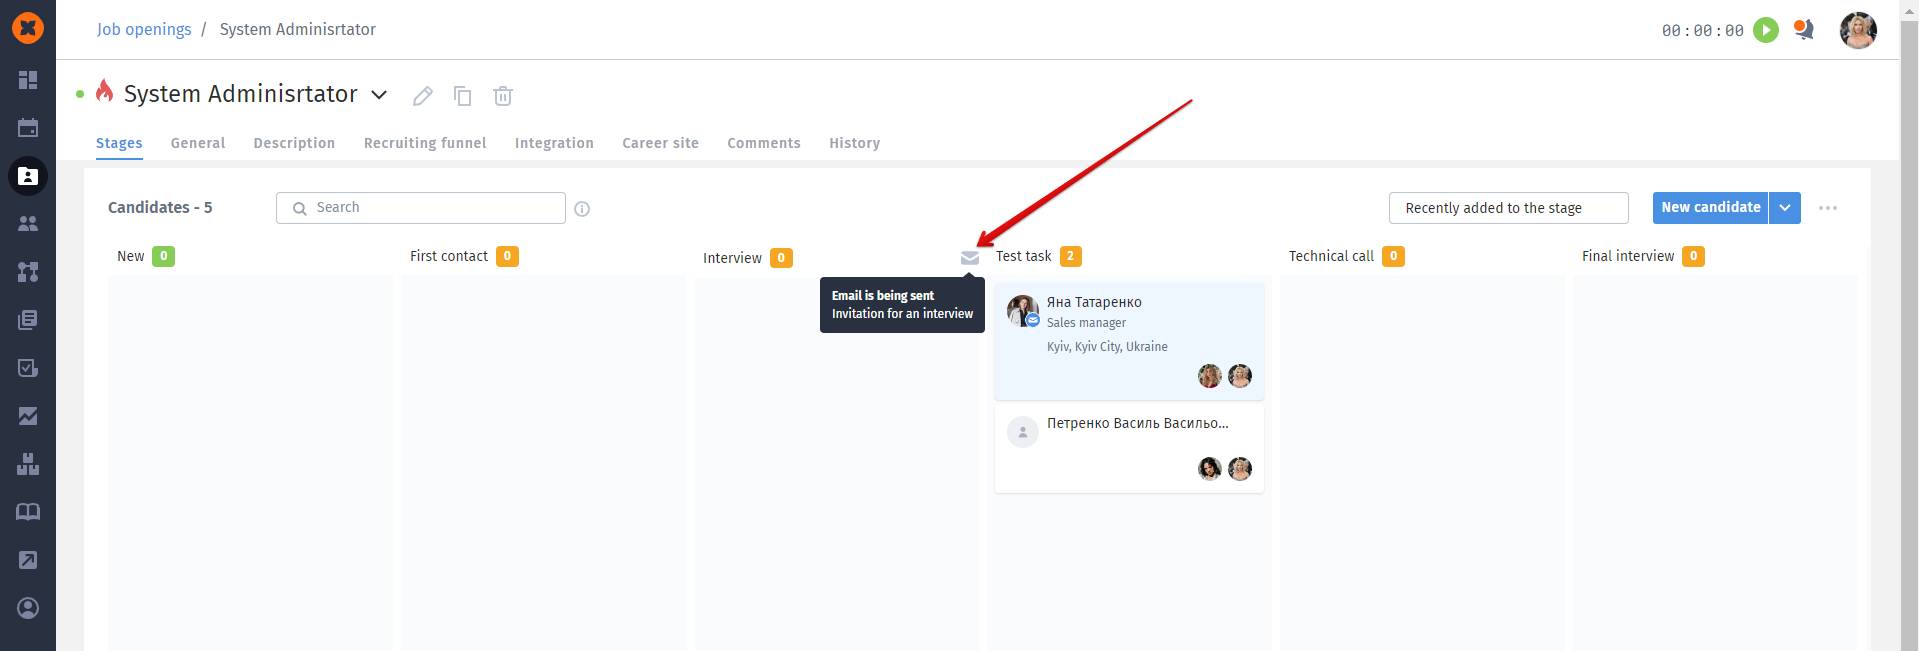
When a candidate is moved from one stage to another, emails attached to each of the stages are sent.
Used tags are filled with the corresponding information. If a tag does not have information, it will appear in red, and the user will not be able to send the email.
If you need to send multiple emails to a candidate automatically, for example:
propose a job to candidates for consideration, then follow up to get a response;
periodically stay in touch with potential candidates, reminding them about company news, etc.
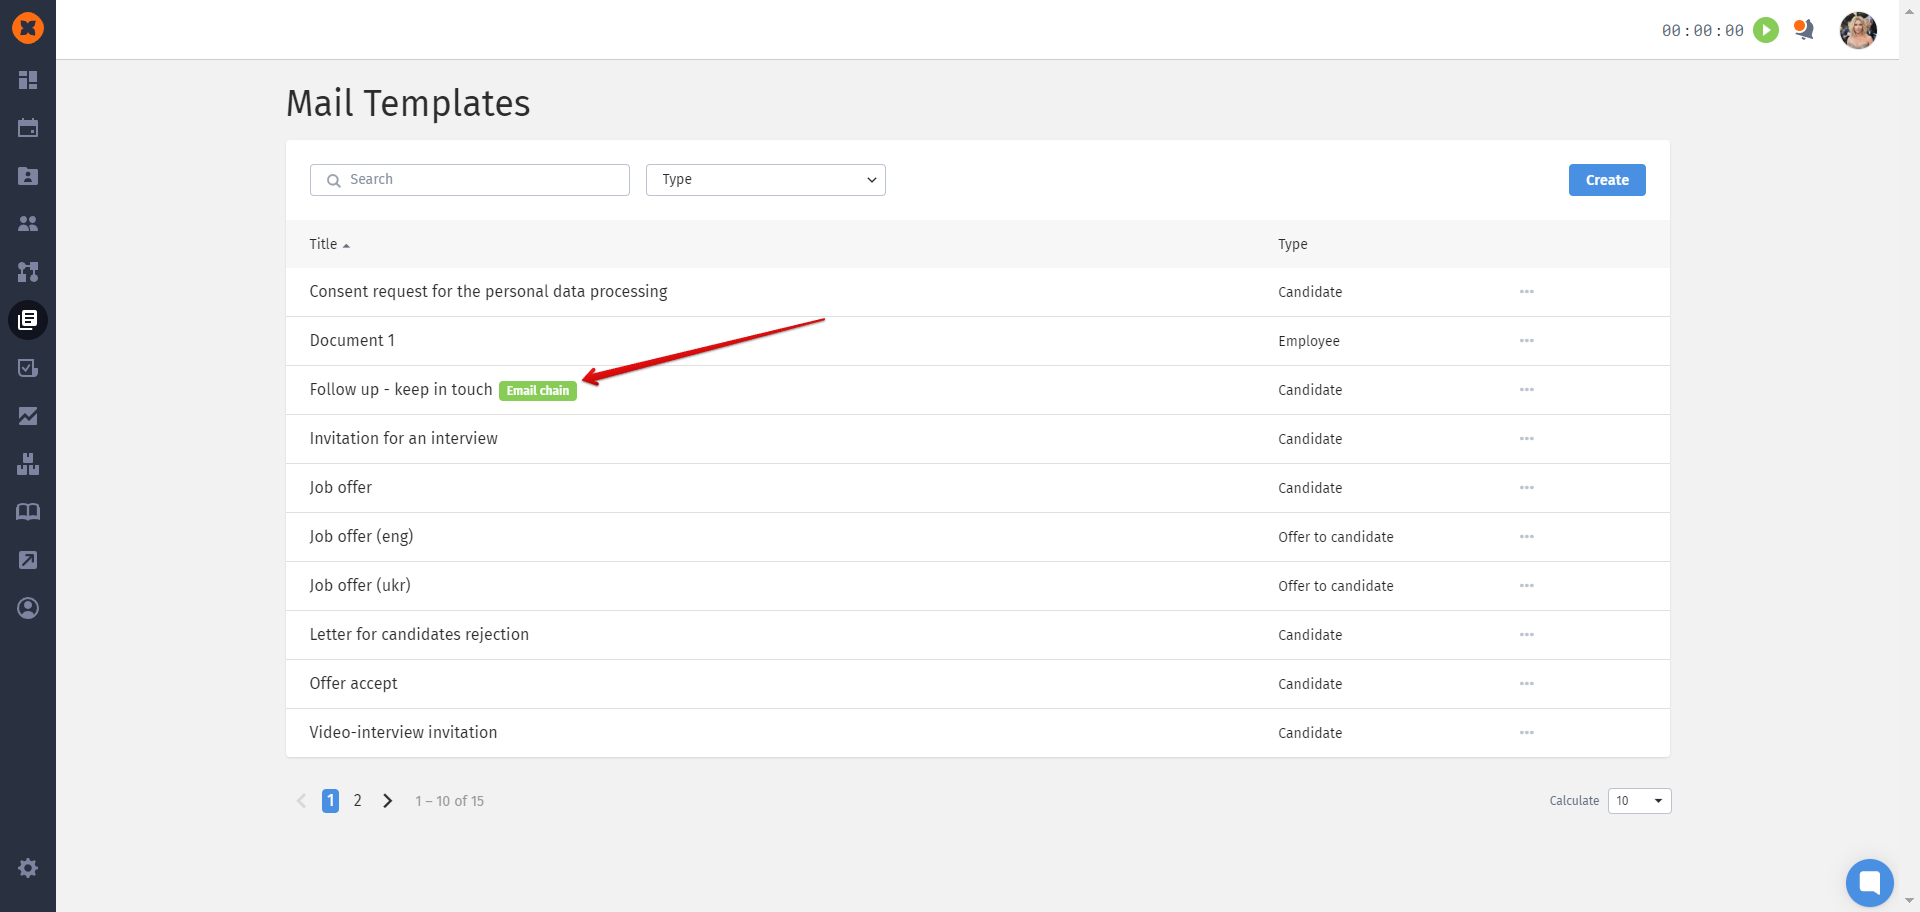
Then, follow-up email chains will be useful.
To create a follow-up template, go to the "Templates" section - the "Mails" tab, click on "Create," and set up the first email to the candidate.
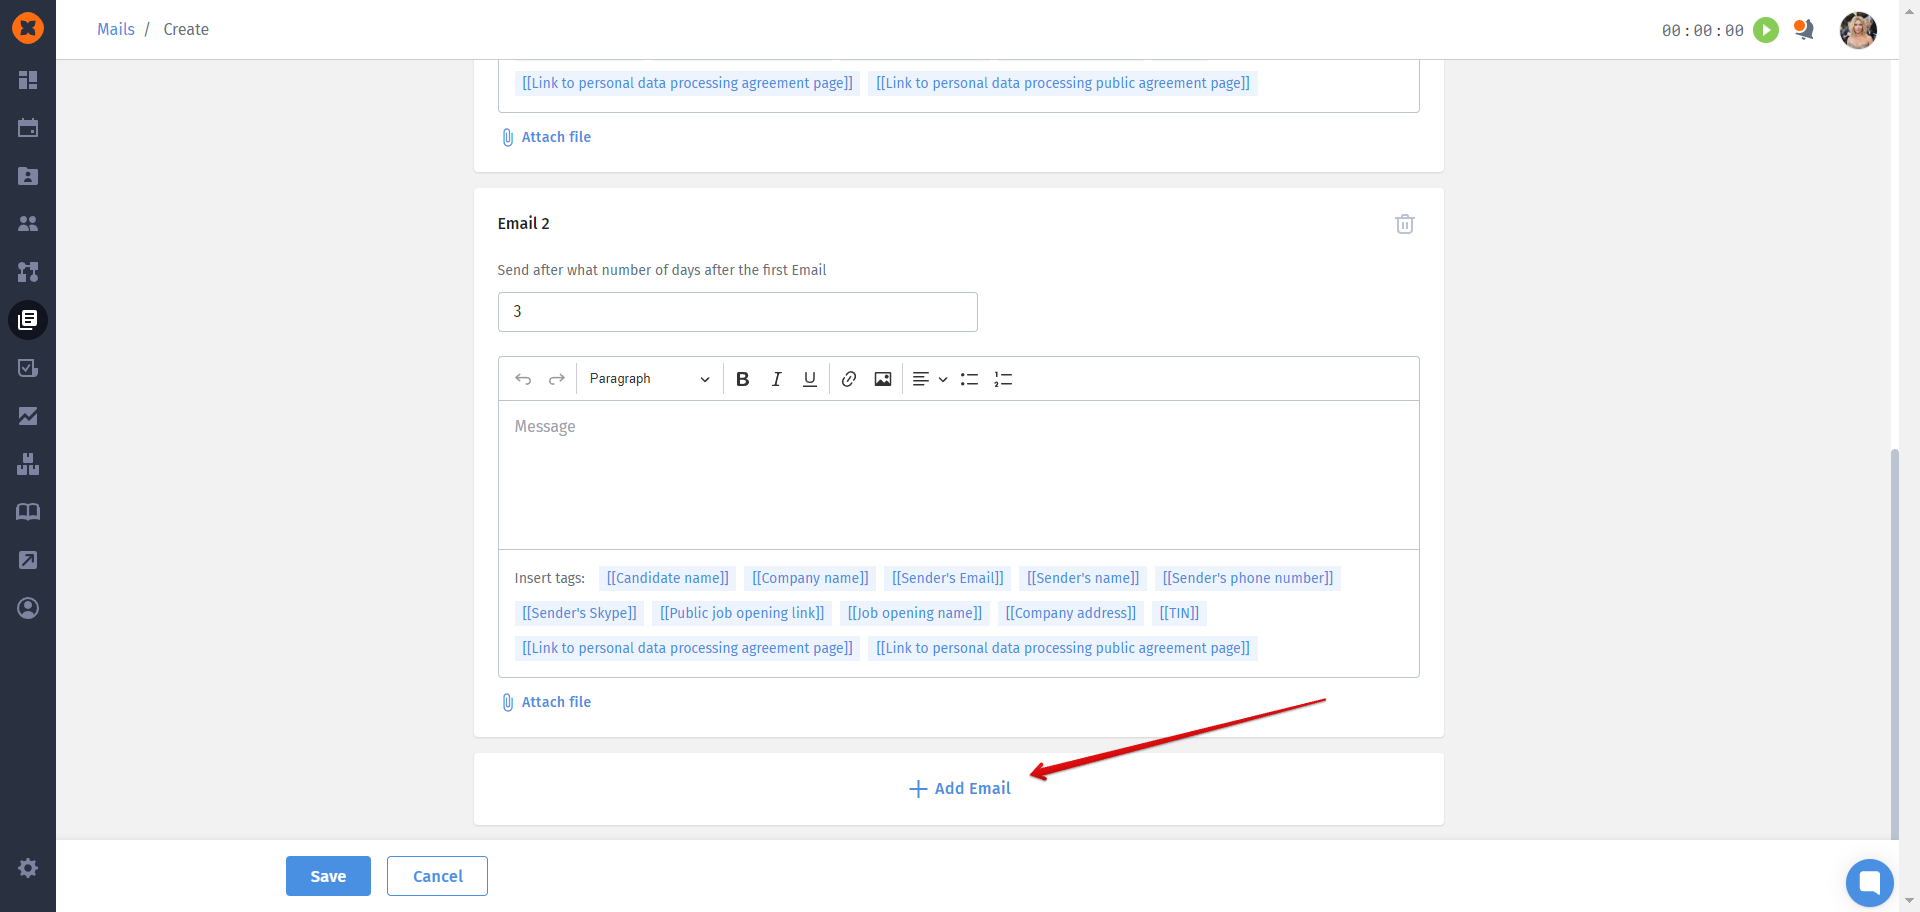
Click on "+ Add Email" and set up the next one.
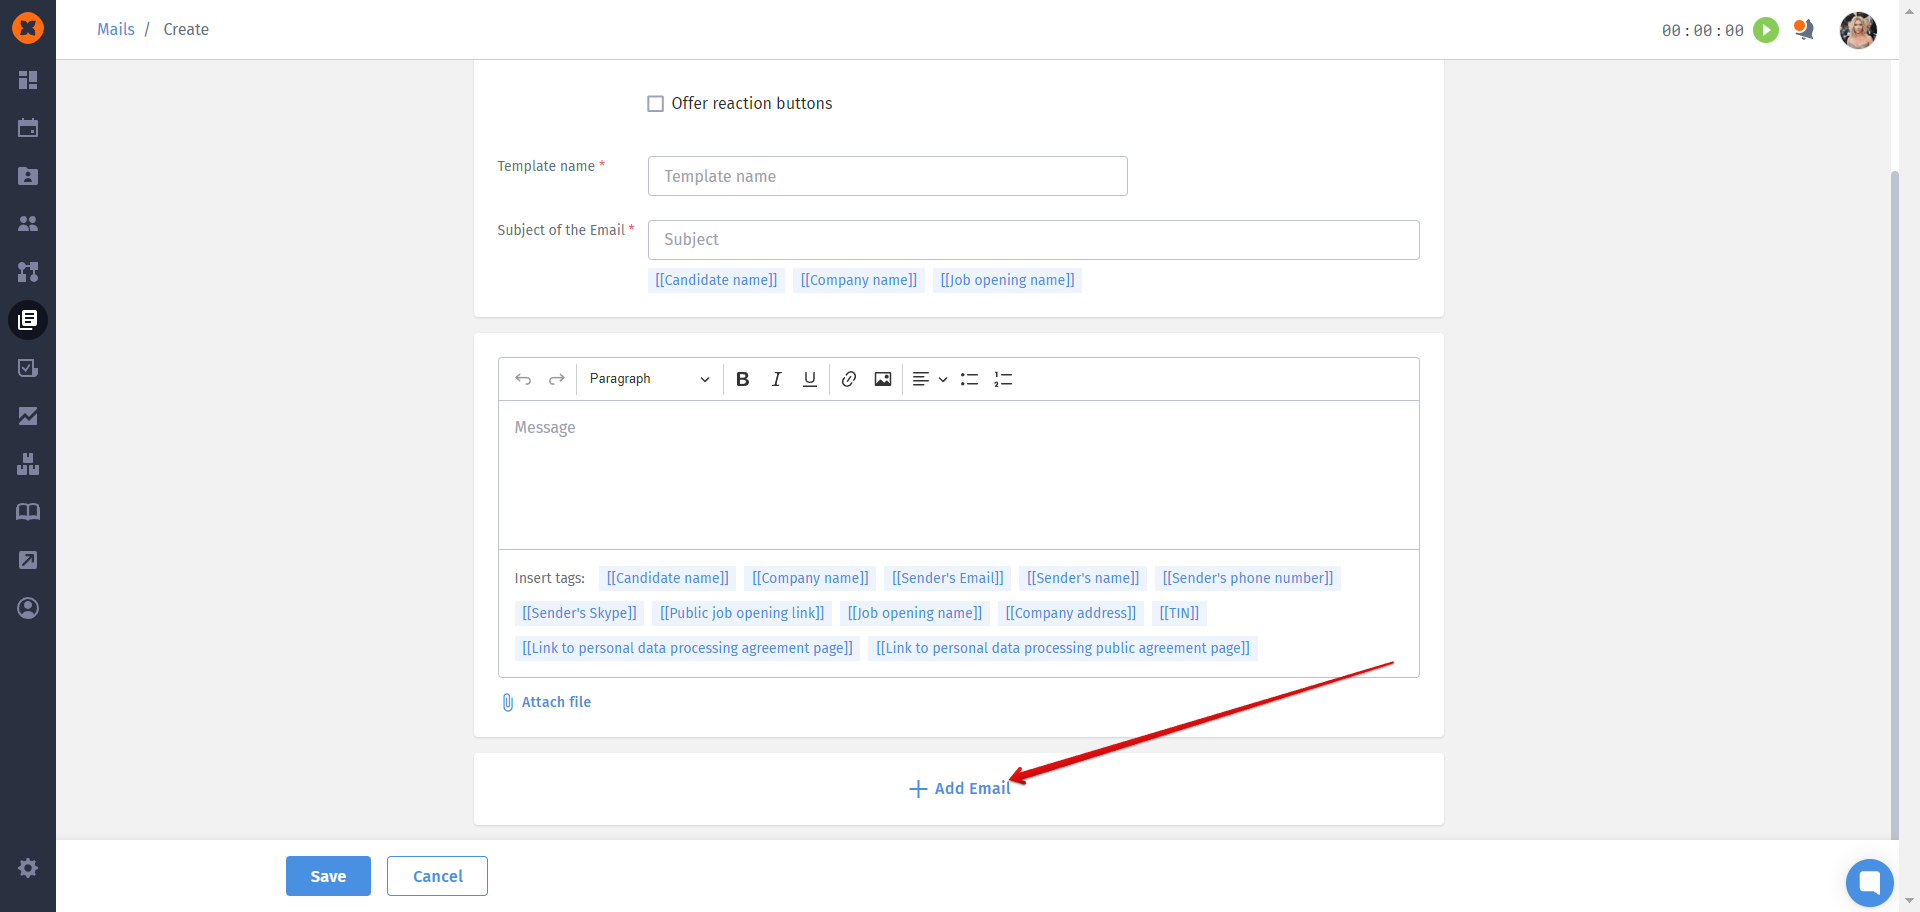
specify how many days after sending the first email the second email should be sent;
write the text, add tags to personalize your email, and attach a file if needed;
click "+ Add Email" and set up another one.

Make your recruitment process more engaging and effective with follow-ups.
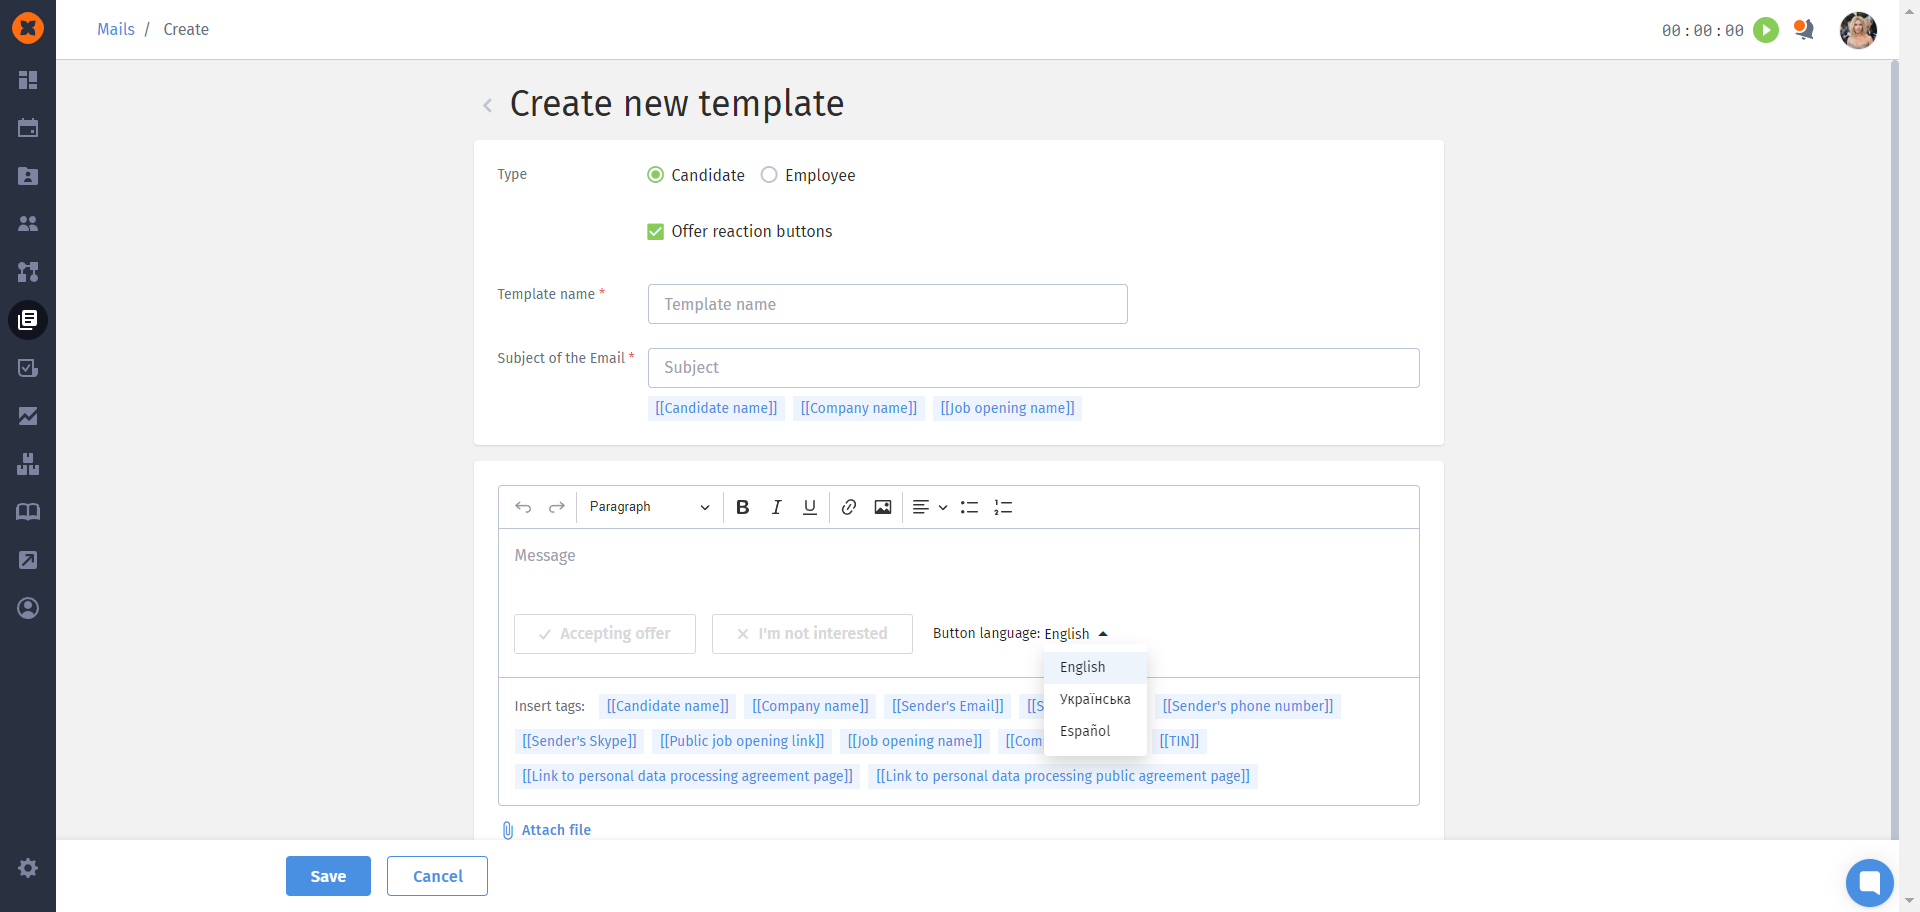
In the "Mails" section, you can create offer templates to send to candidates.
There are several examples available in the system that you can edit, duplicate, or delete as needed.
To create an offer template, follow these steps:
click the "Create" button;
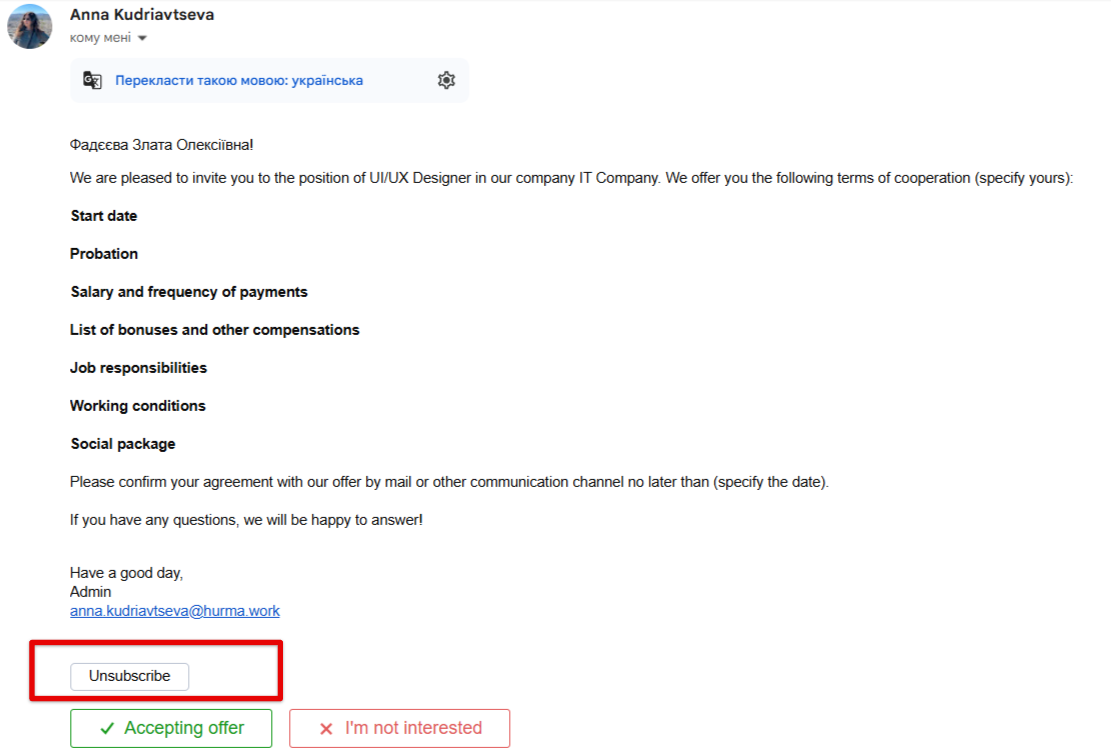
select the template type, activate the "Offer reaction buttons" checkbox, and enter the template name;
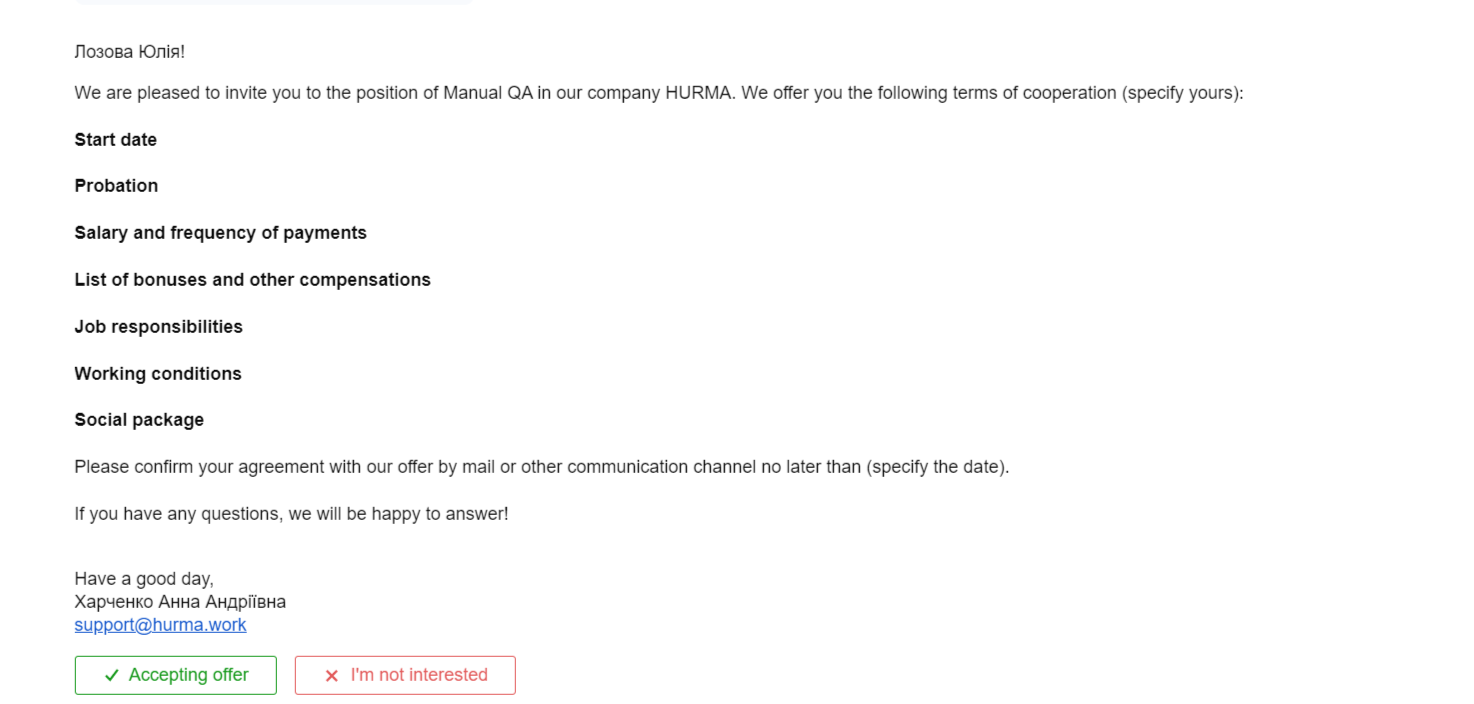
specify the email subject, write the email text, and choose the language for the "Accepting offer" / "I'm not interested" buttons (which will be displayed to the candidate in the email);
optionally, attach a file to the email if needed;
save your settings.
You can send an offer either from the candidate's profile or by attaching the email to the job stage.
To send an offer to a candidate from their profile, go to their profile and click the "Submit an offer" button.
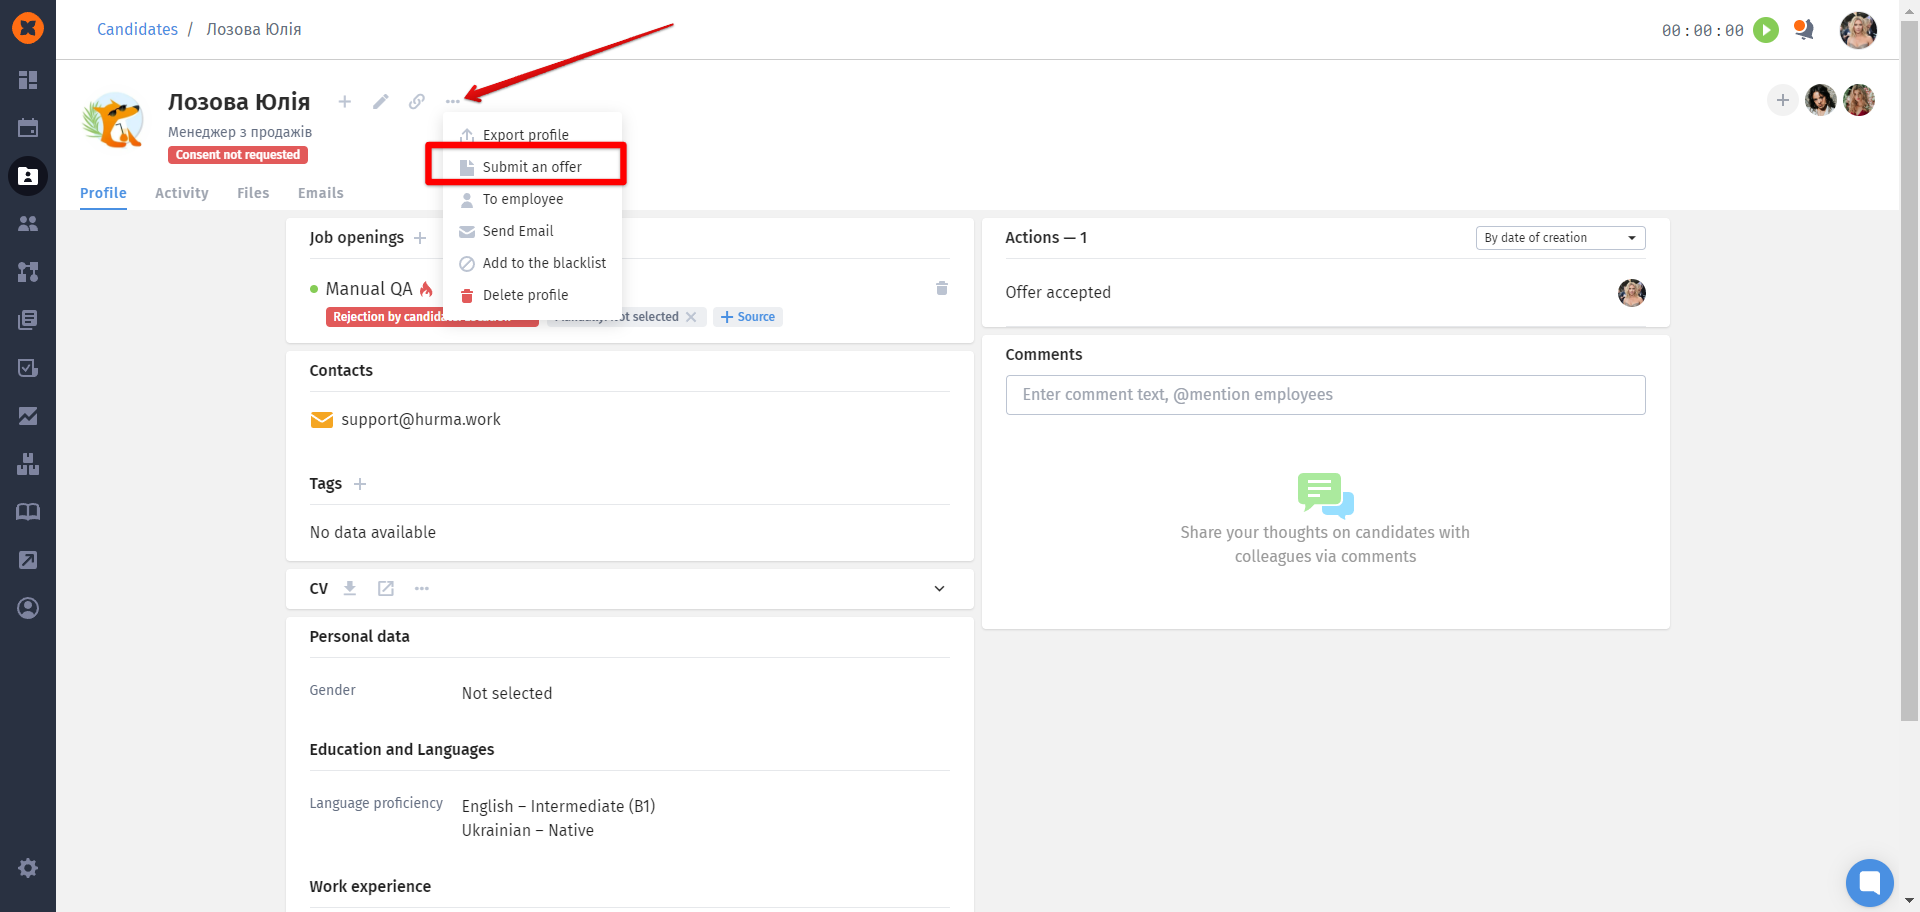
Next, you can select the job position and the offer template you want to send to the candidate.
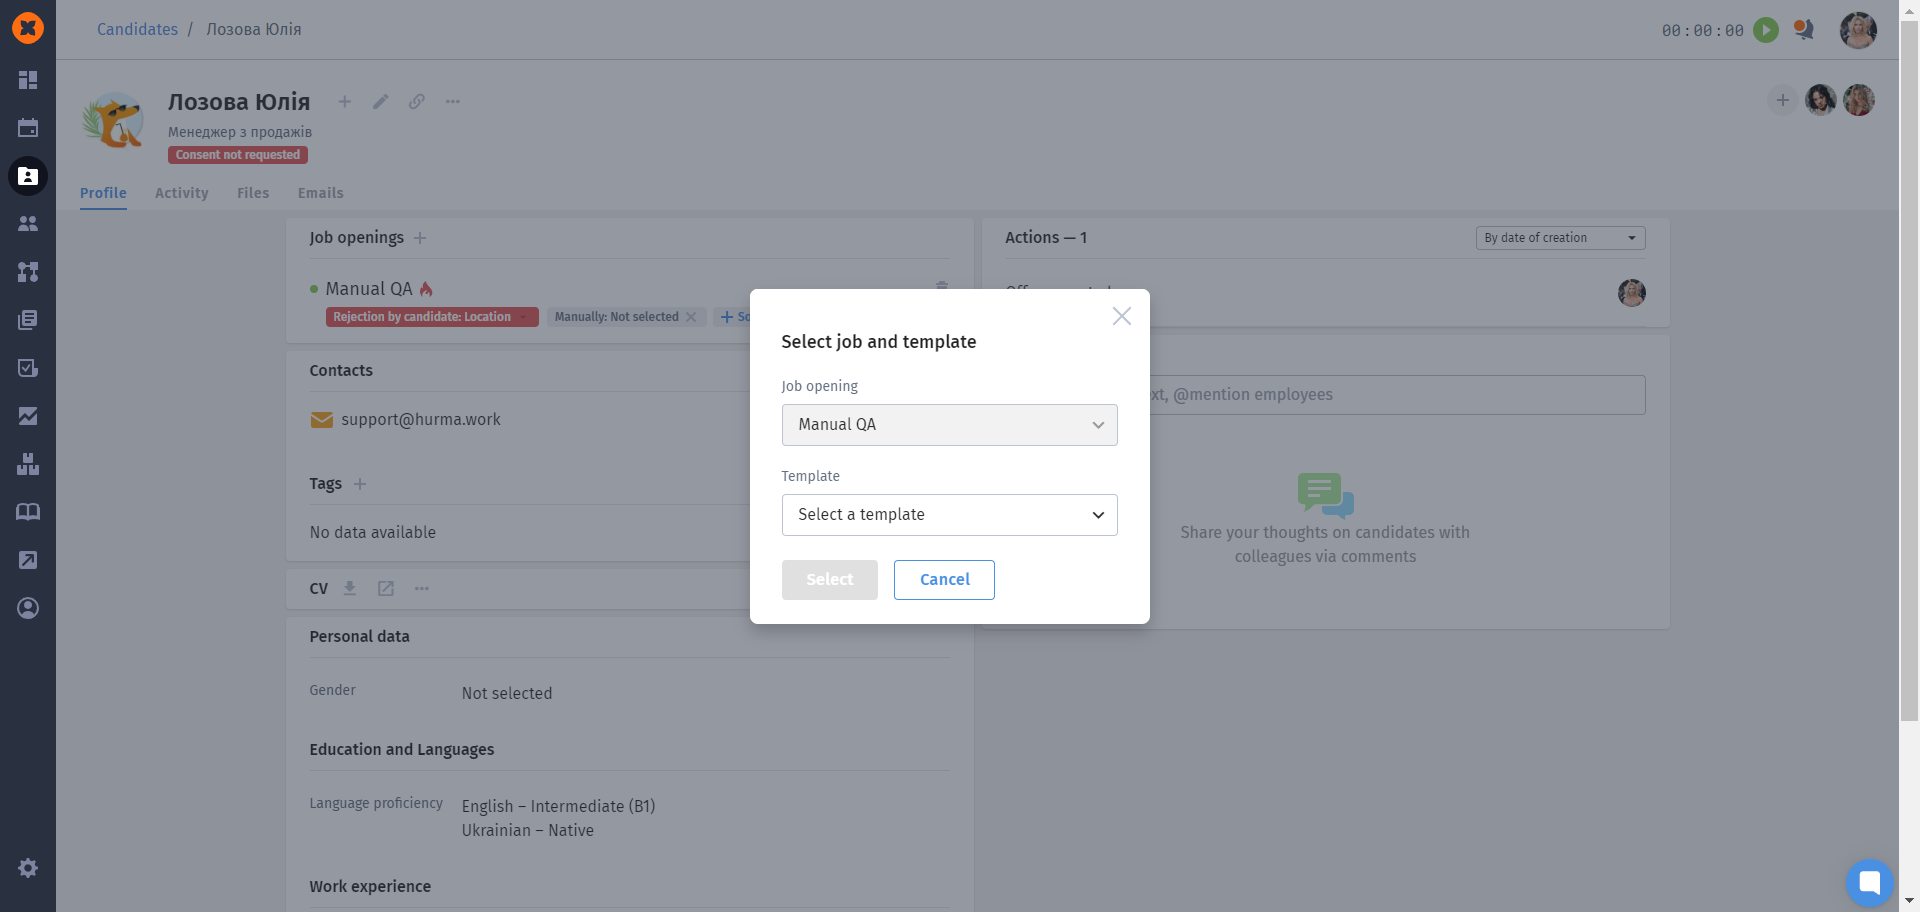
You can also review the email text, edit it if necessary, and then click the "Send" button.
The candidate will receive the email and can respond by clicking on the button to indicate their decision.
All information about sent offers is collected in the "Sent offers" Report. You can read more about this report in our article.
The unsubscribe feature in the Hurma system is a convenient tool for candidates that allows them to control the information they receive. It provides comfort, reduces informational noise, and improves interaction with candidates, which in turn helps create a more positive and effective experience for all parties involved in the process.

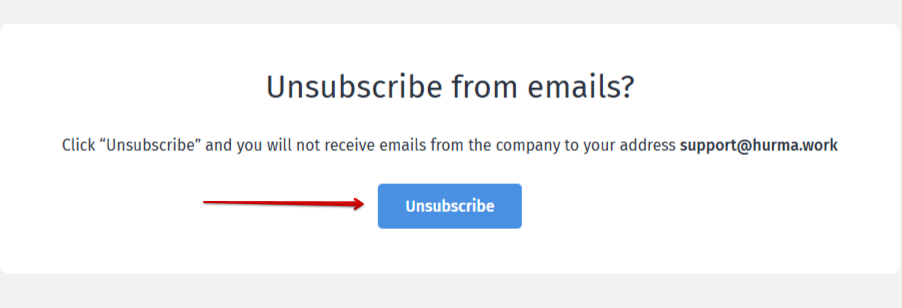
A candidate who receives an email will simply be able to click the "Unsubscribe" button to stop receiving messages from the system. Importantly, this button can be customized for each client — companies can specify their own label for the button, adapting it to their style and needs. This makes the unsubscribe option even clearer and more user-friendly for candidates.
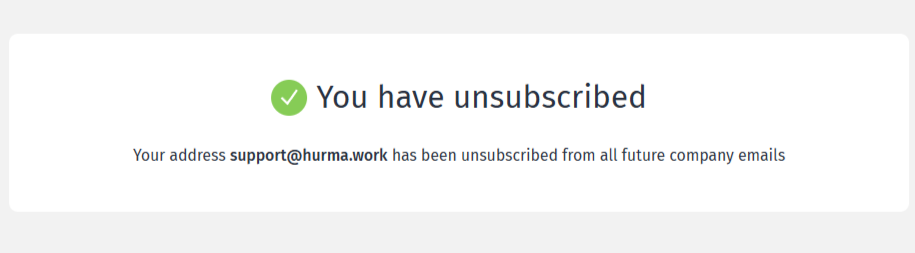
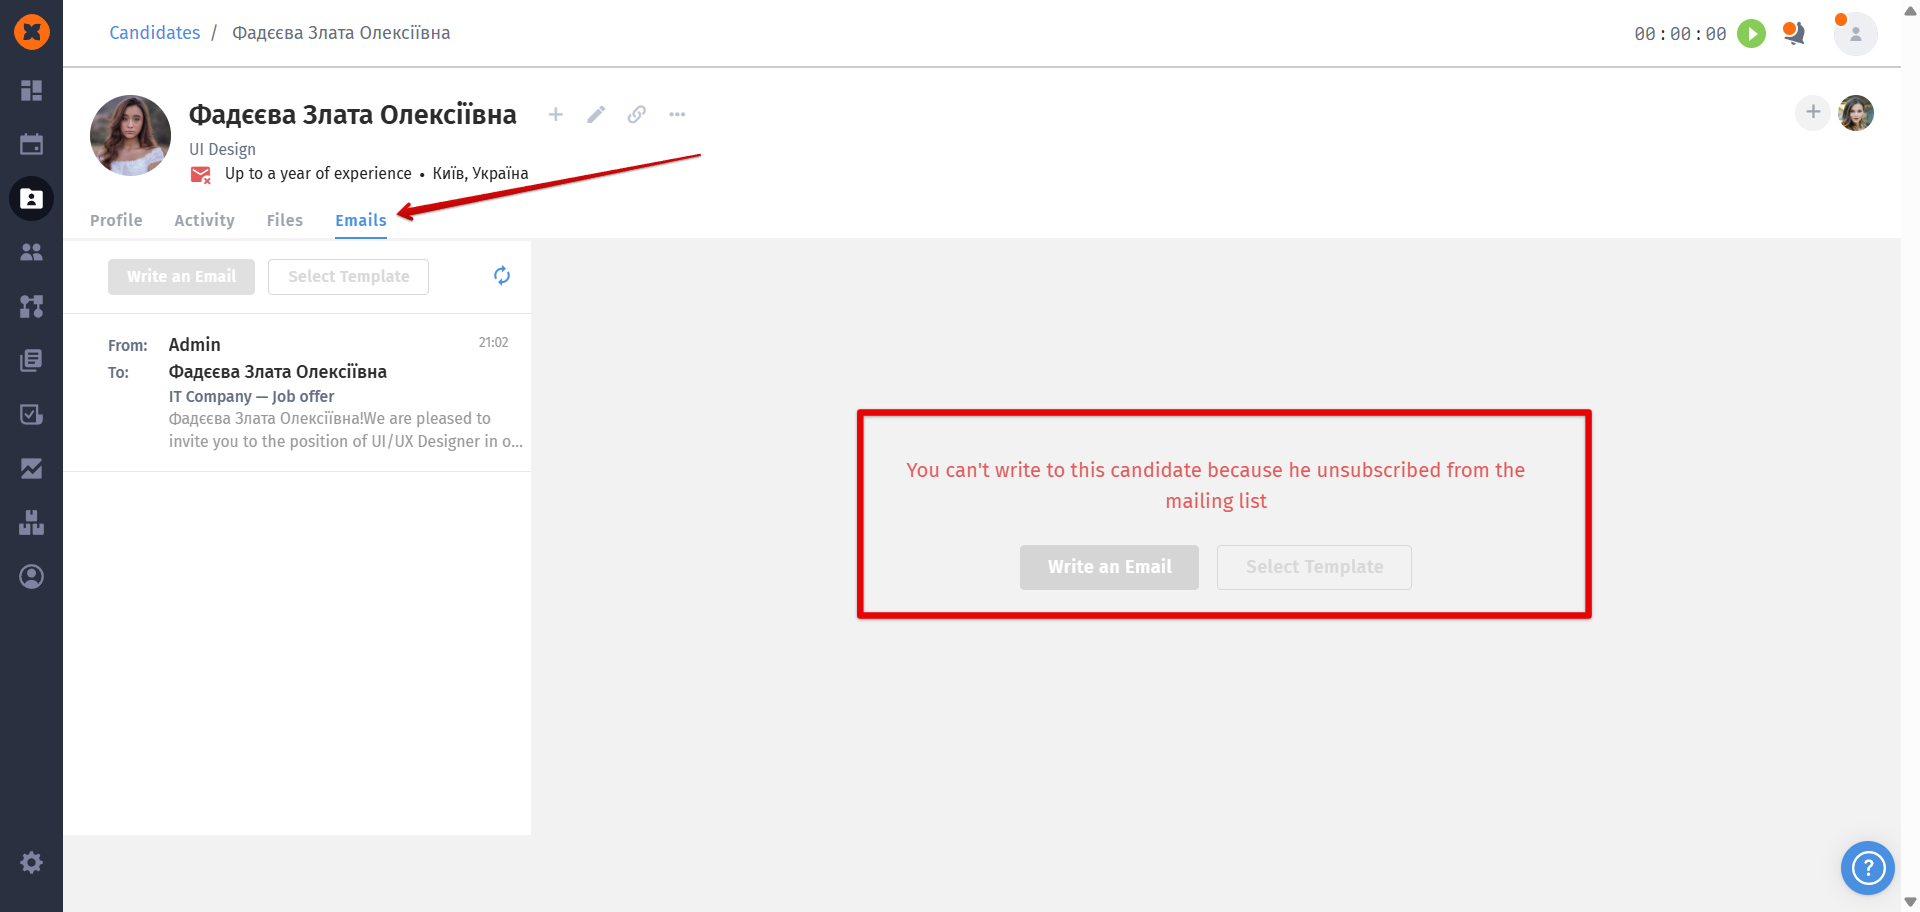
After the candidate unsubscribes from emails in the system, this will be reflected in their profile, and the option to send them emails will also be disabled.

This feature helps maintain a positive interaction with candidates by giving them full control over the messages they receive and supporting an ethical approach to communication.
