Zapier is a tool where you can create your own integrations between different services without any coding. For example, when an employee is created in your tracking system, that employee will automatically be created in Hurma.
Hurma has the following actions for Zapier:
Create a job opening
Create a candidate
Create an employee
If you’re missing some features for automation, just let us know.
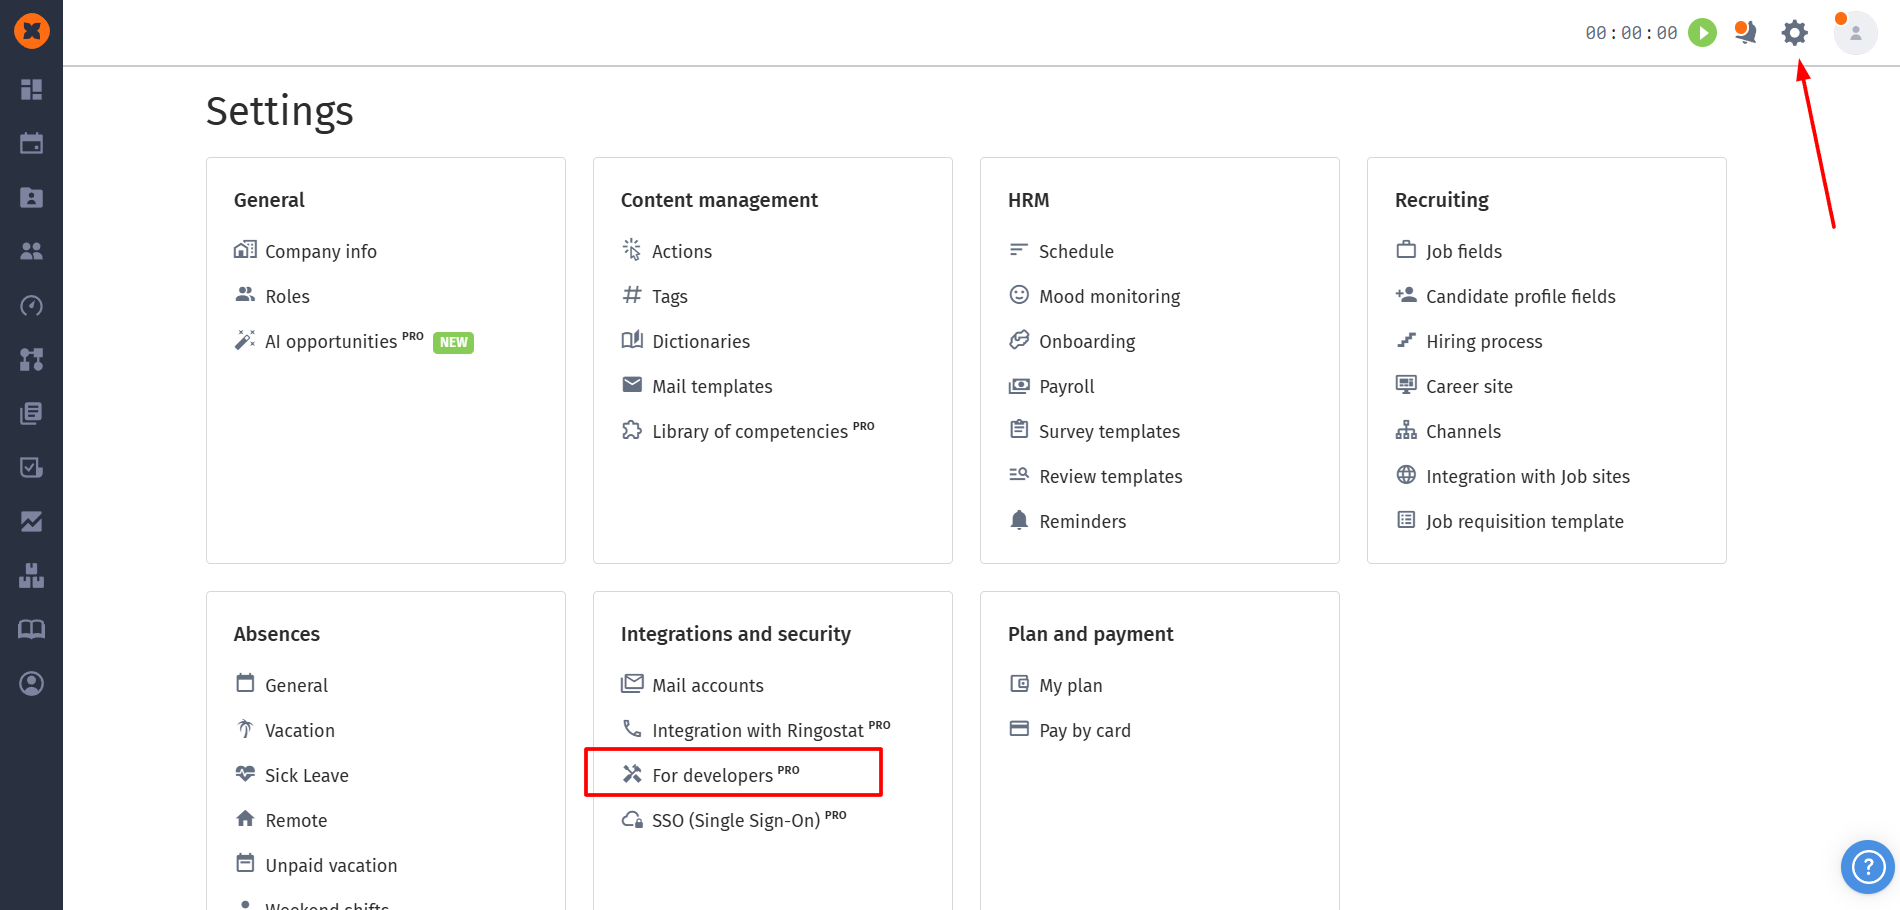
To log in to Zapier, you need to create an API v3 client in the settings. Before creating an API client, make sure that your role in the Hurma system has access in the “Settings” → “For developers” → “API v3”: Create.

Creating an API v3 client:
Open the settings (“⚙“) and go to the “For developers” section.
In the “API v3” list, click the “Add” button and pick “API Client”.
On the creation page, in the “Name” field, type Zapier or any other name you like.
For “Authorization type”, select Authorization code.
For “Redirect”, copy and paste the value: https://zapier.com/dashboard/auth/oauth/return/App226499CLIAPI/.
In the “Description” field, you can add your own note if you want.
In the “Access settings to information via API” table tick the checkboxes for the items you want to give access to for Zapier:
Employees – Write
Vacancies – Write
Candidates – Write
At the bottom, click the “Add” button.
After that, you'll land on a page with a list of created API clients.
To log in to Zapier, you need:
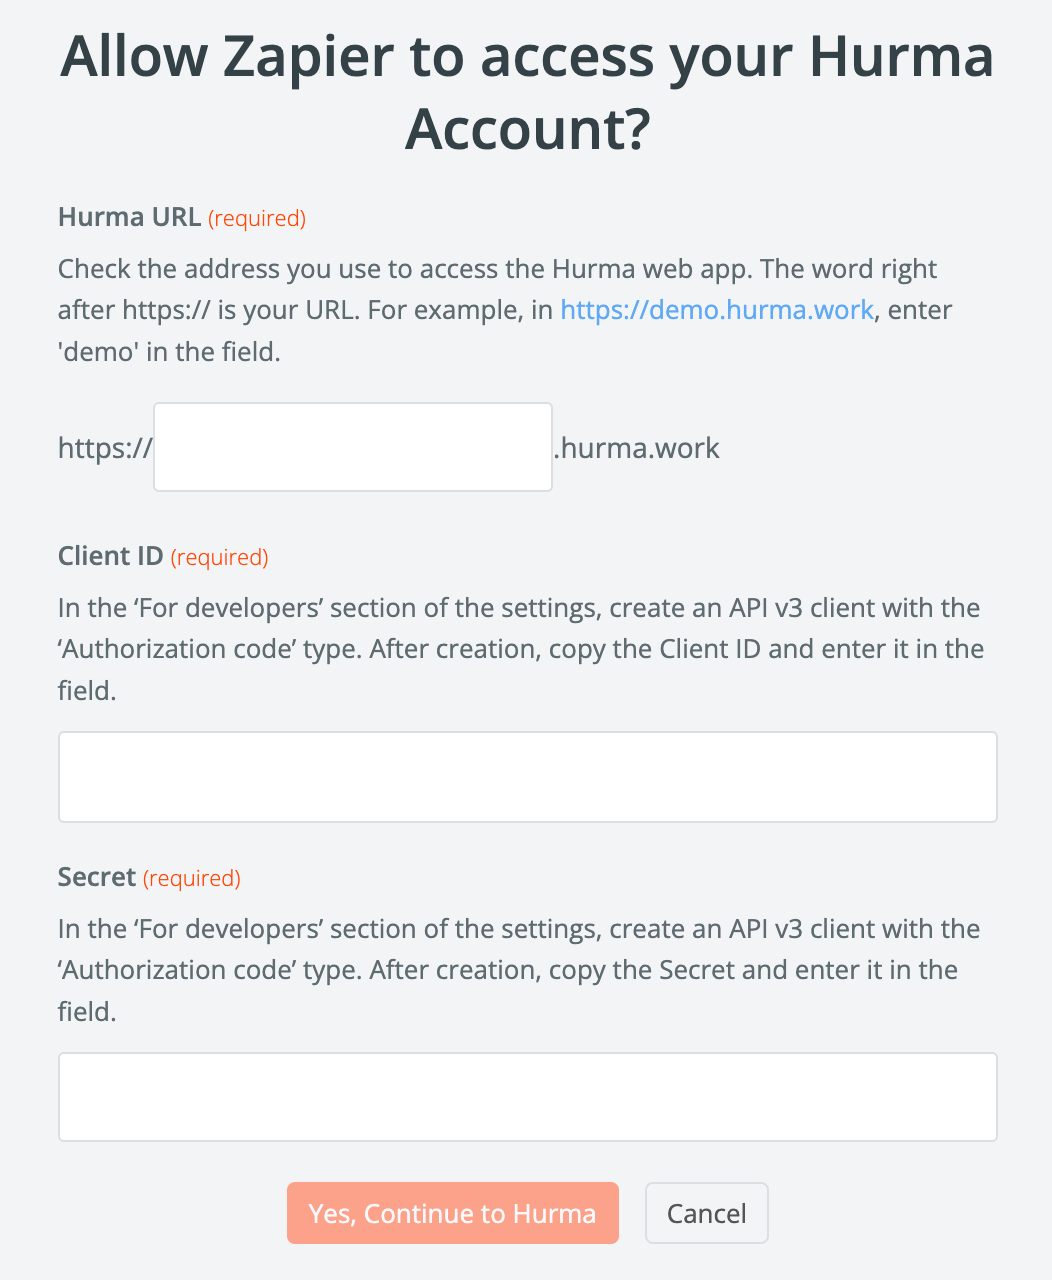
Hurma URL – this is the first part of the web address you use to access the Hurma service. For example, for https://demo.hurma.work you need to use demo in the field.
Client ID – this is the client ID from the first column of the table for the API client you created.
Secret – this is the Secret from the fourth column of the table for the API client you created. You can click the icon to the right of the secret to copy it.
After that, click the “Yes, Continue to Hurma” button.

