To optimize your work with the system and quickly get the information you need, you can connect an AI assistant to HURMA via an MCP client. This allows the agent to work directly with your internal data: candidates, vacancies, or employees.

To enable the tool and generate a link for the AI agent, follow these steps:
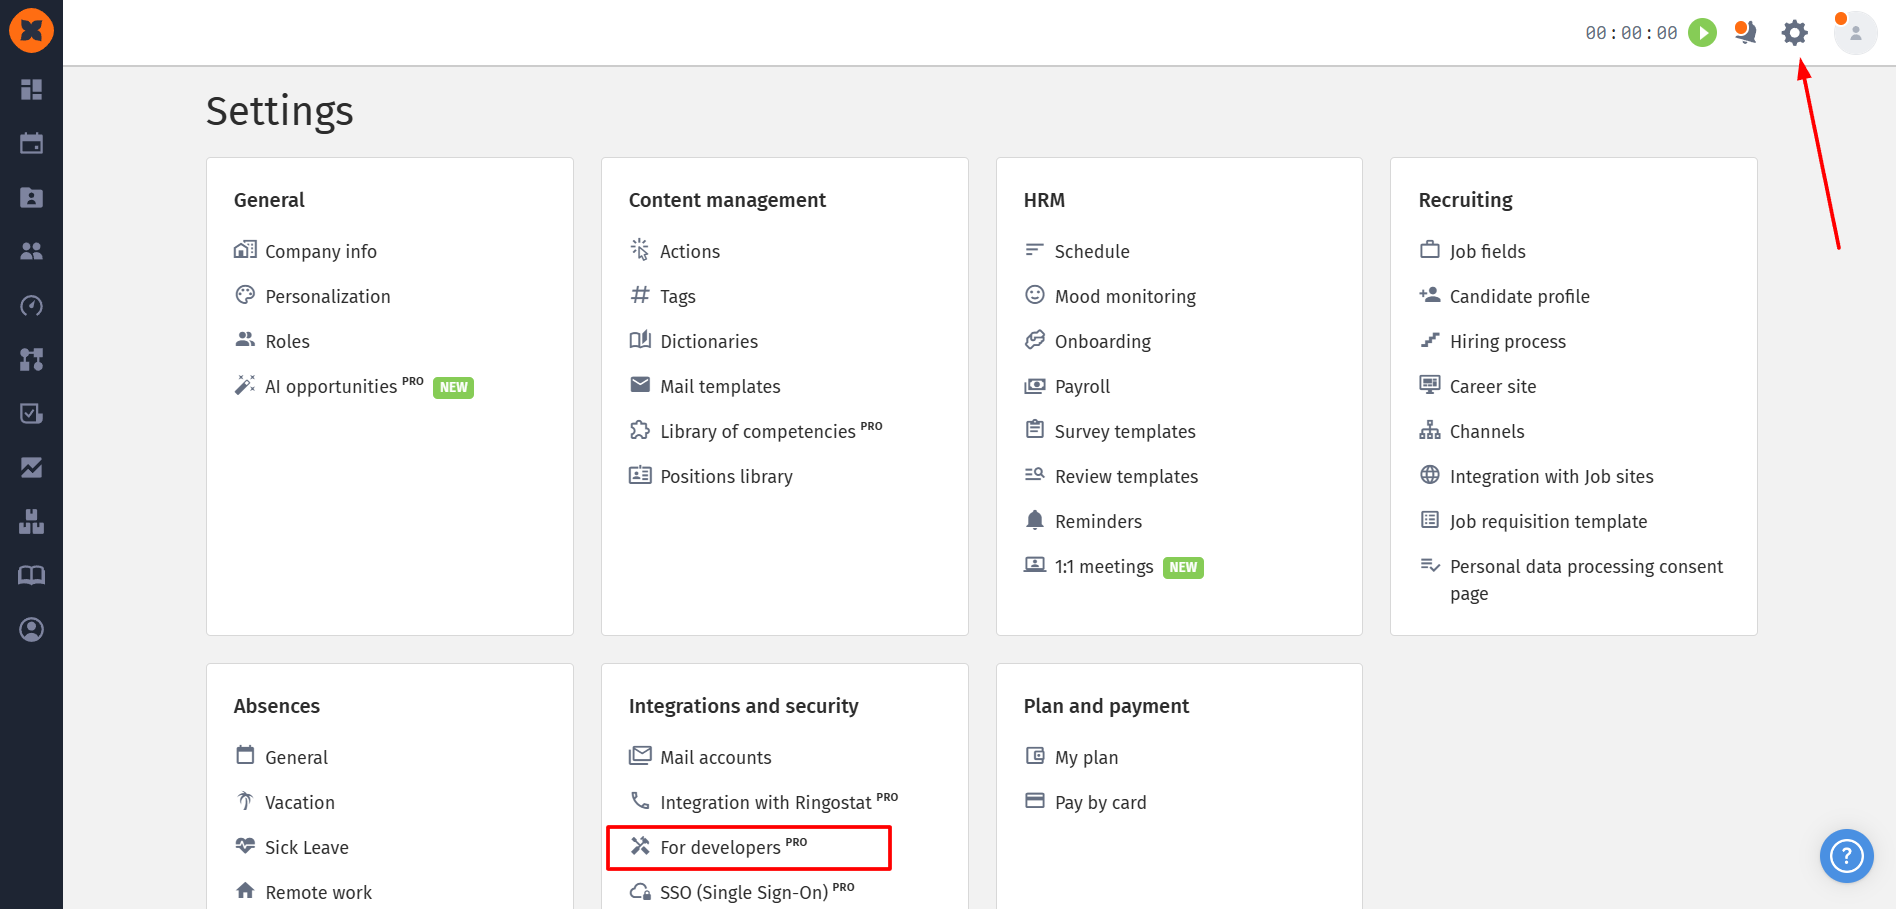
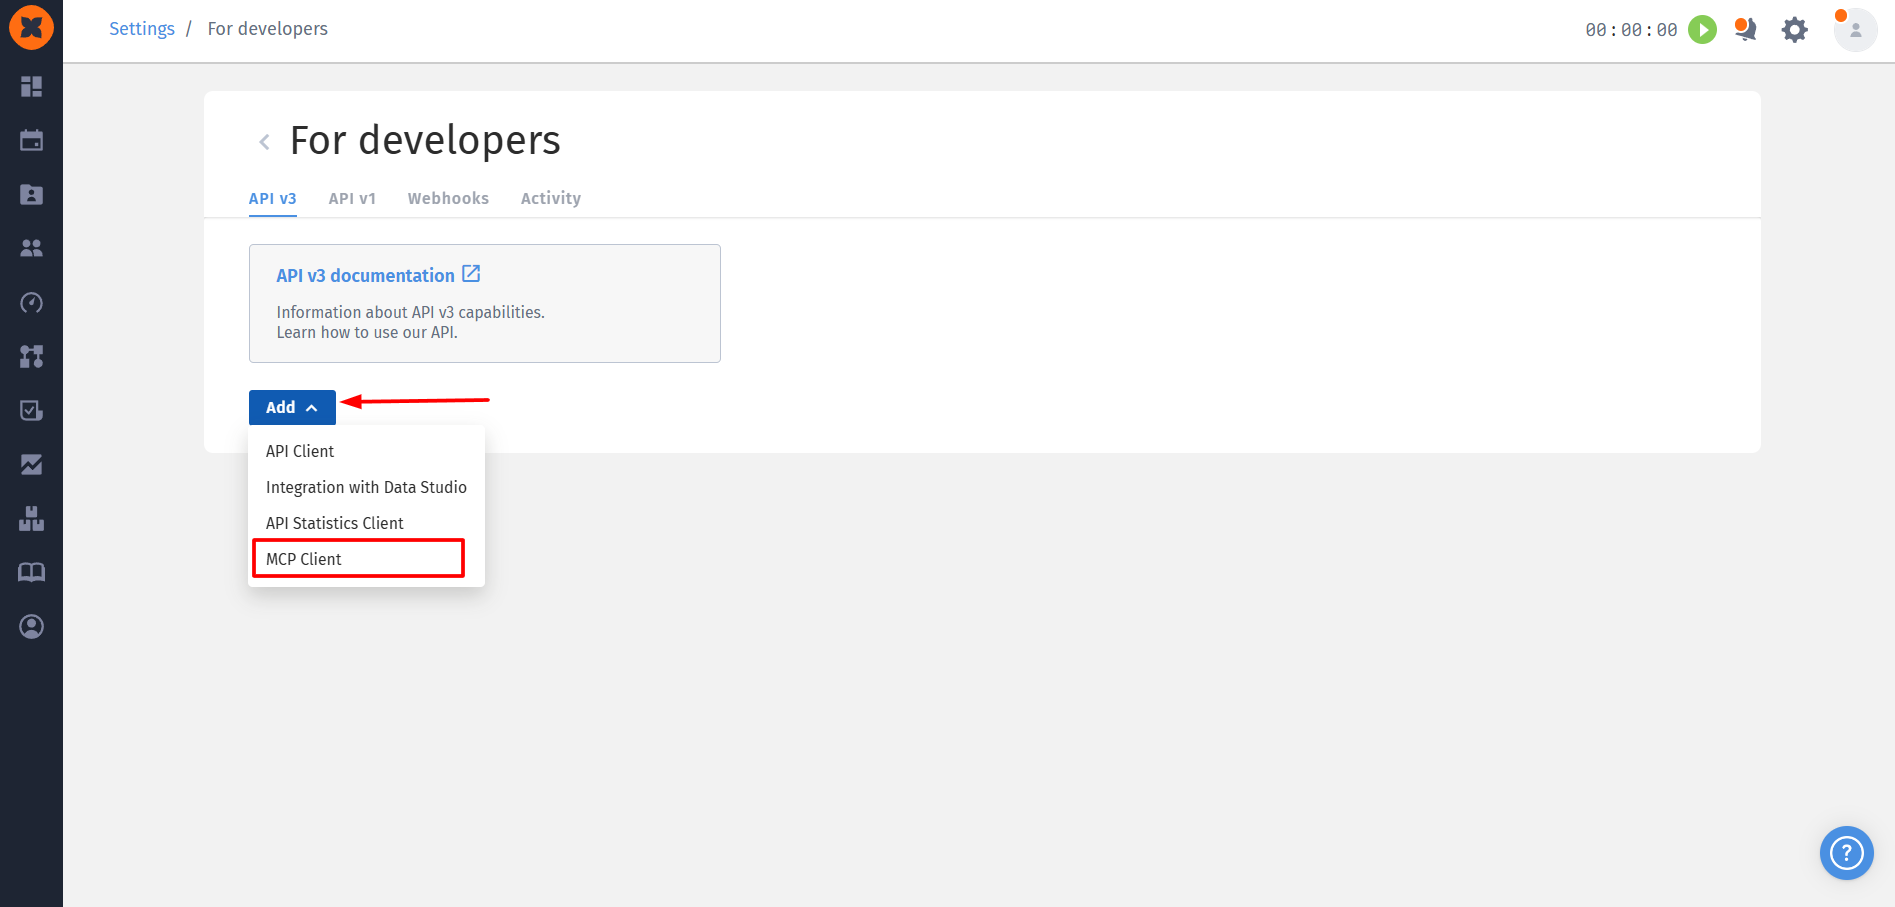
Go to the system settings, open the “For developers” section, and click the “Add” button and select the “MCP client” section;
Enter a connection name (any name, at least one character); the “Description” field is optional.
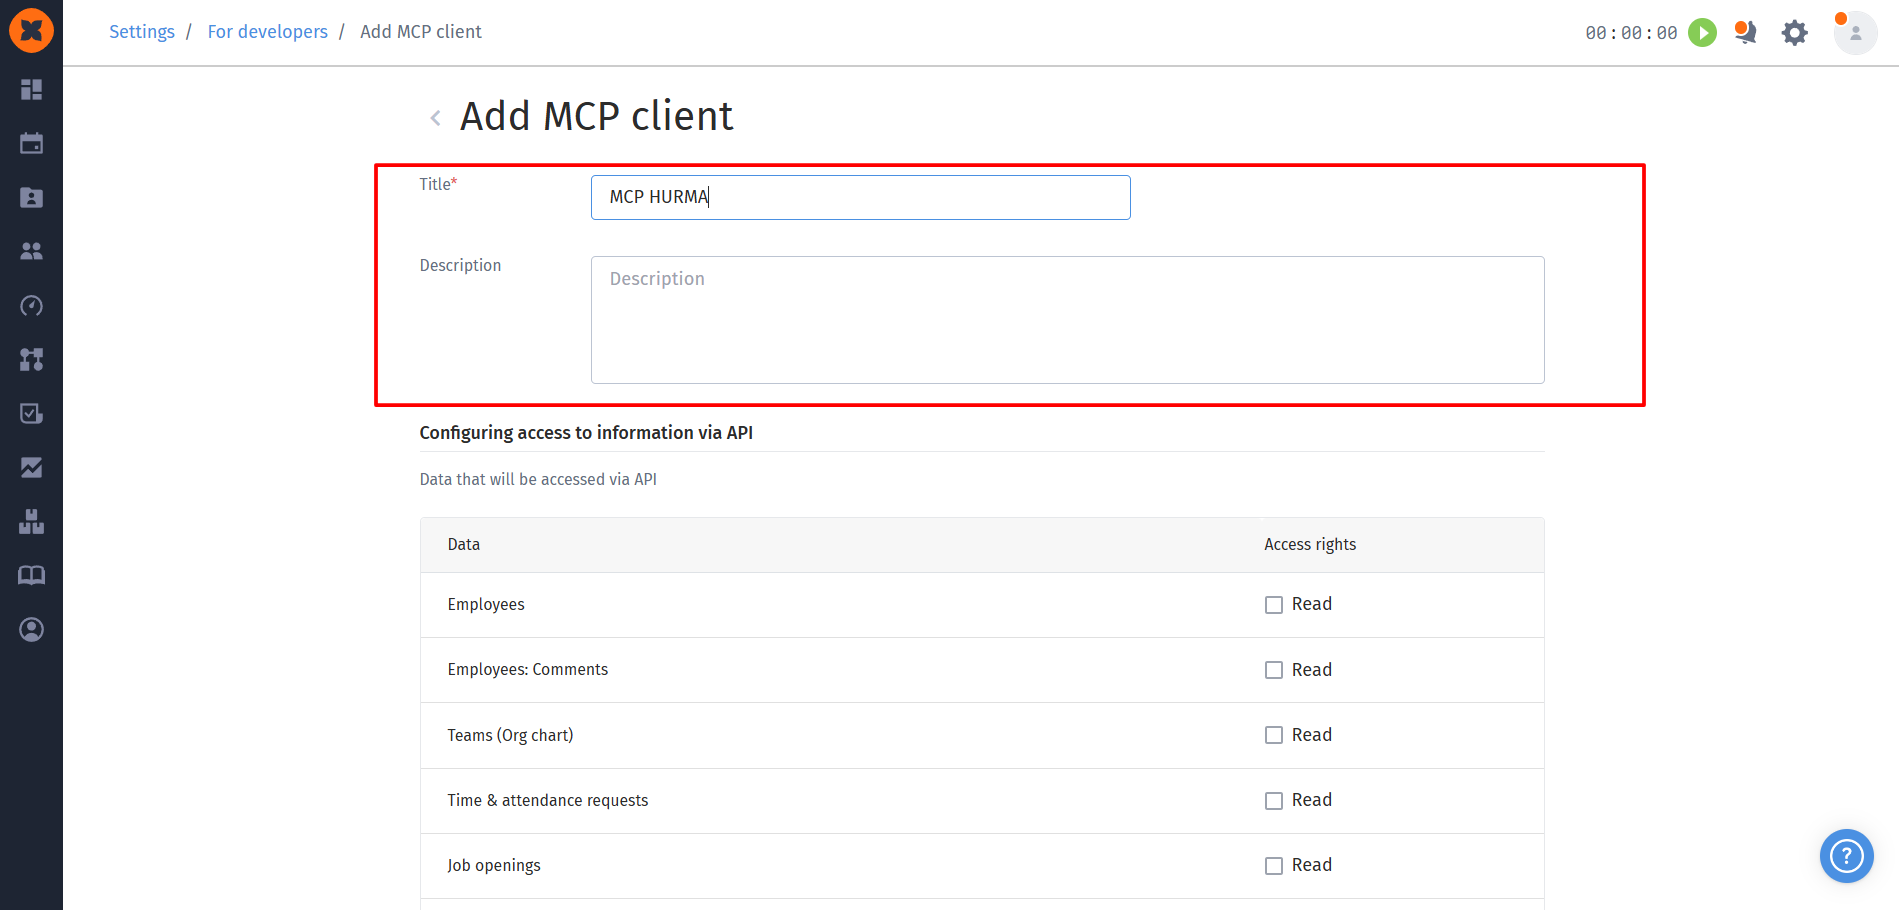
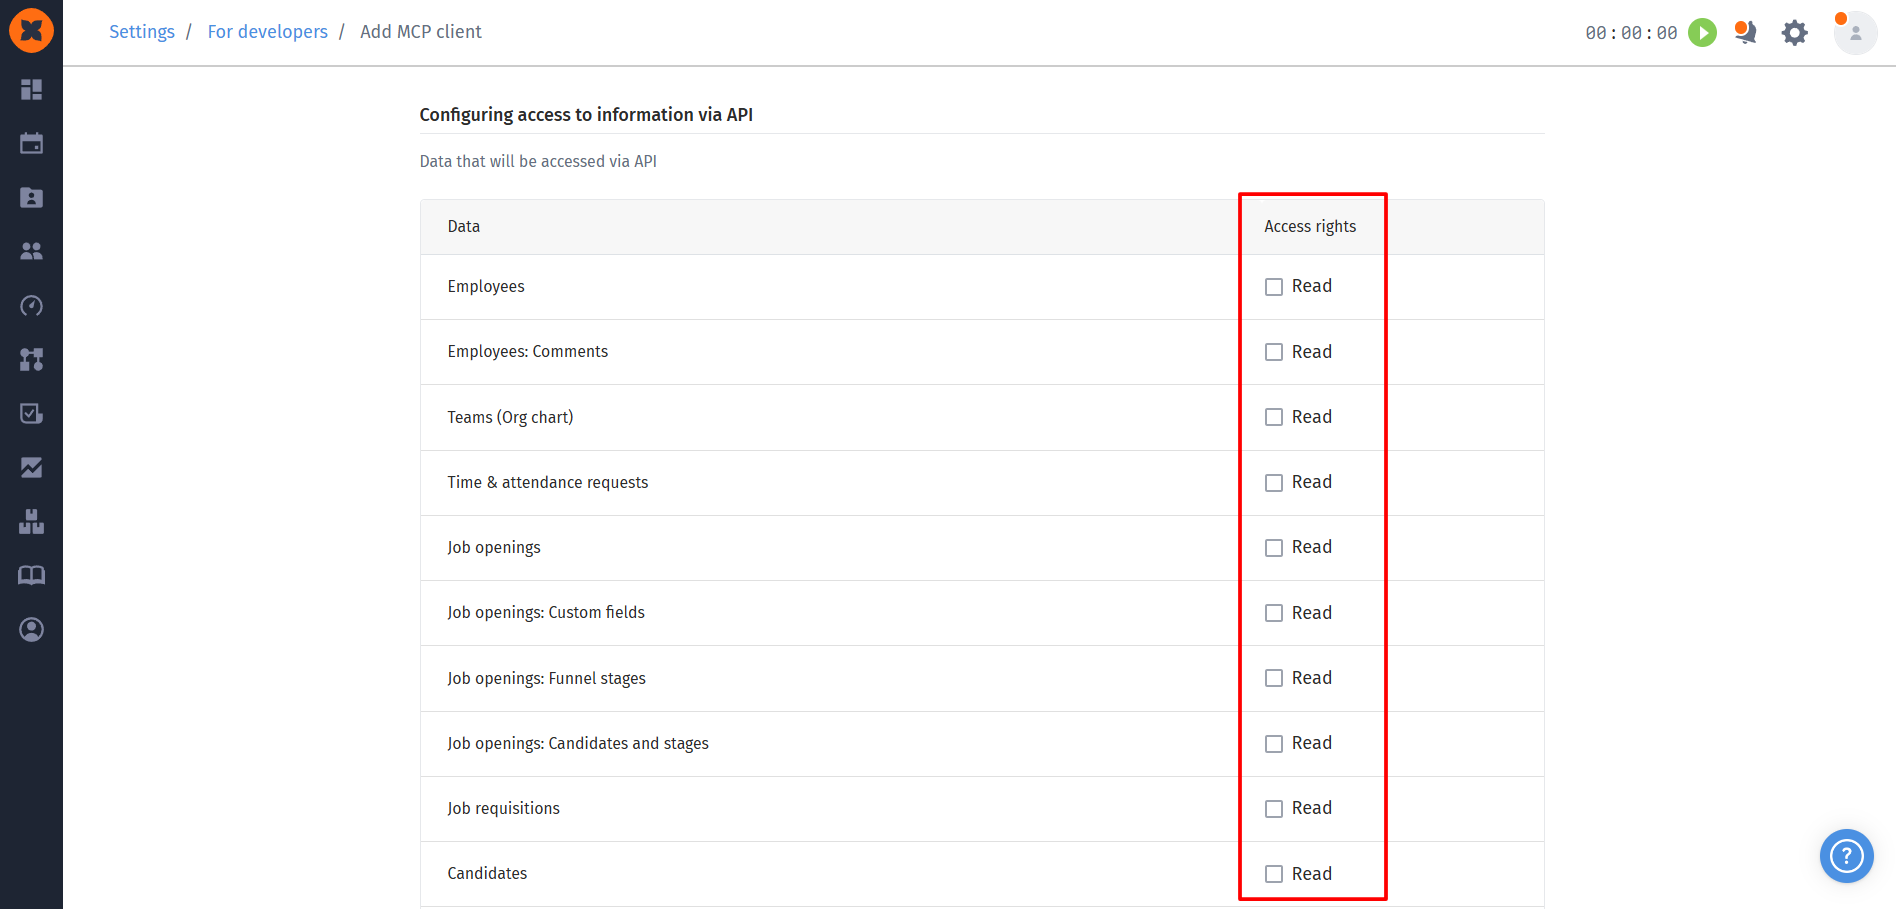
Information access settings: select the checkboxes for the data you allow the AI agent to read when generating responses. At least one checkbox must be selected to save the connection successfully.
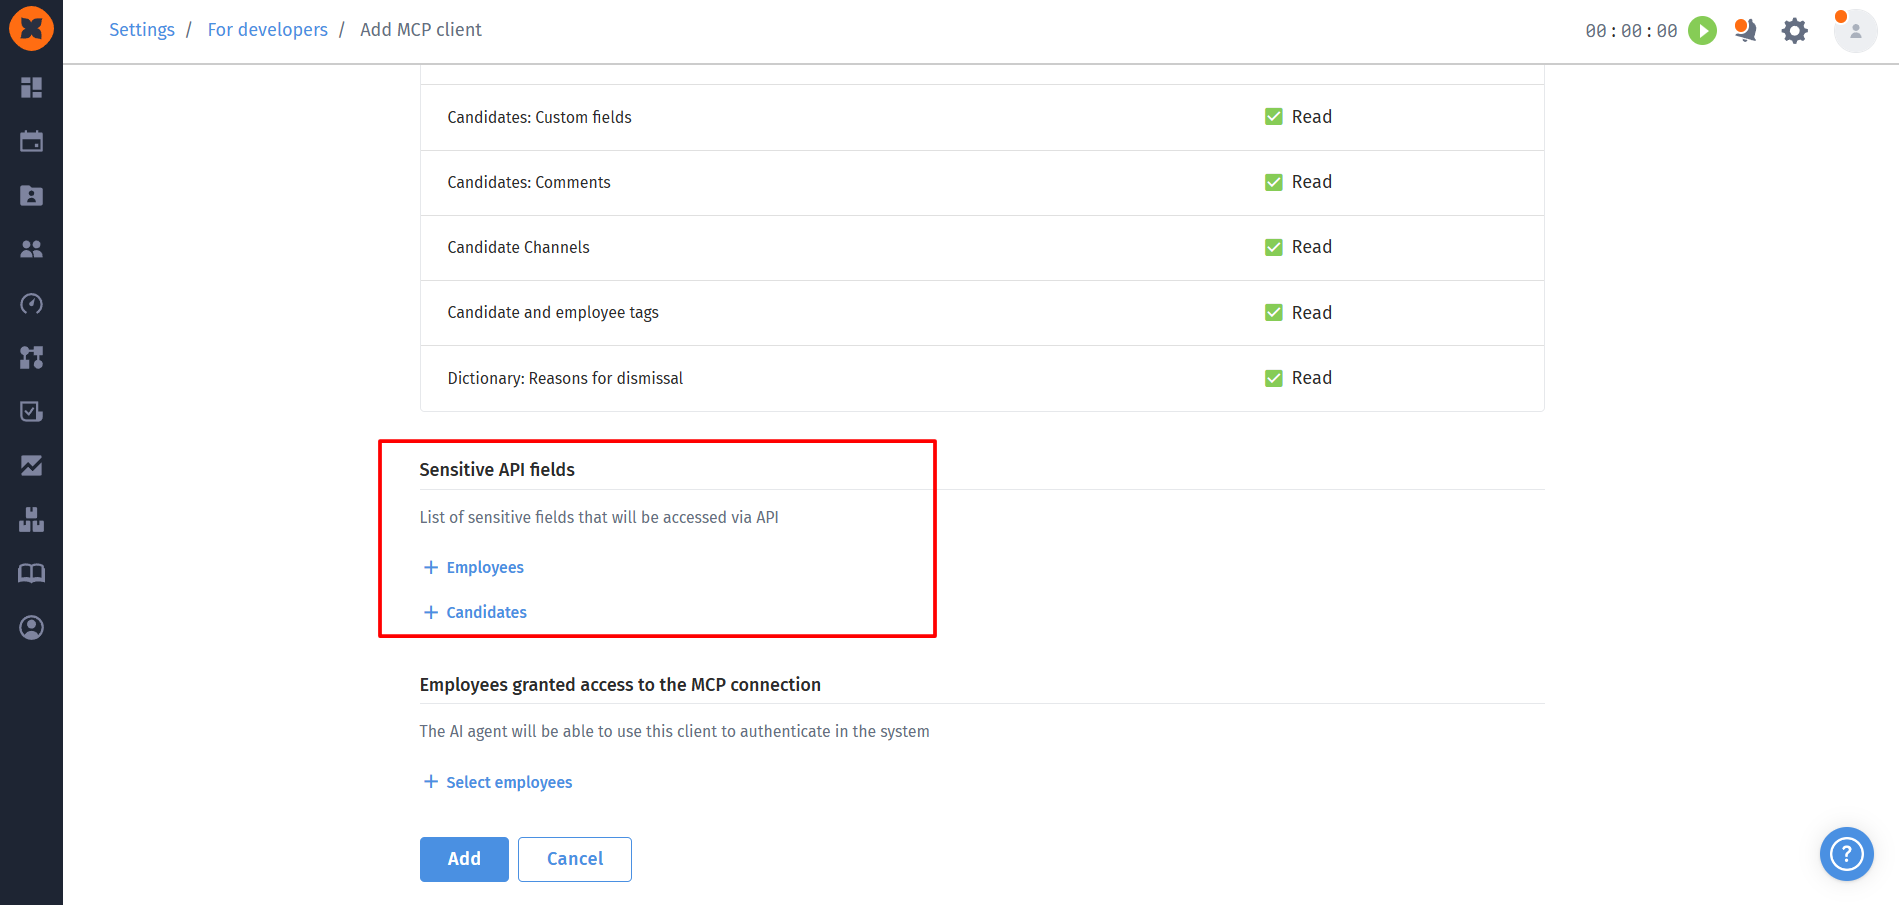
Sensitive fields: you can grant access to some or all sensitive fields for employees and candidates, or select none.

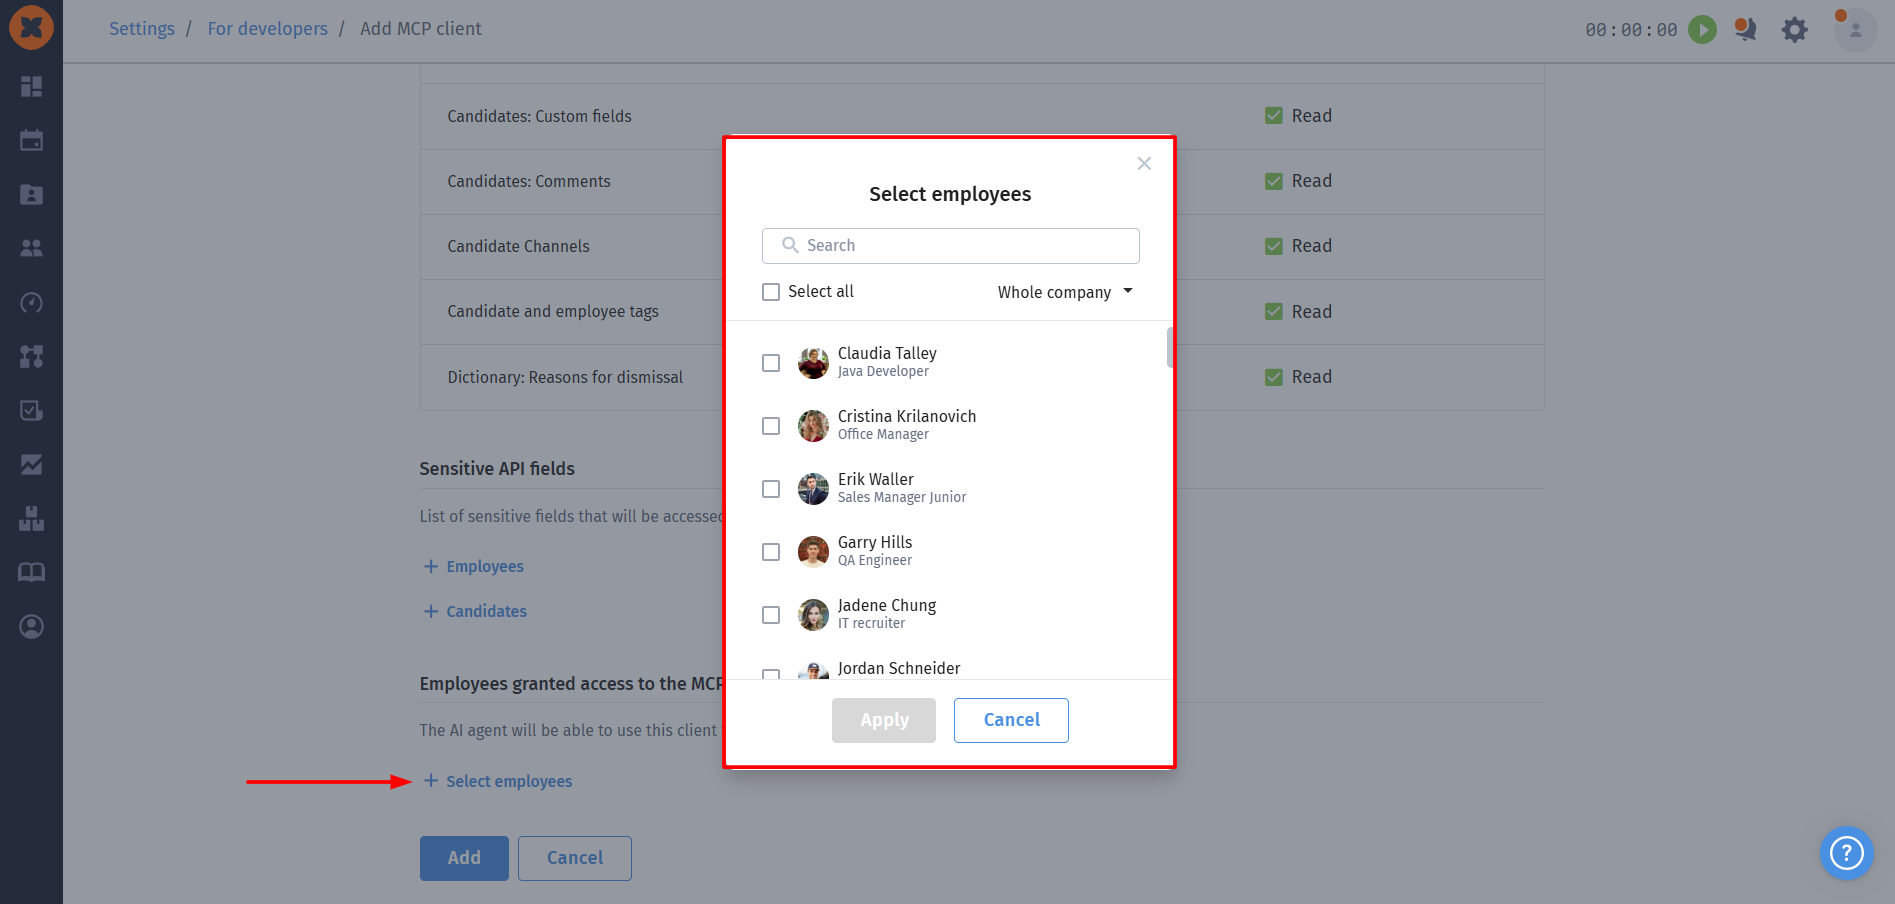
Employee access: you must select the employees who will be granted access to this connection.
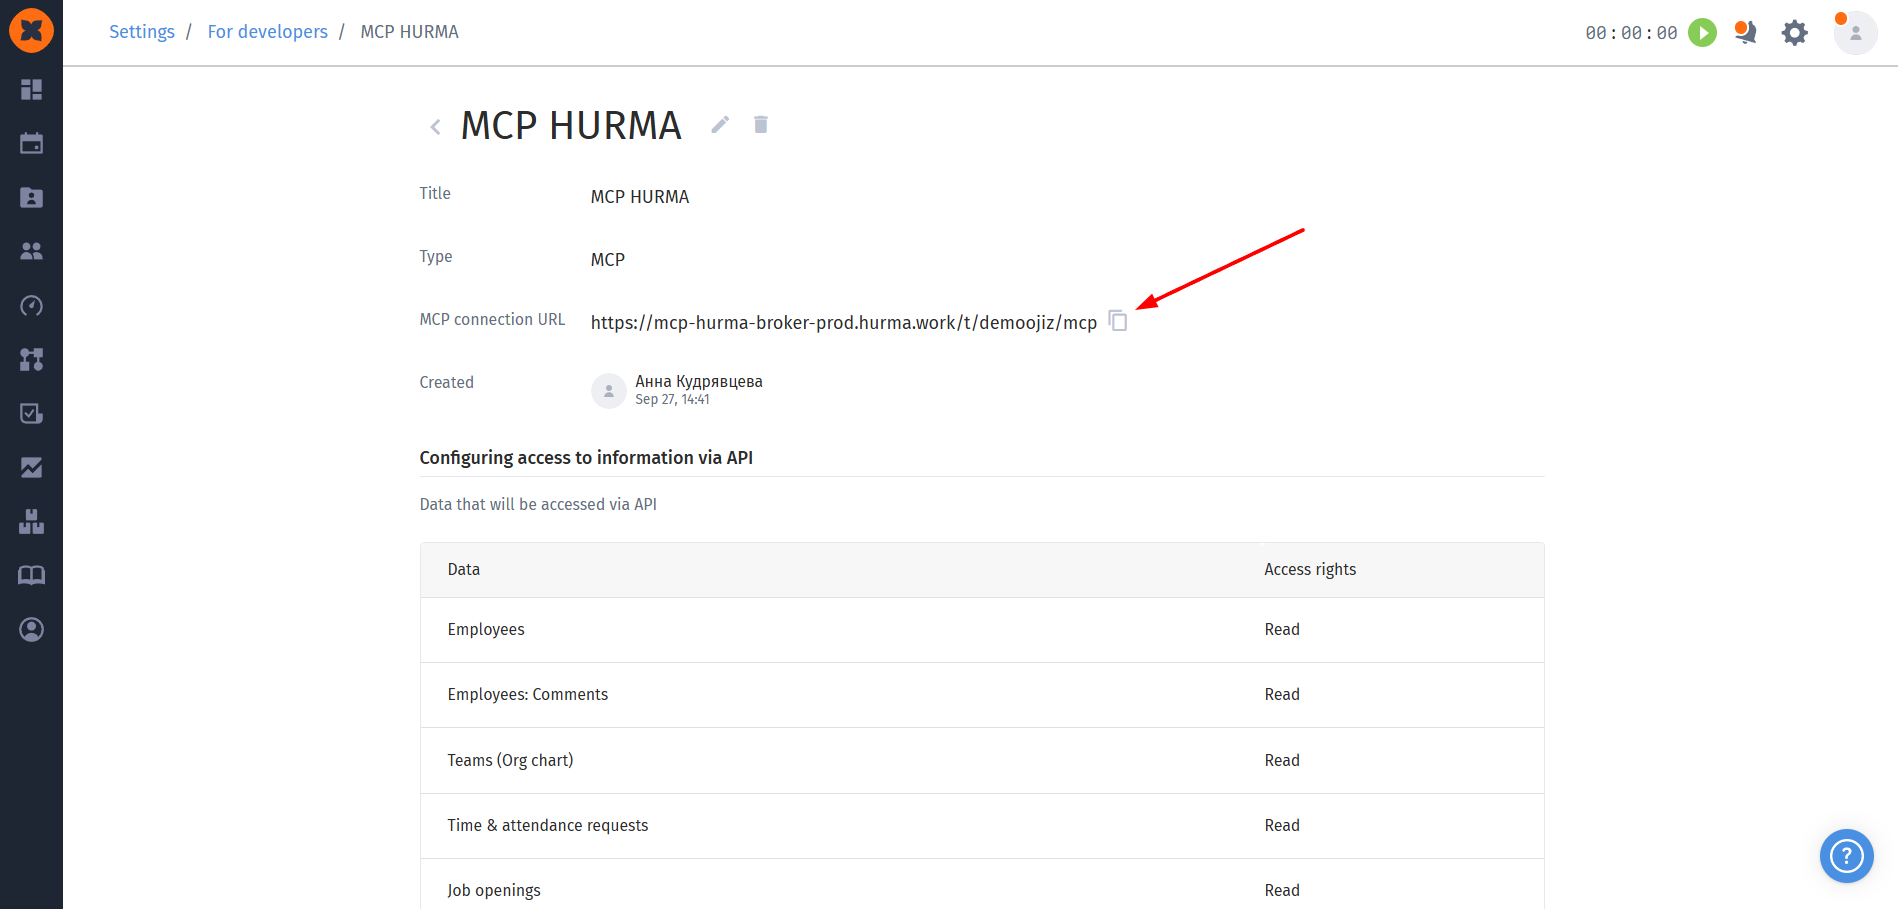
After saving, you will be able to see the created connection in the profile menu. You can create as many connections as needed and copy their URL (by clicking the connection name or opening the client settings) for further use in external agents.
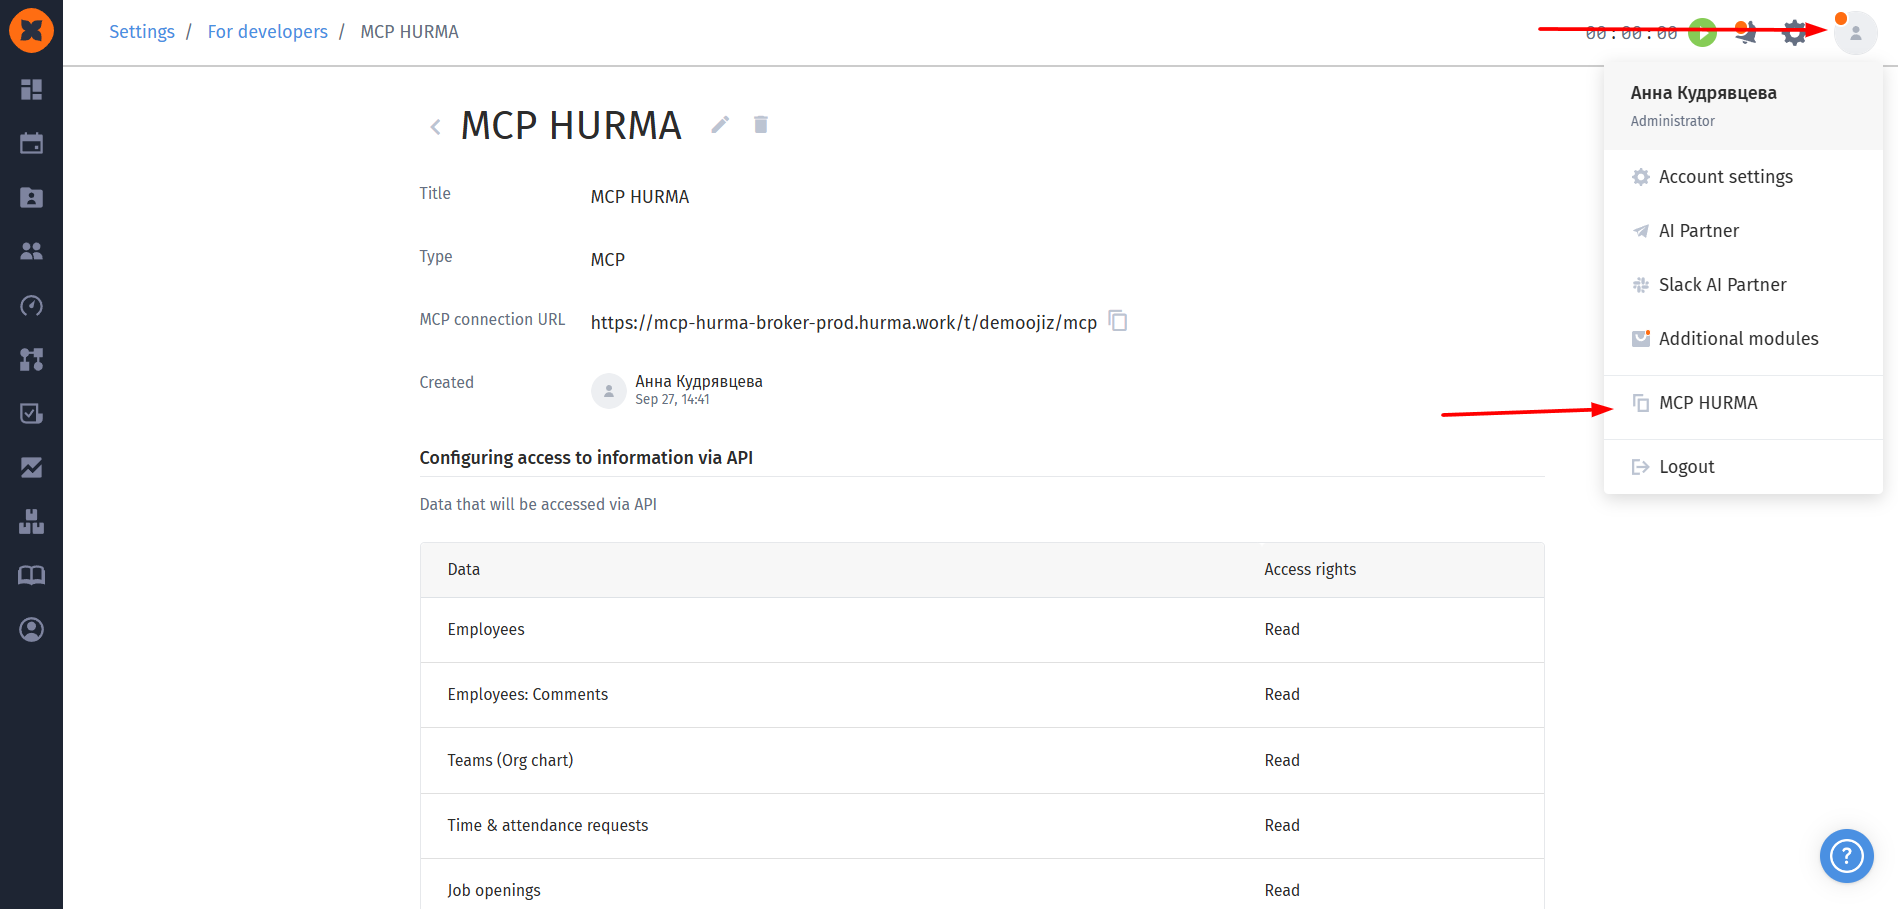
In HURMA, you can track active connections. If you or other employees have successfully connected via an AI agent, the system will display the status "Connected".
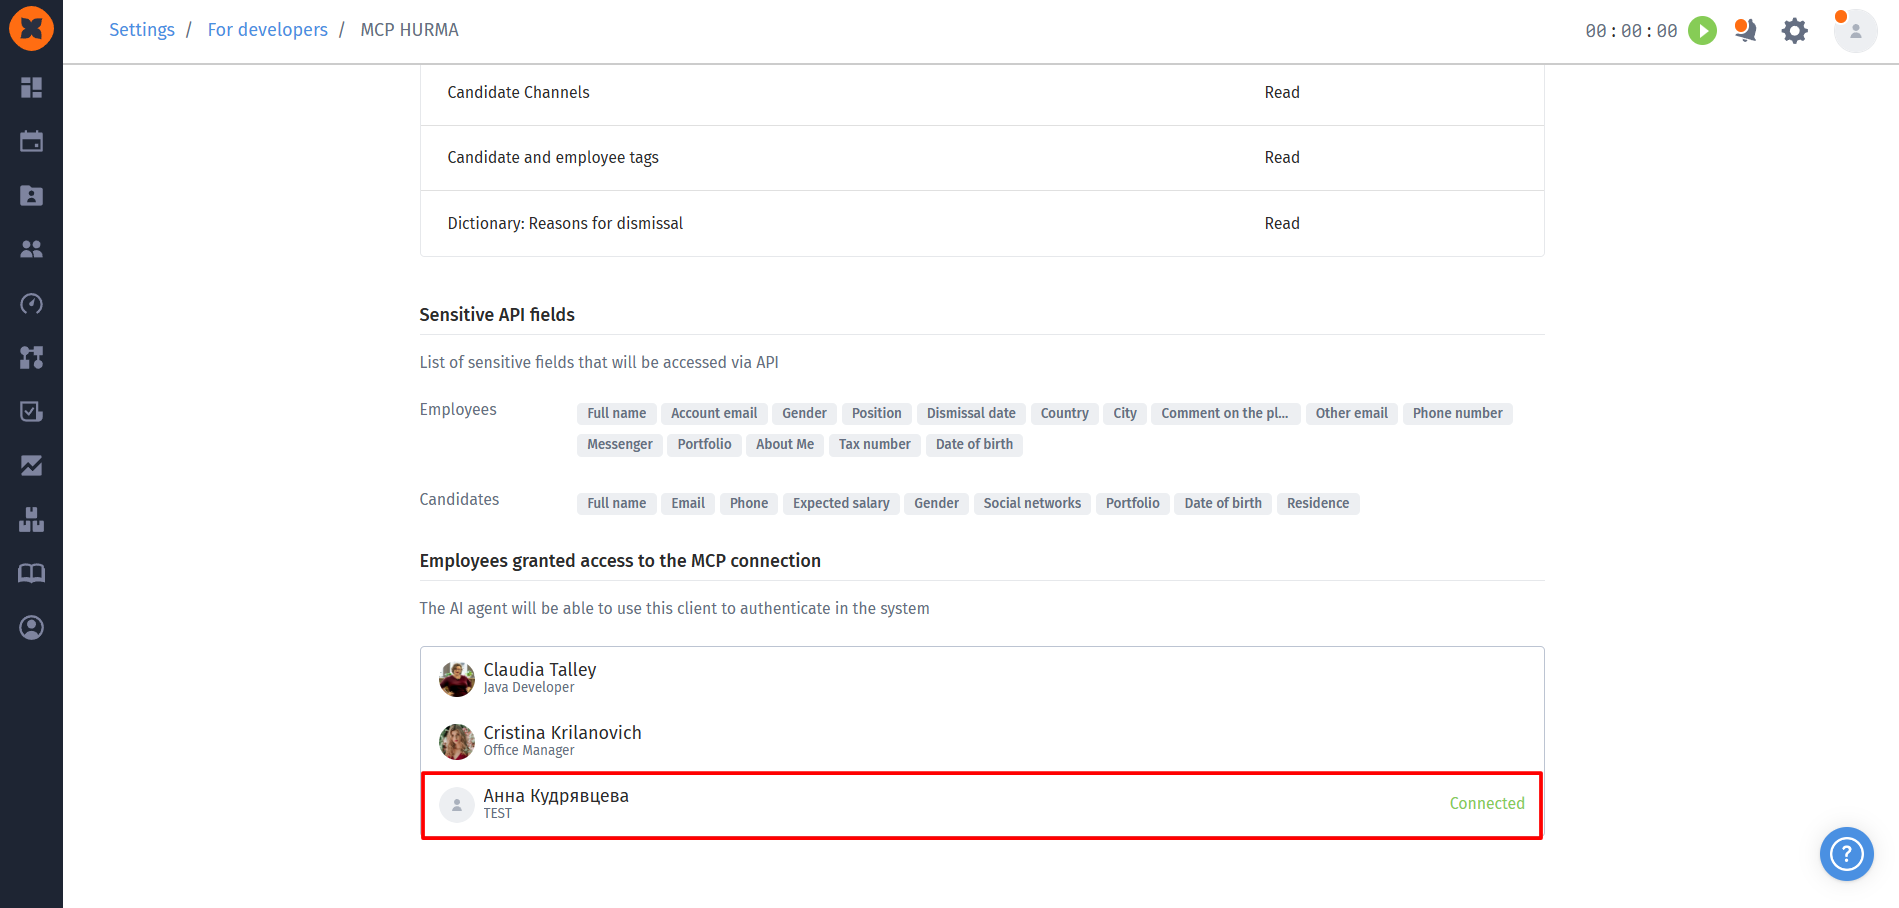
To integrate HURMA with artificial intelligence, copy the URL of your MCP client by clicking the client name or your profile icon.
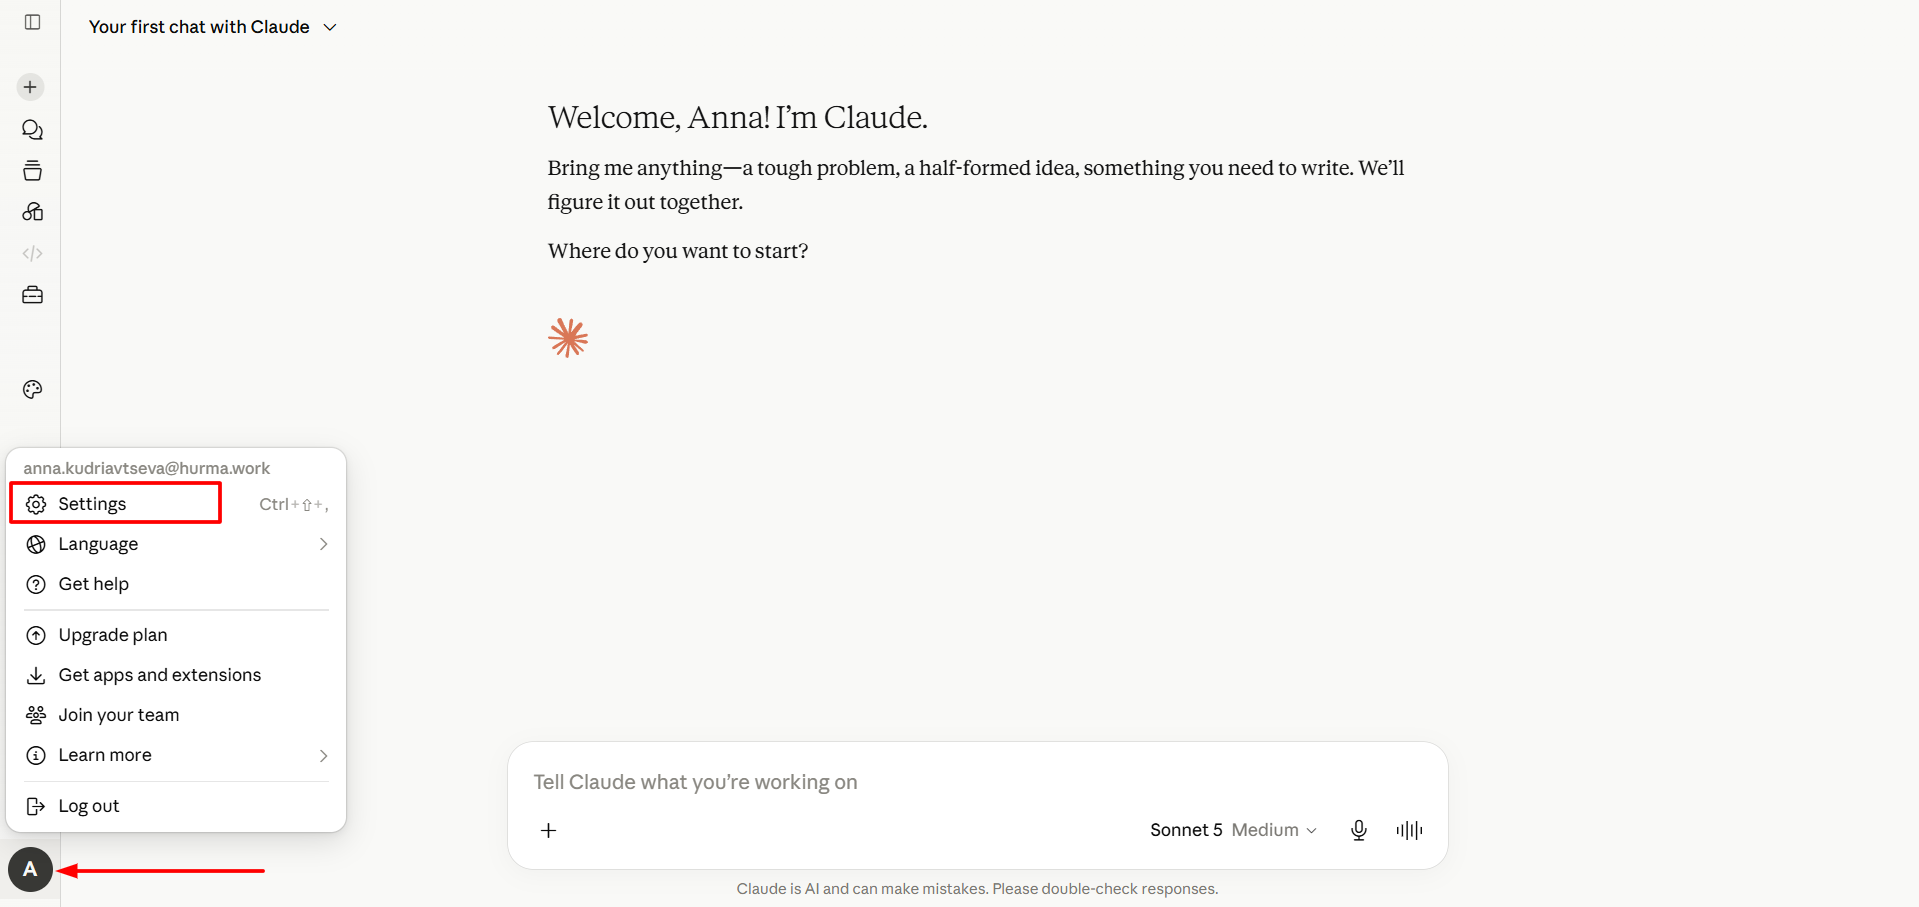
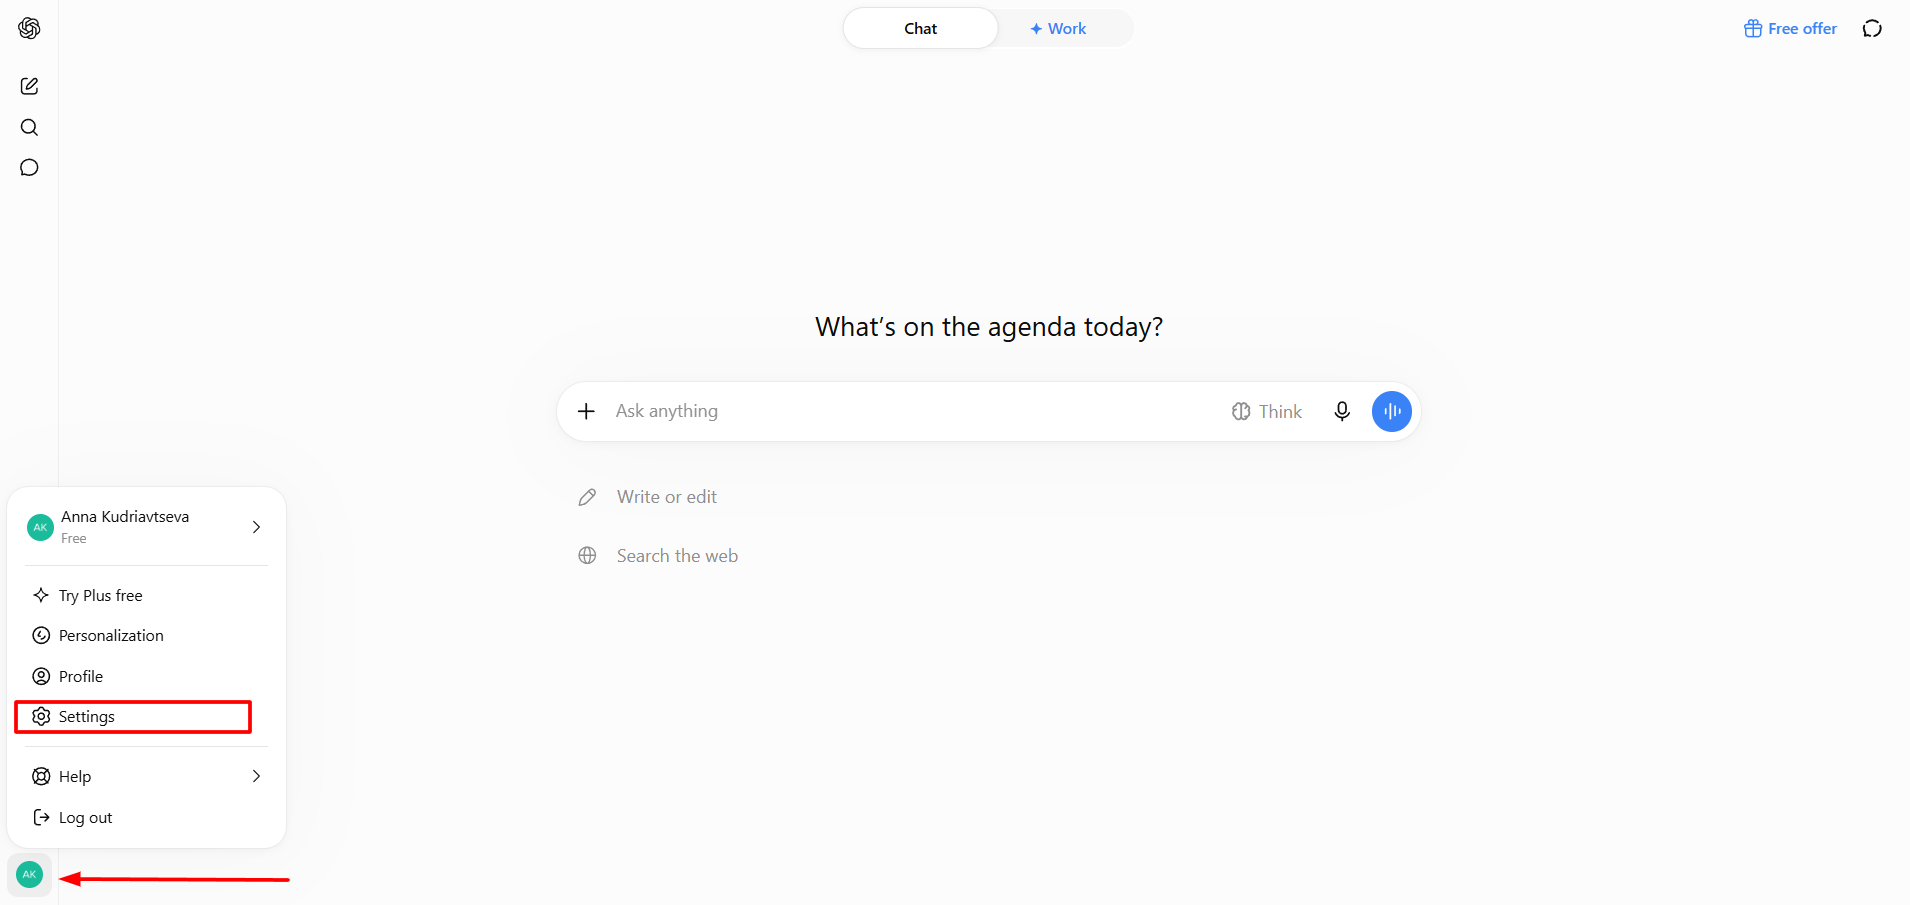
Click the profile menu and select “Settings” (Settings);
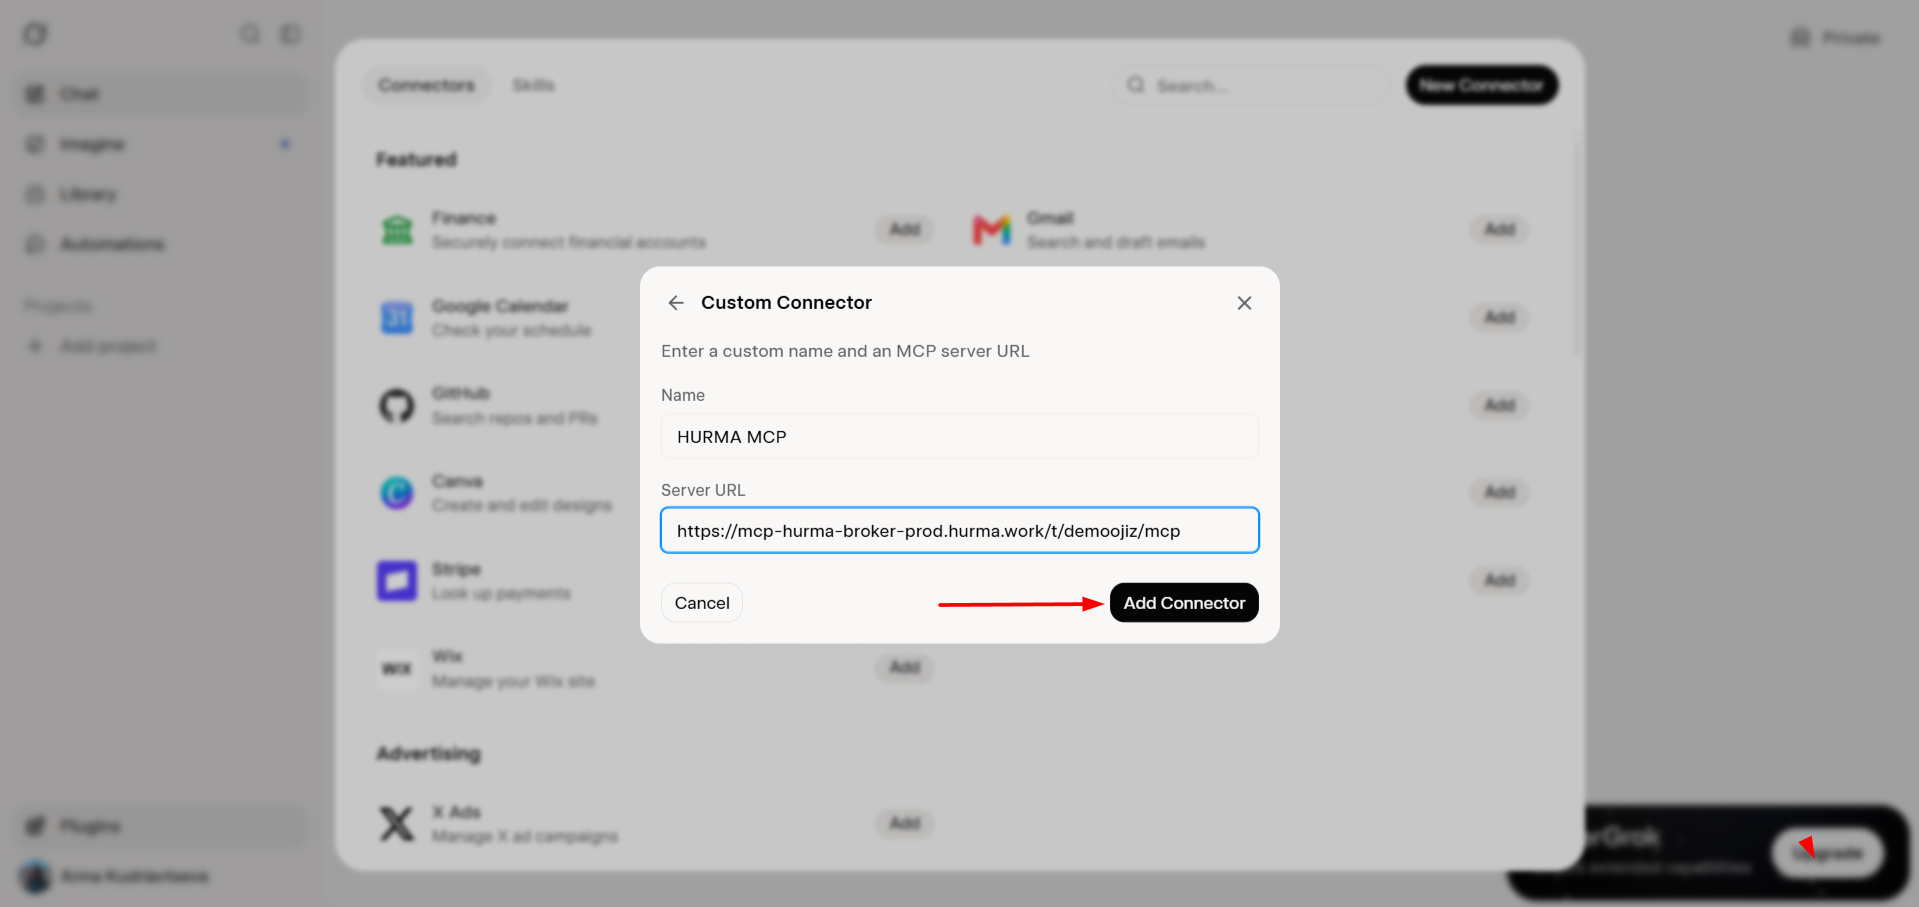
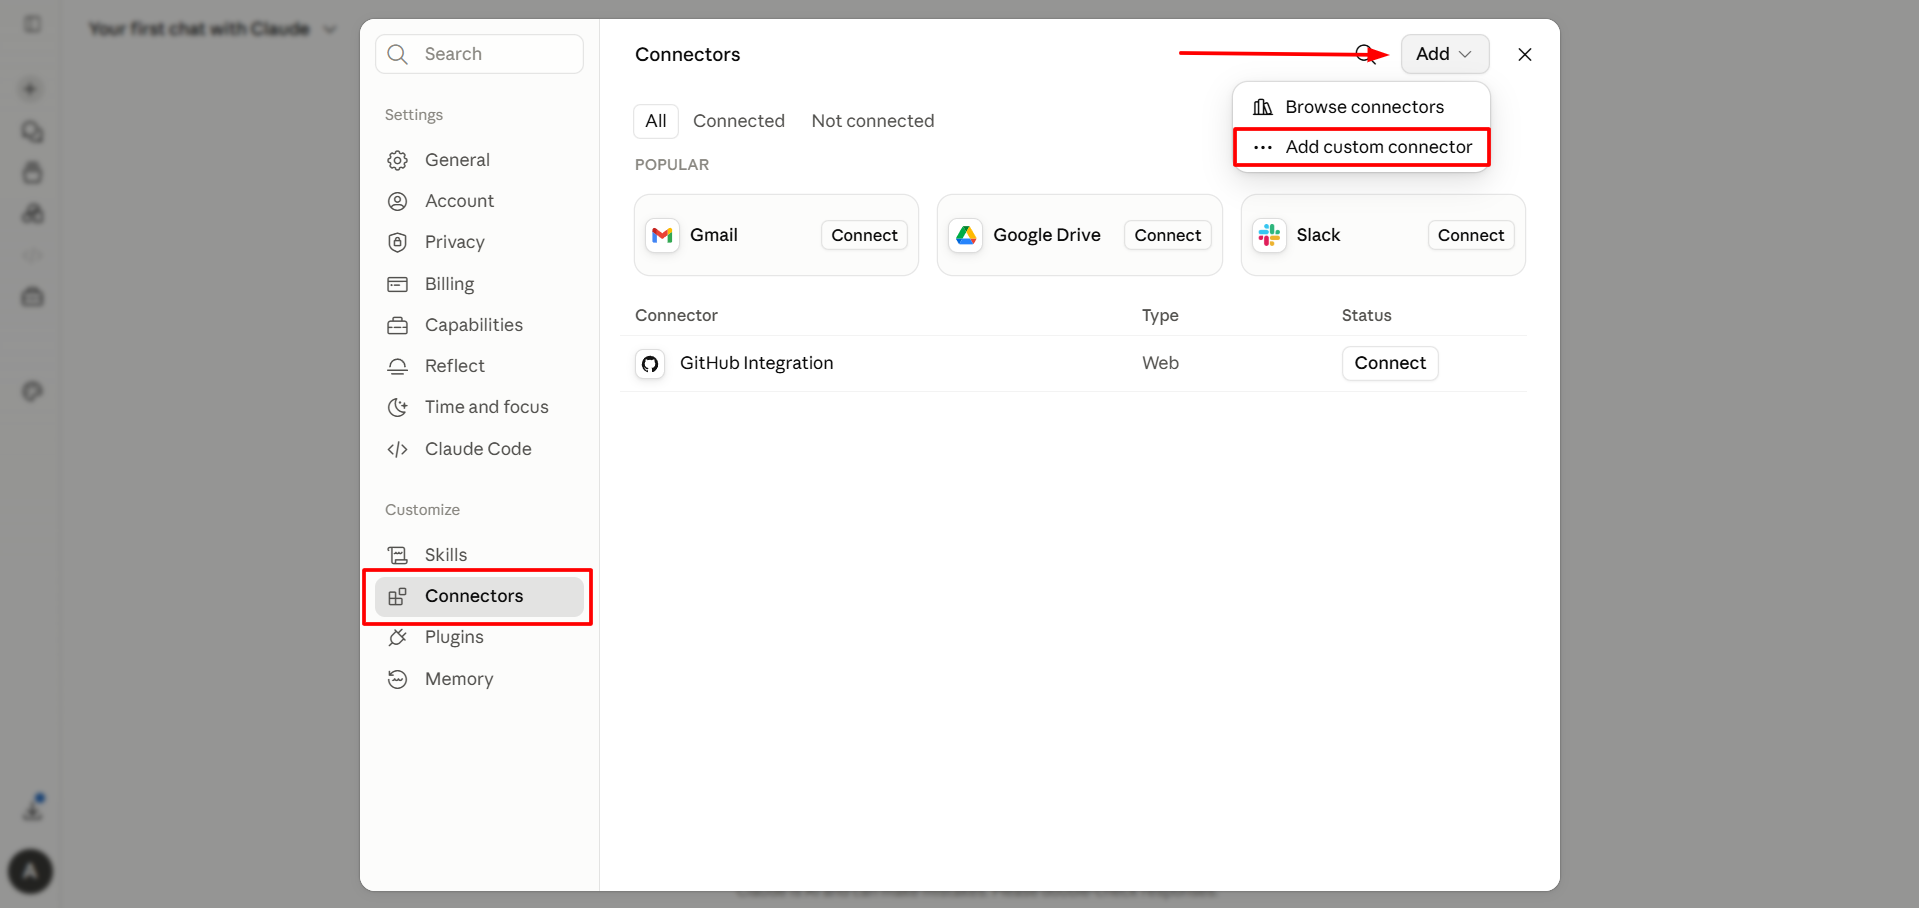
Go to the “Connectors” section, click the “Add” button, and select “Add custom connector”;
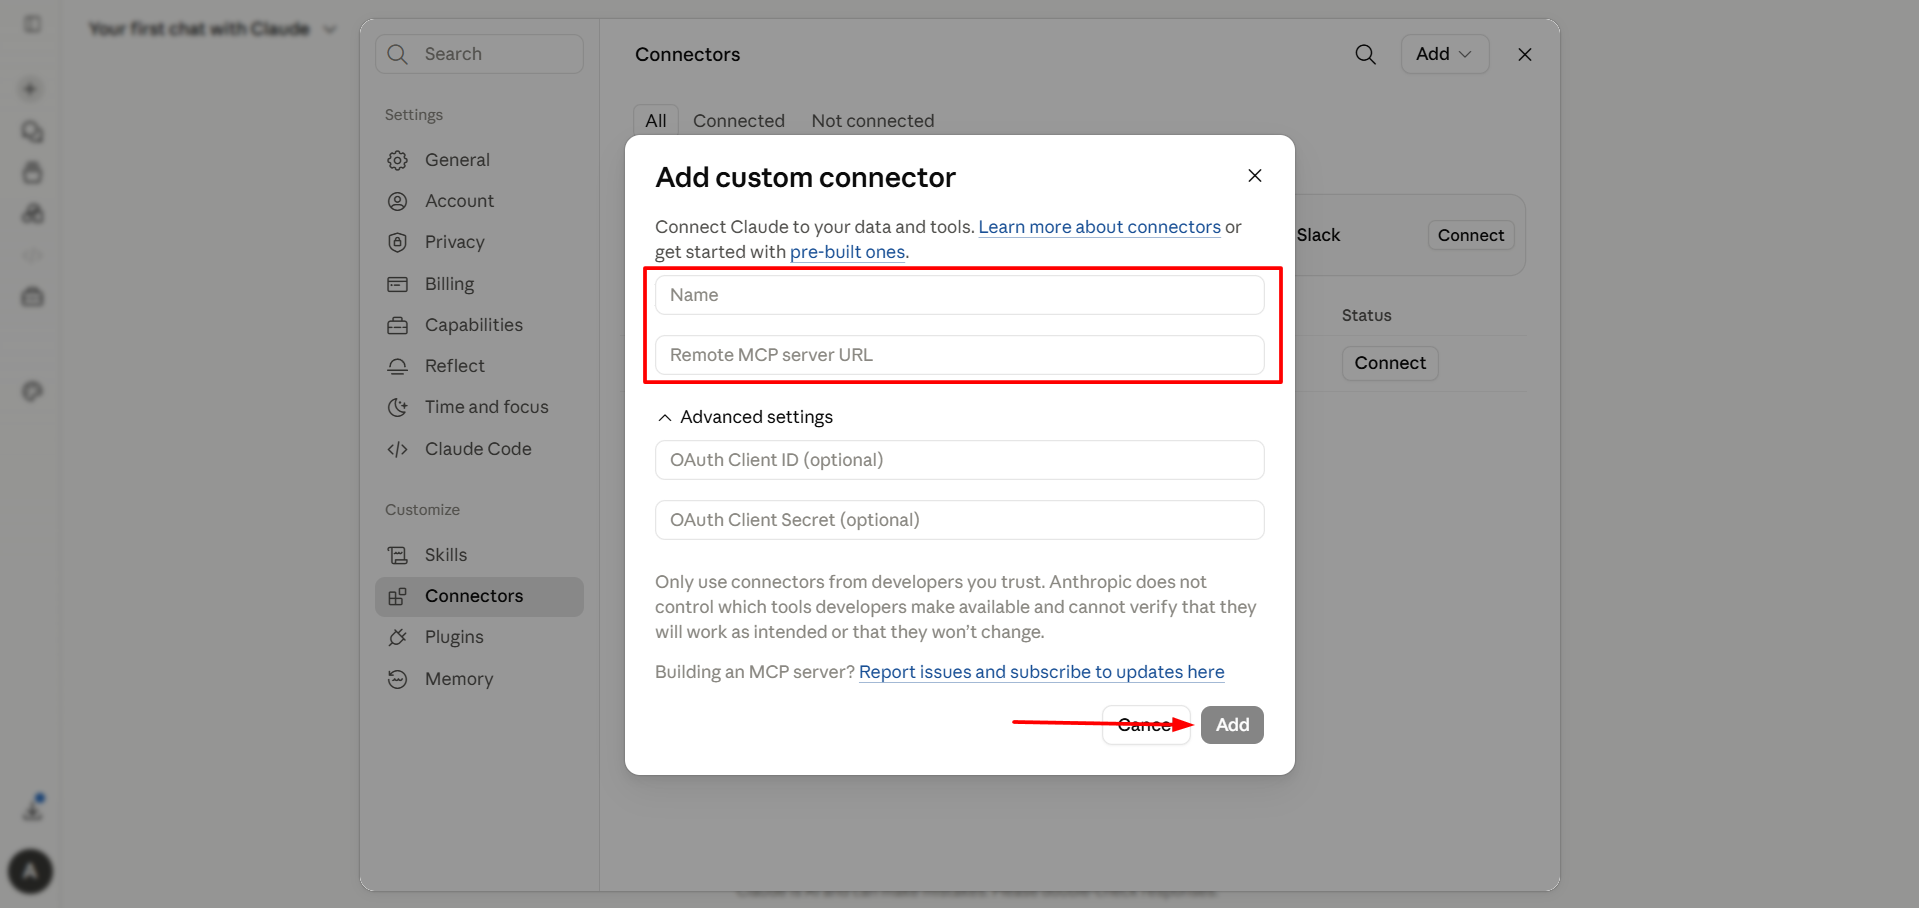
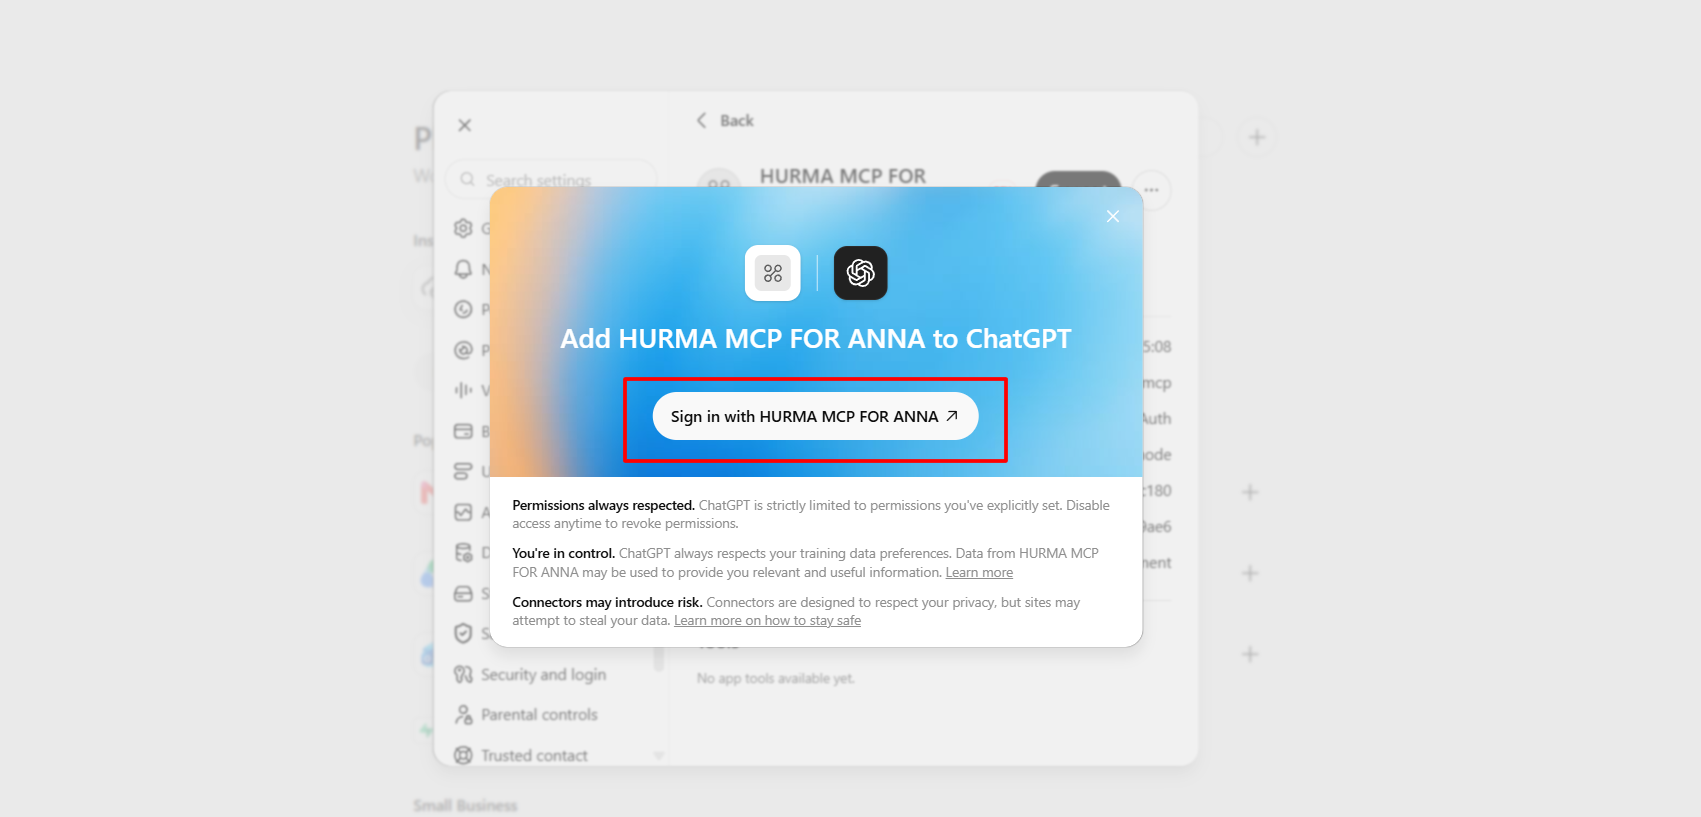
Enter any name (you can use the same name as in HURMA), paste the copied URL, and click “Add“.
Then follow these steps to connect successfully:
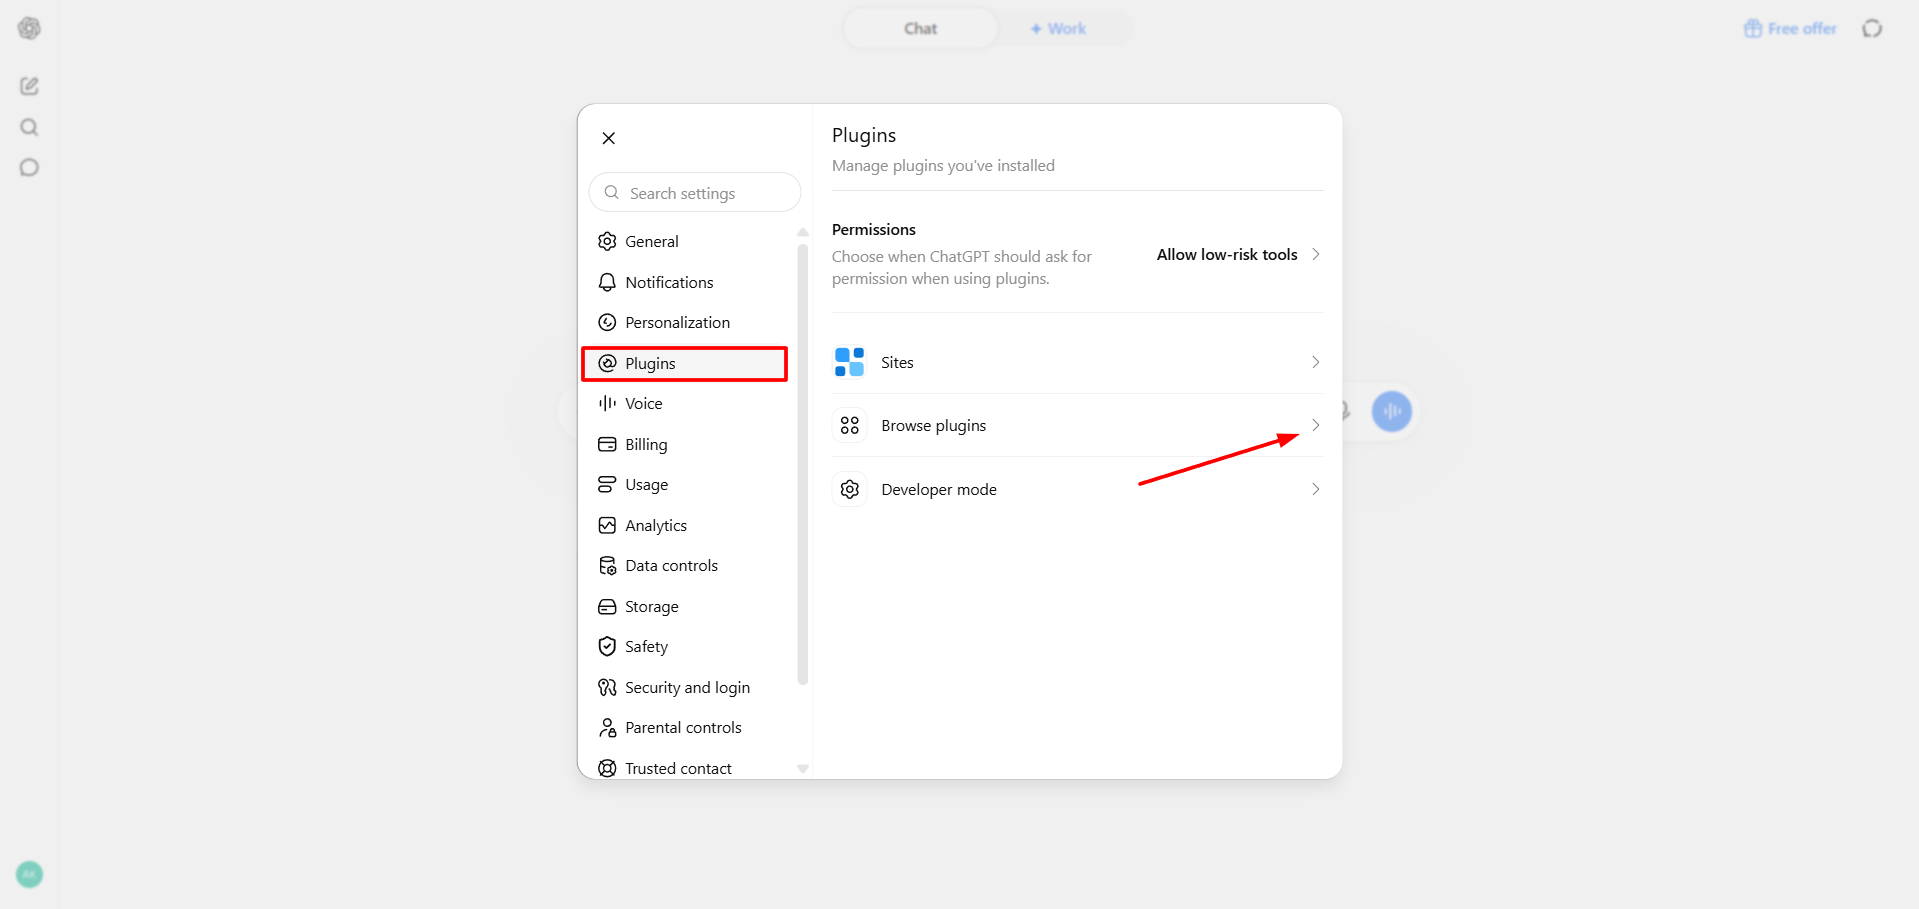
Click the profile menu and select “Settings”;
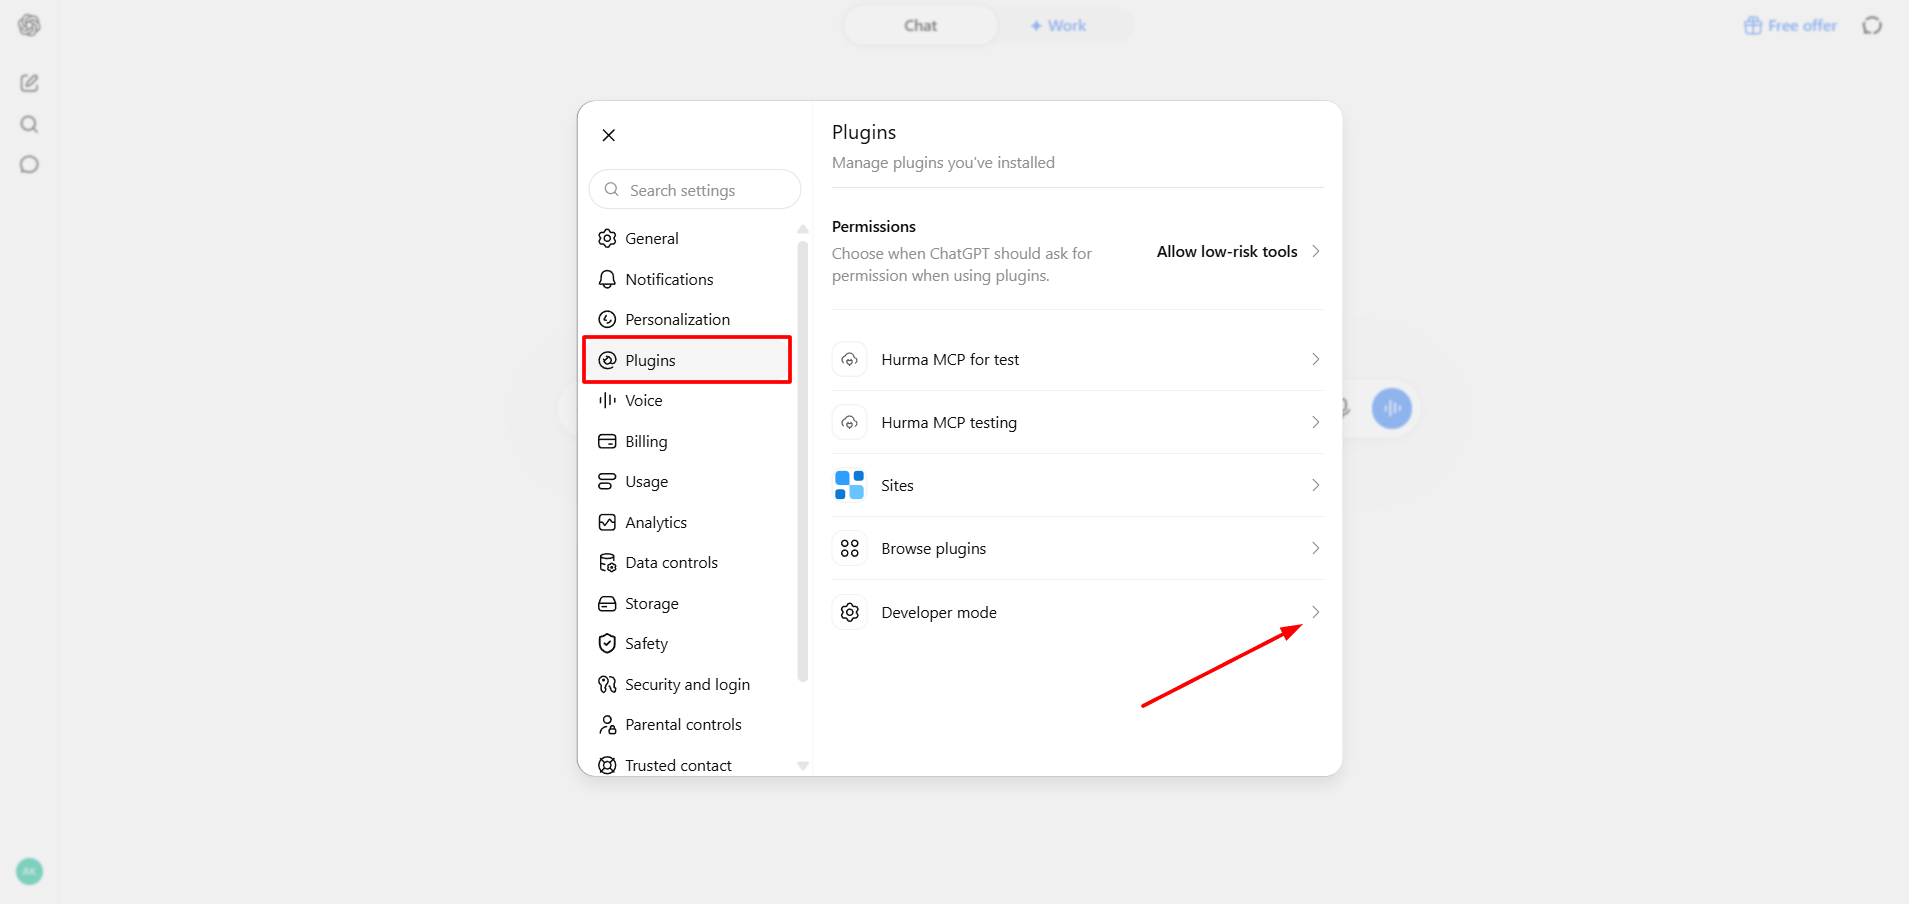
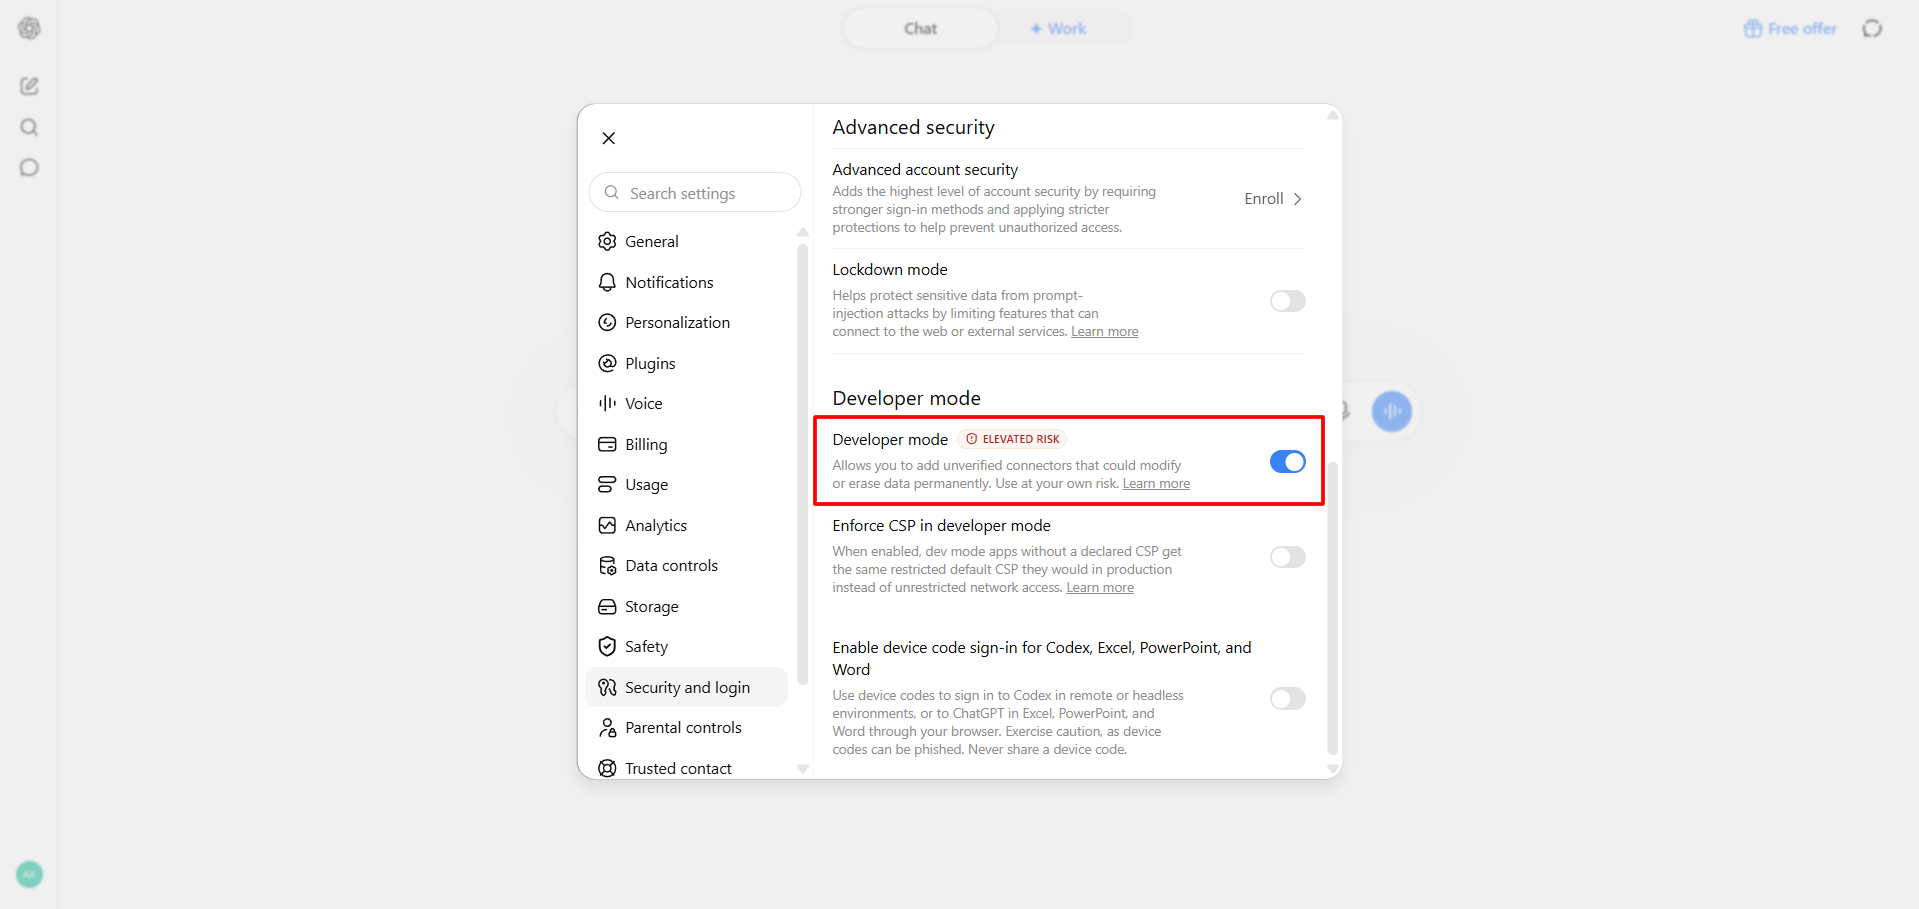
Go to “Plugins” - “Browse plugins”;
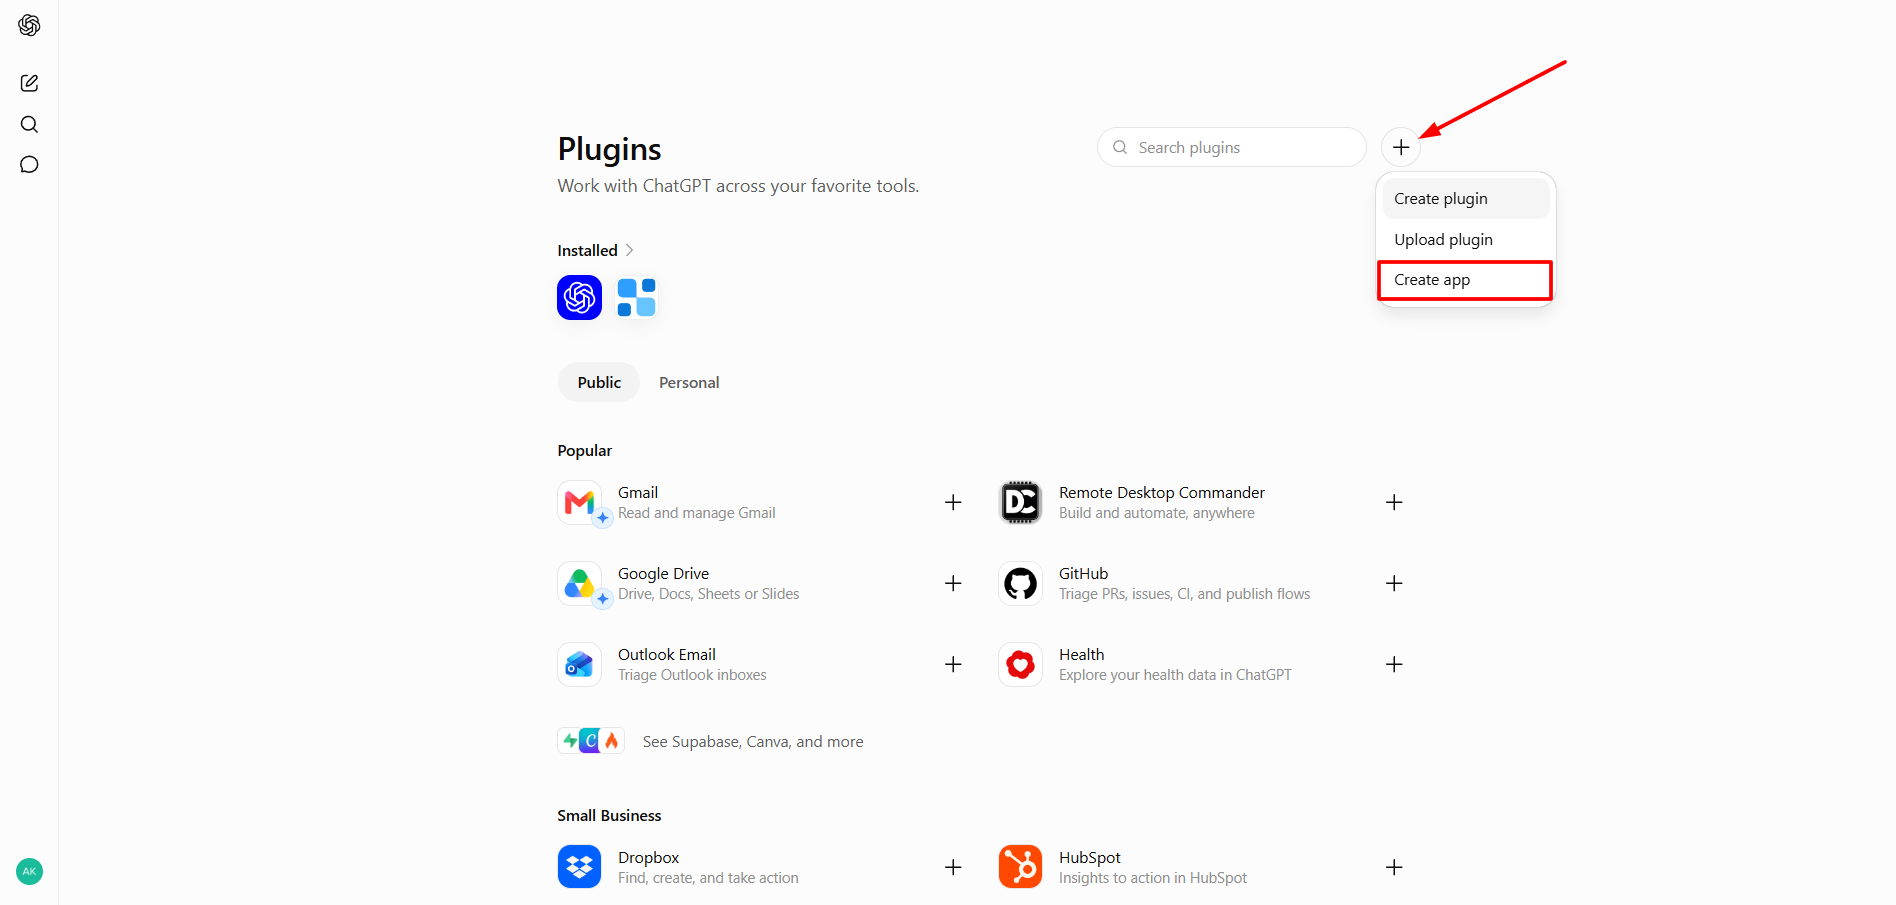
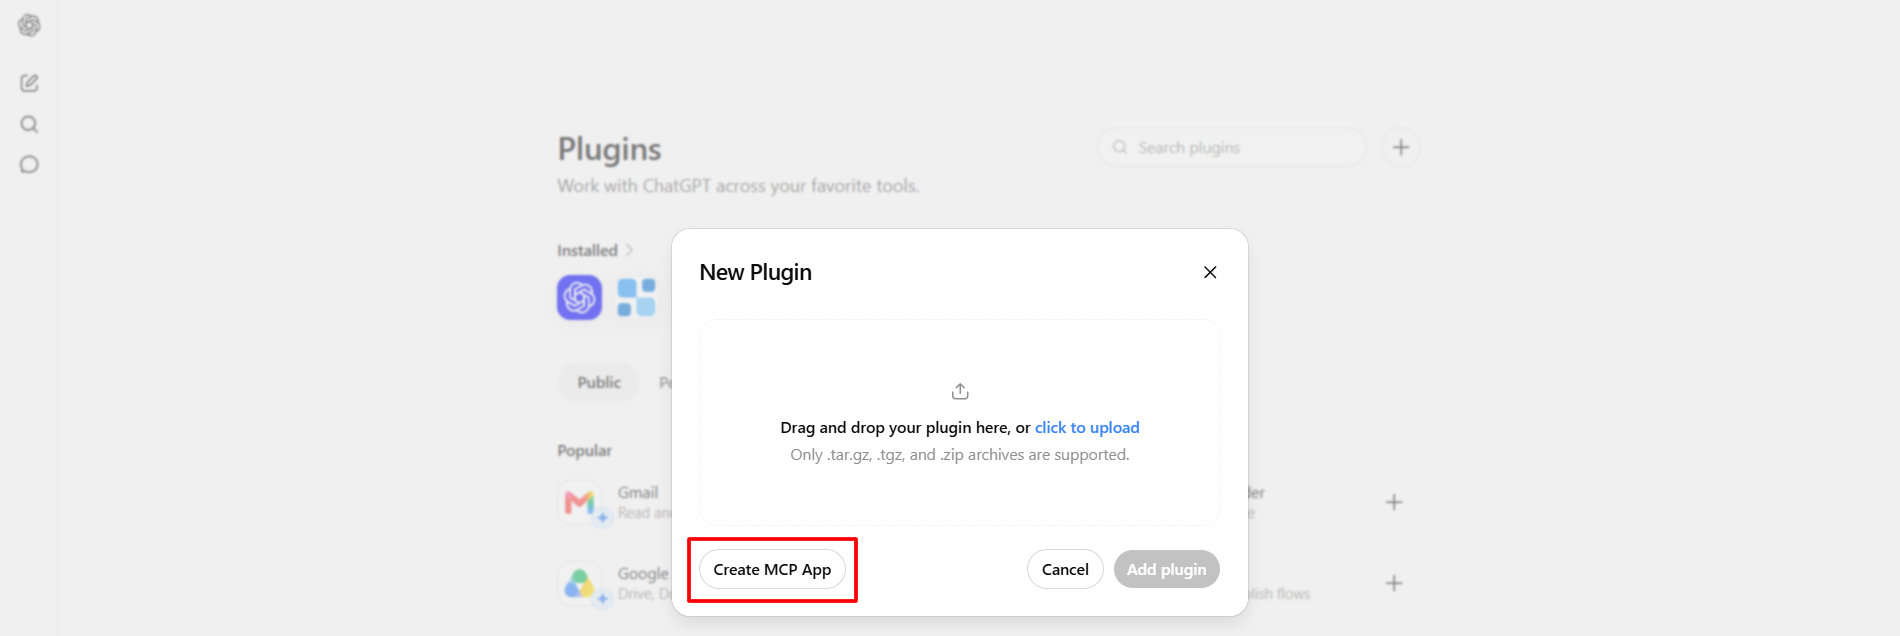
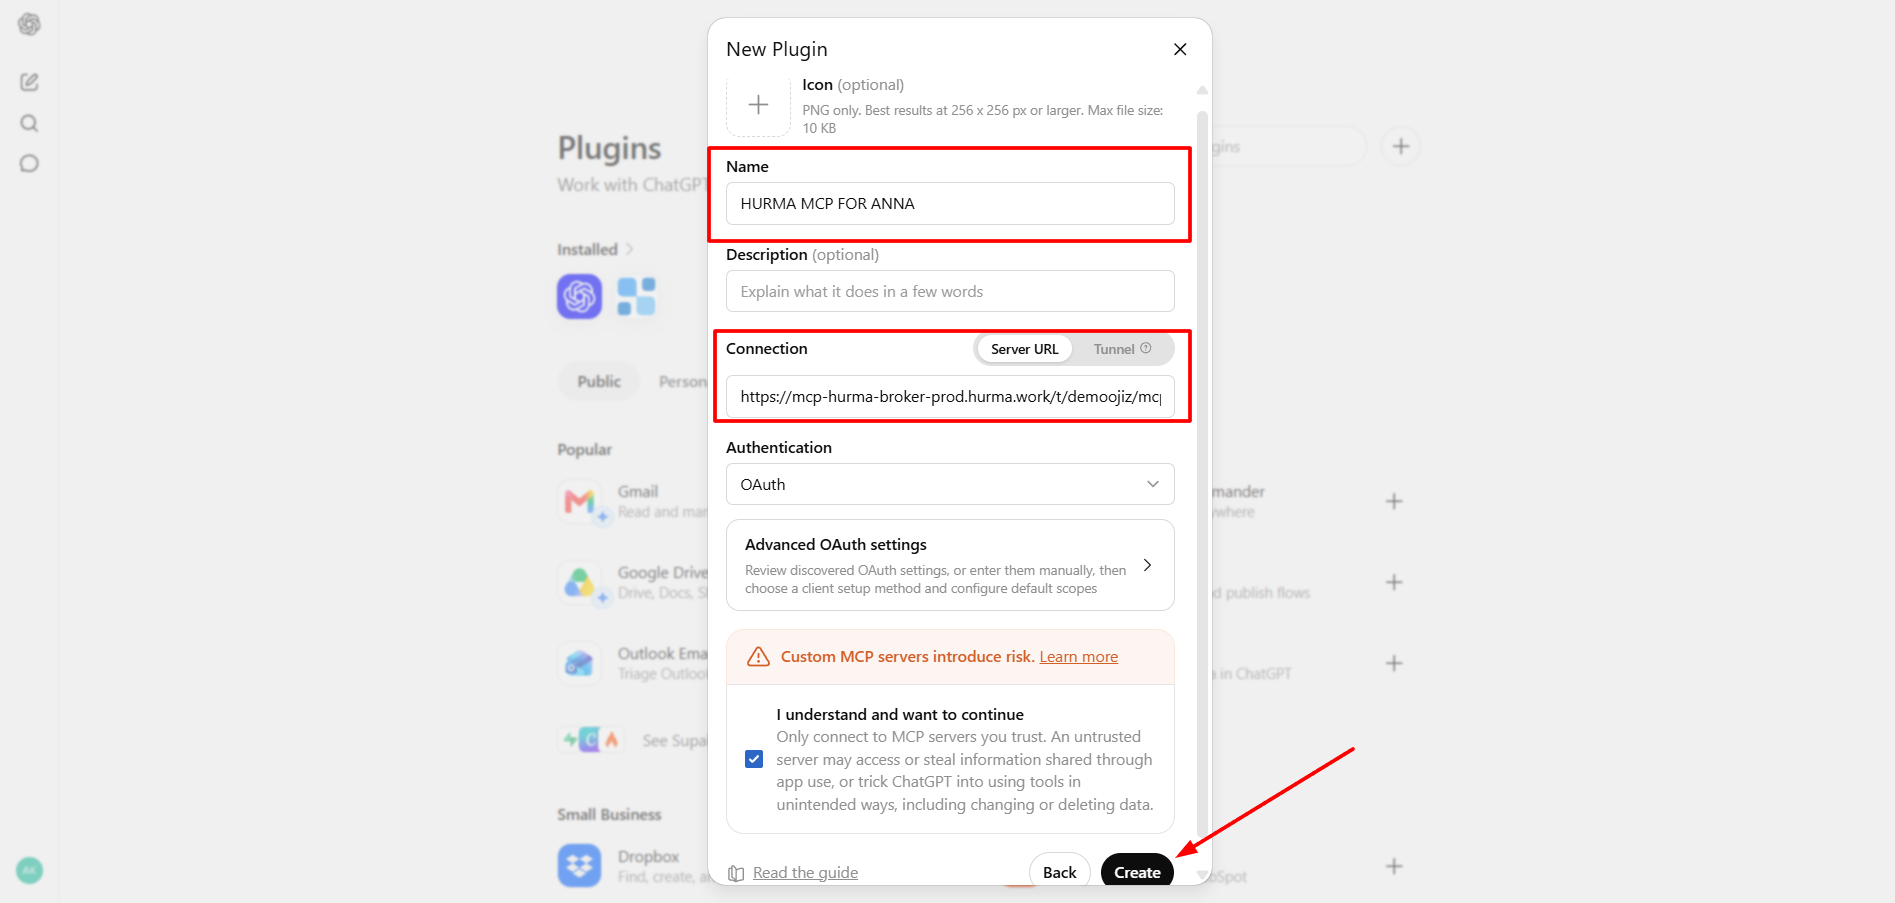
Click the “+” icon - “Create app“, enter a name, and paste the URL from your clipboard;
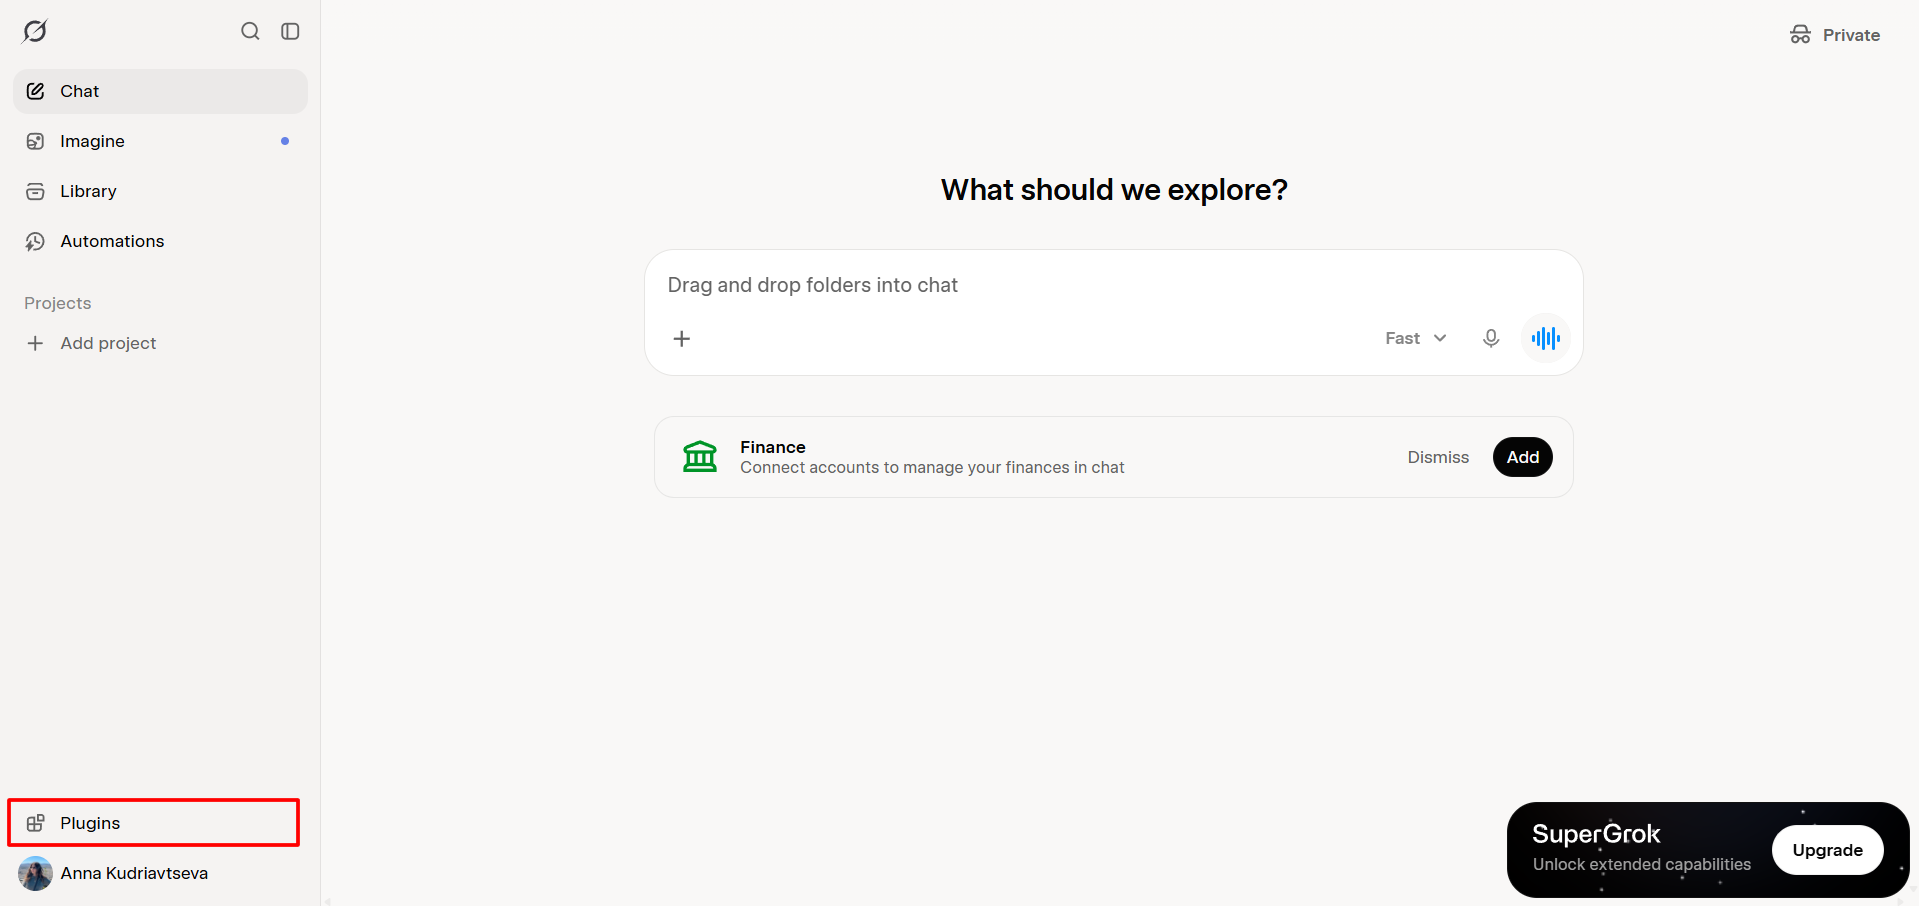
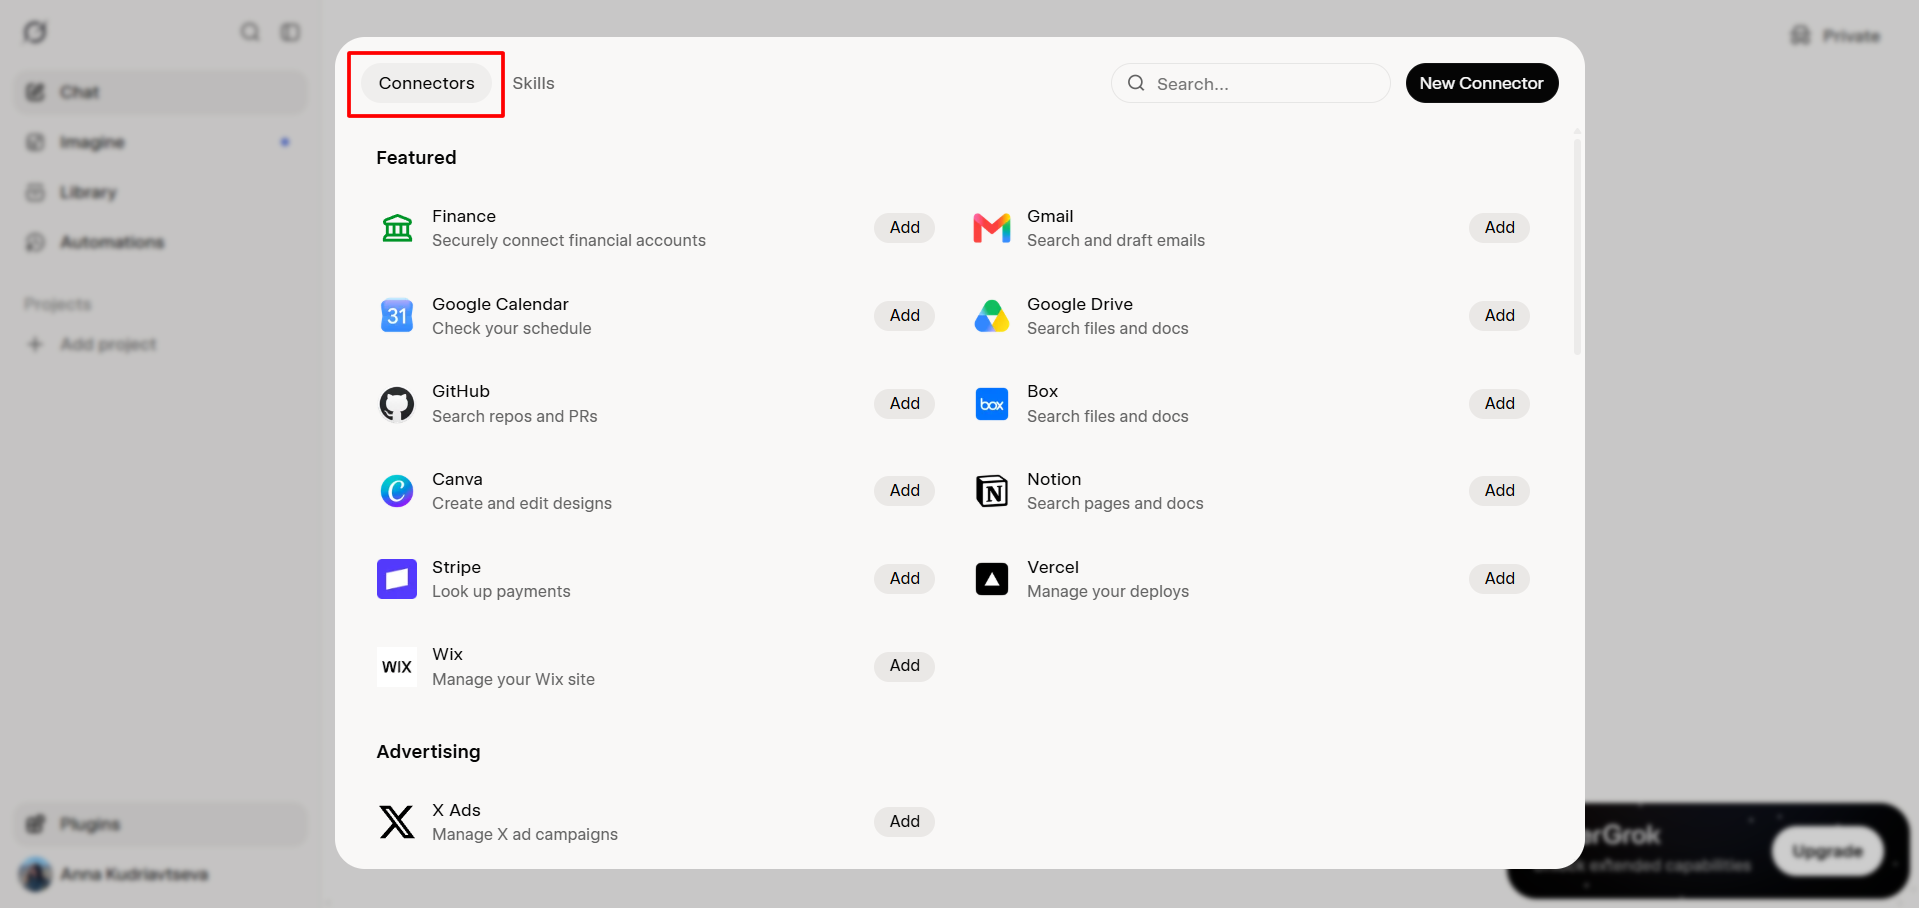
Go to “Plagins” and select “Connectors”;
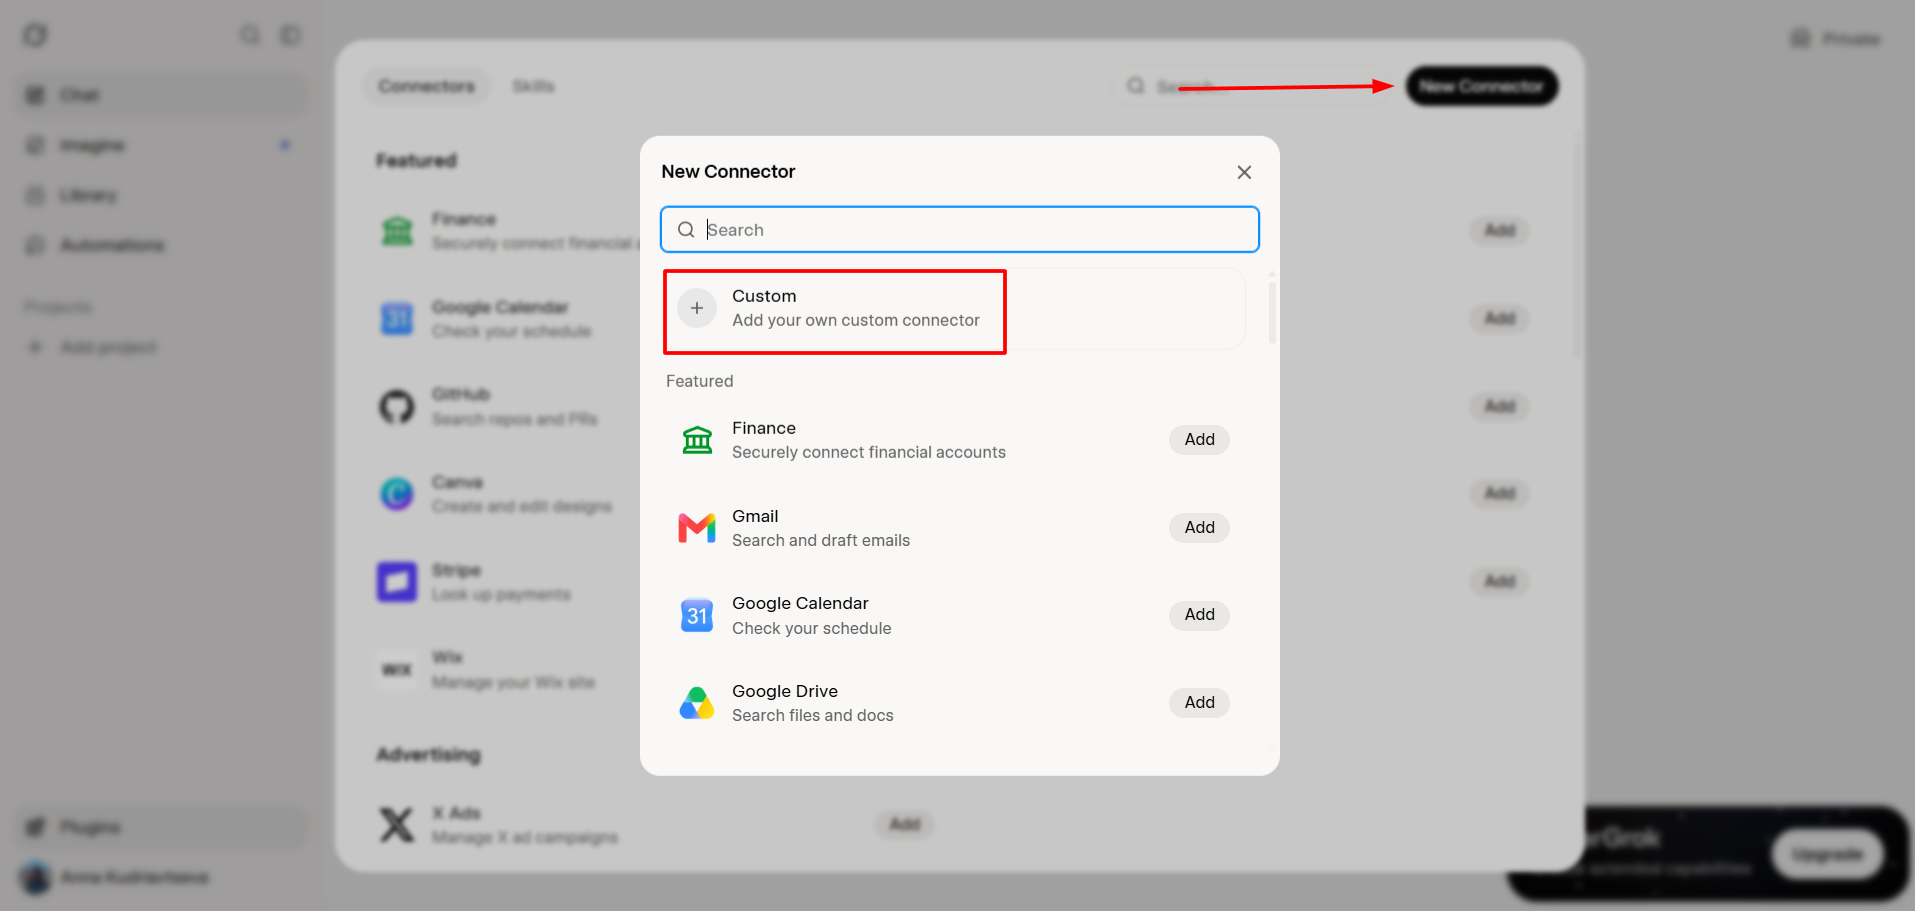
Click “New connector” and be sure to select the “Custom” type;
Enter a name, paste the URL, click the “Attach connector” button, and wait a few seconds for the connection to be established.