Single Sign-On (SSO) - is a technology of unified access that significantly enhances security and allows for time savings in user management across various systems and applications that employ different company commands.

Time savings: SSO reduces the time spent on logging into systems, as users can access multiple applications and services using a single account without the need for repeated entry of login credentials.
Security: One of the main issues is the reuse of identical passwords across different systems, increasing the risk of data breaches. SSO allows better control of access to systems and reduces the likelihood of information loss due to weak passwords or other authentication system vulnerabilities.
Enhanced security and access management: With SSO, there is more centralized access management to resources, simplifying administration and enhancing system security.
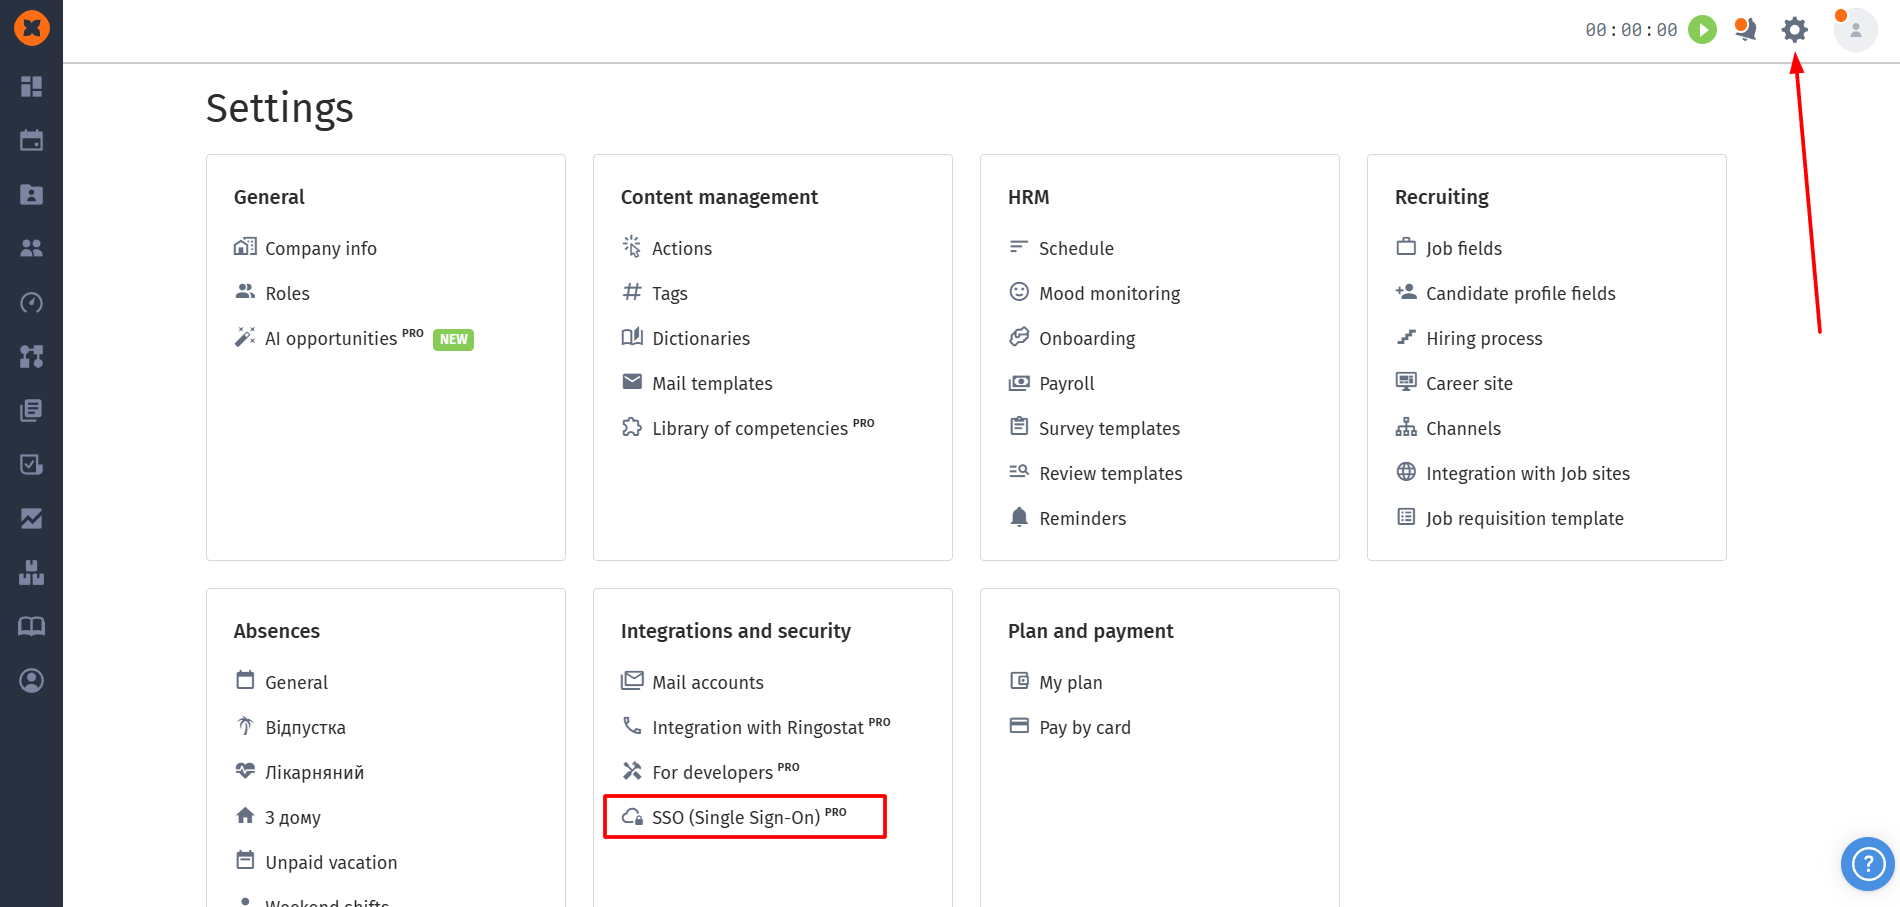
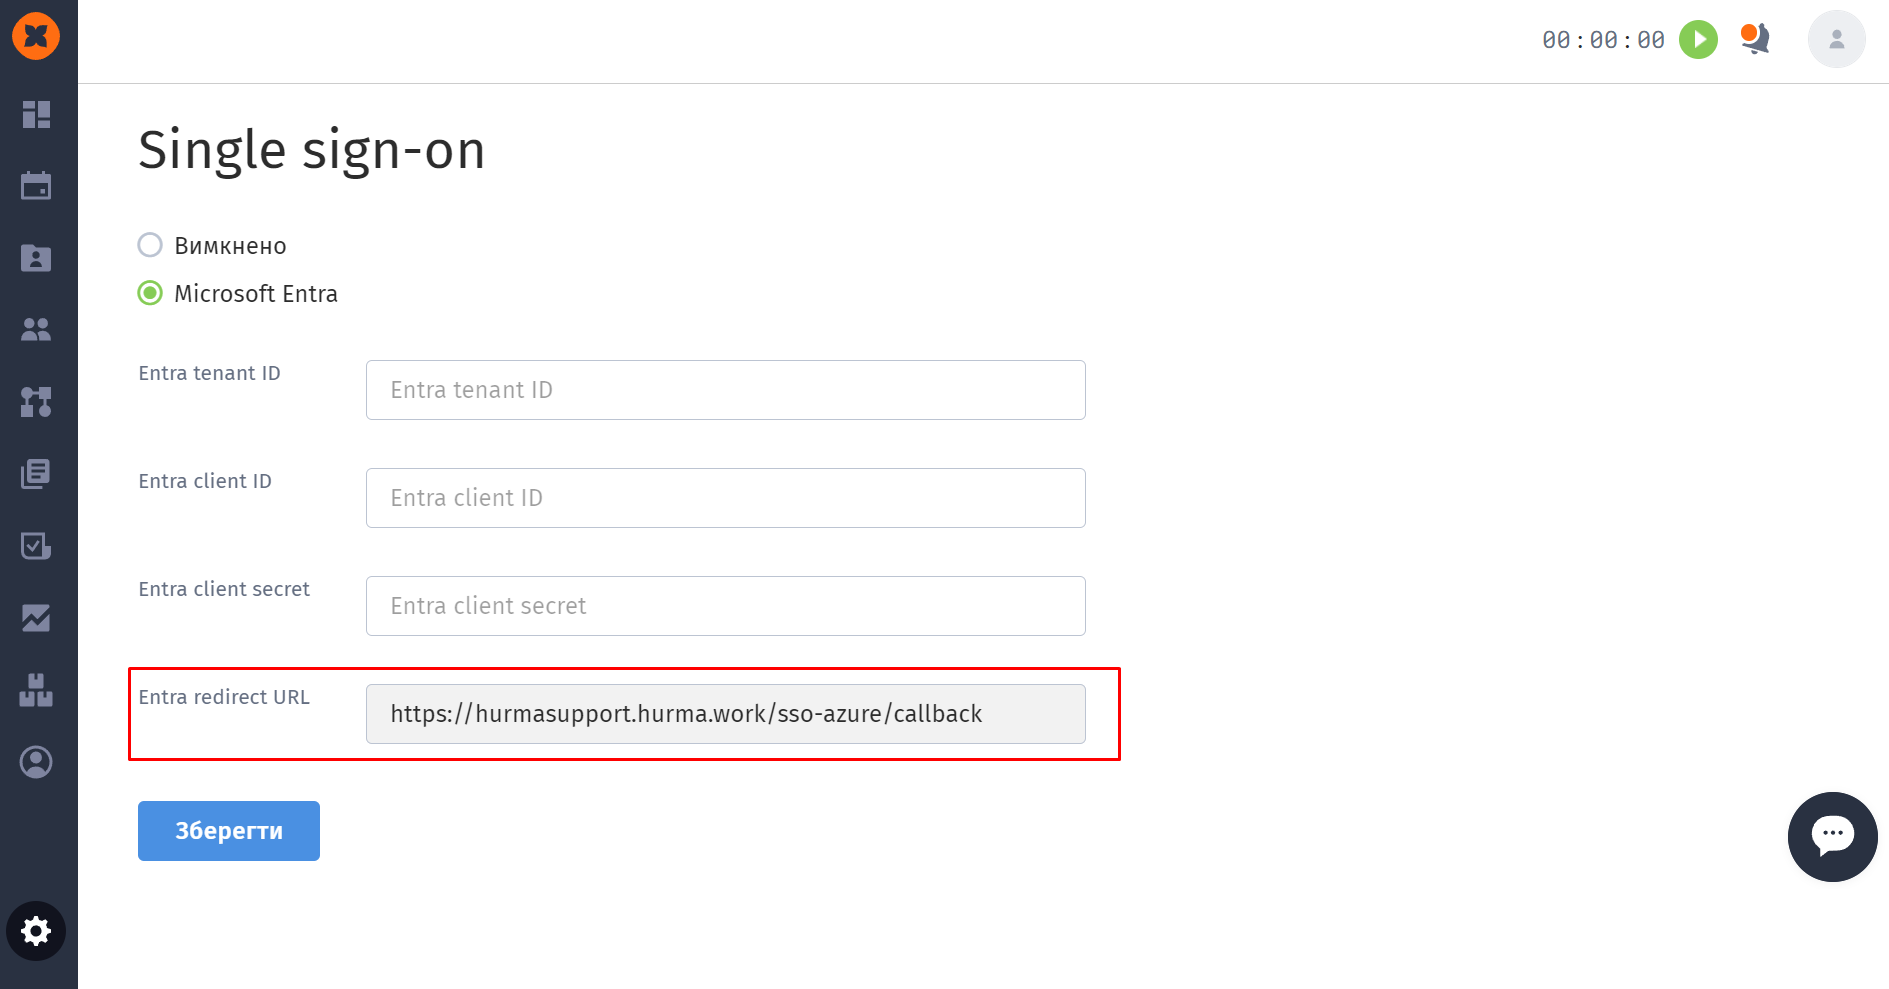
Activation of the option occurs in the "⚙" - "SSO" section.
To activate, you need to select the "Microsoft Entra" option and fill in the corresponding fields (taken from the Microsoft Entra portal) - Entra tenant ID, Entra client ID, Entra client secret, Entra redirect URL, and then click the "Save" button.

After this, system users will have the option for authorization through SSO on the login page.

To connect the option on the Microsoft Entra portal, you need to navigate to the "App registrations" section and click on "New registrations."

After that, you need to:
In the "Supported account types" section, choose who can use this application, depending on your company's policies.
In the "Redirect URI (optional)" section, choose "Web" and enter the information from the "Entra redirect URL" field in HURMA.
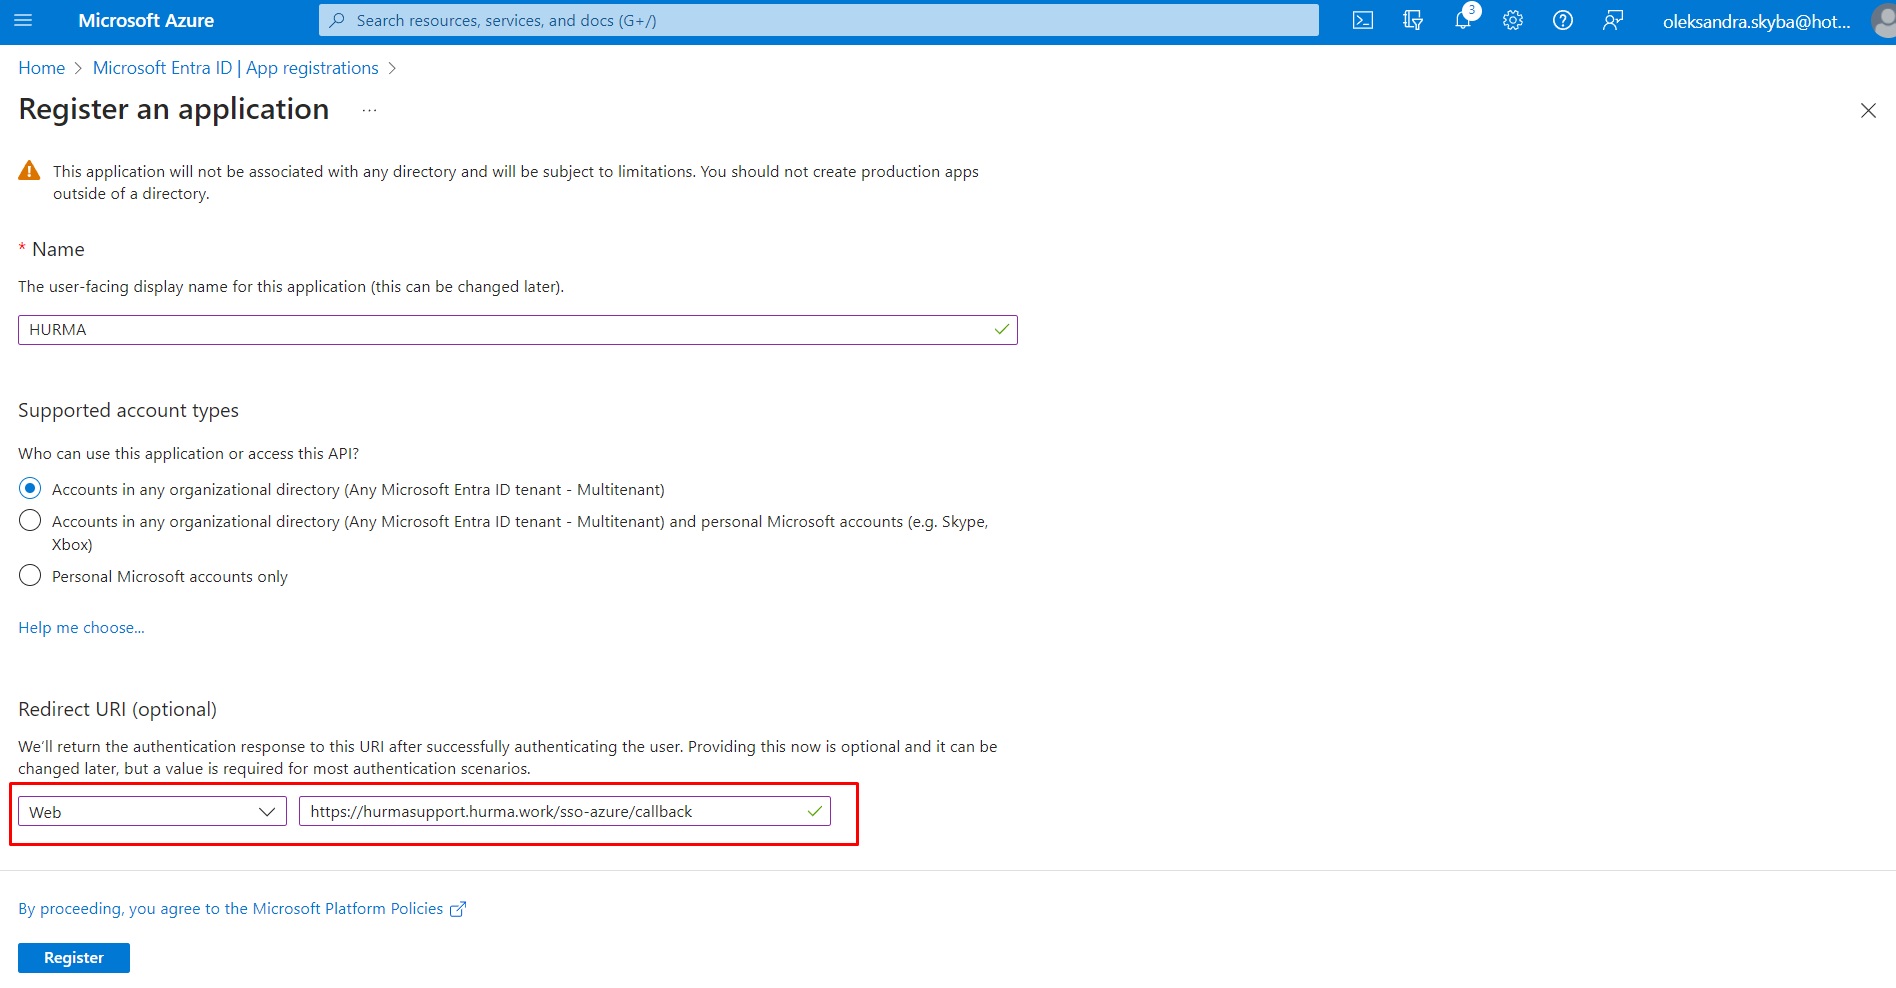
3. Click on the "Register" button.
After creating a separate application, you need to grant HURMA permission to use it. To do this:
Go to "API permissions."
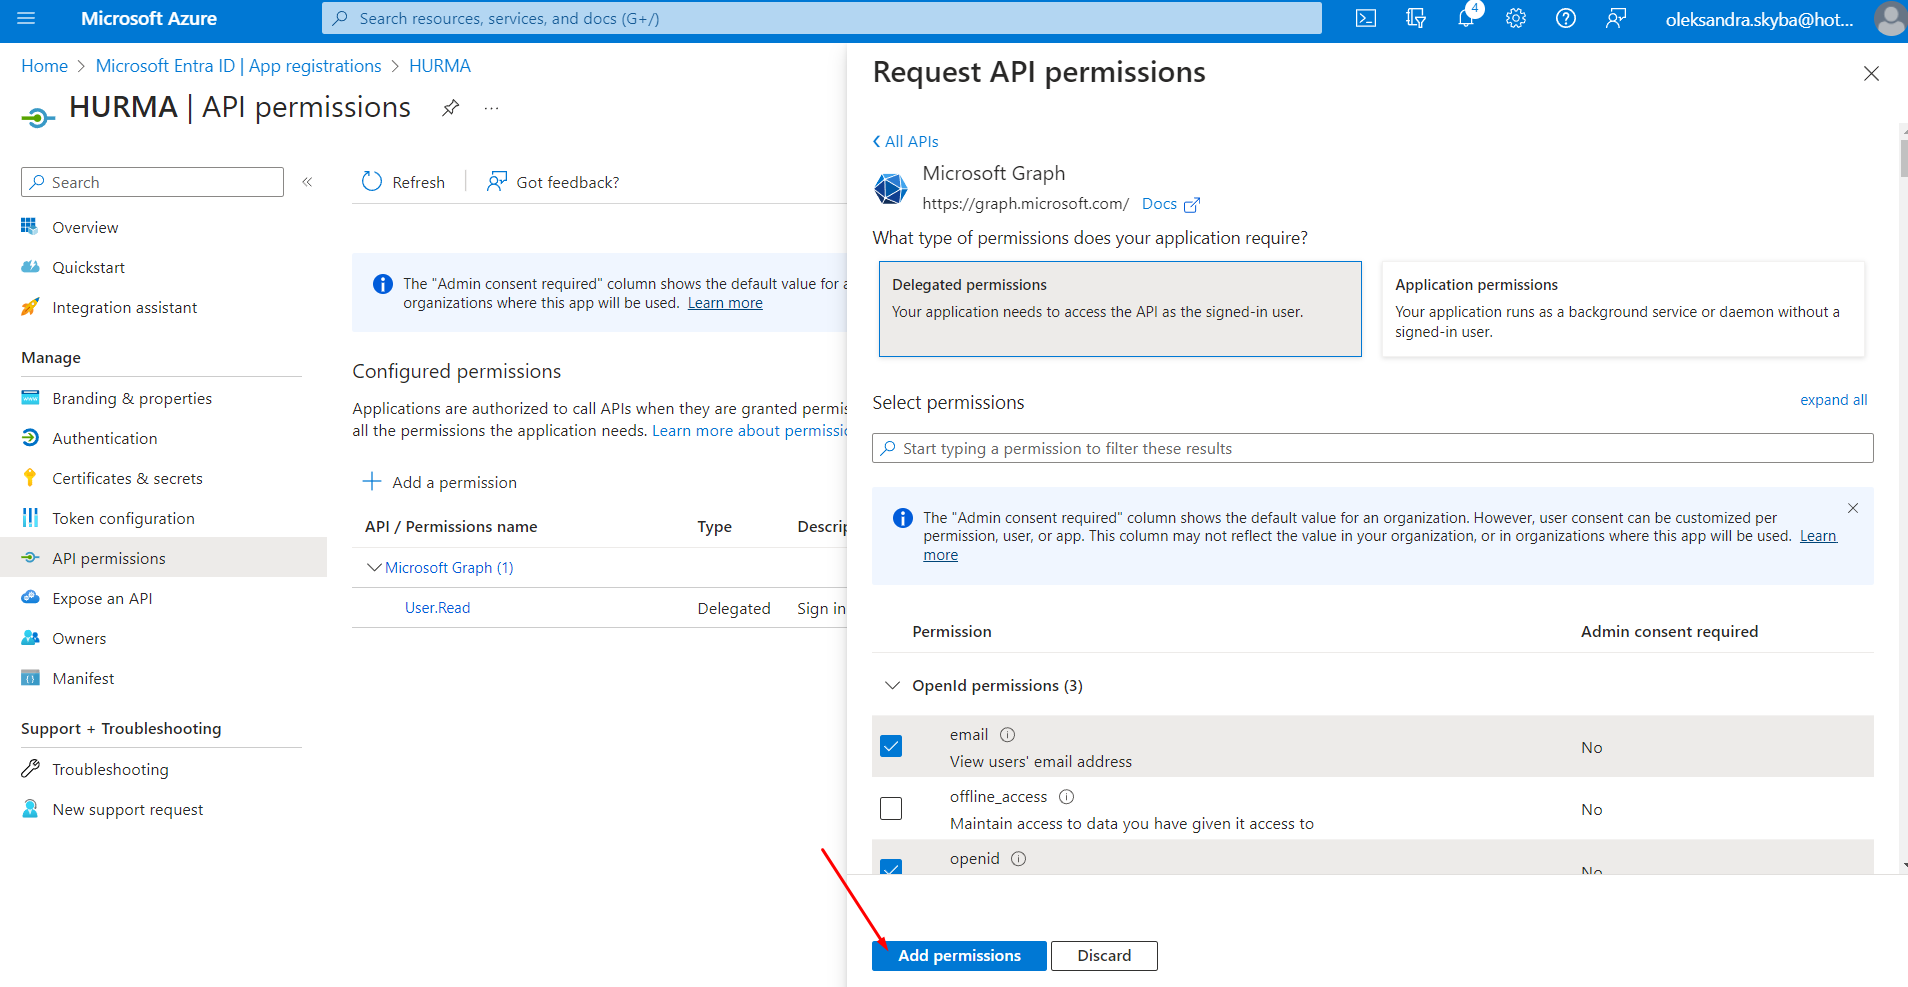
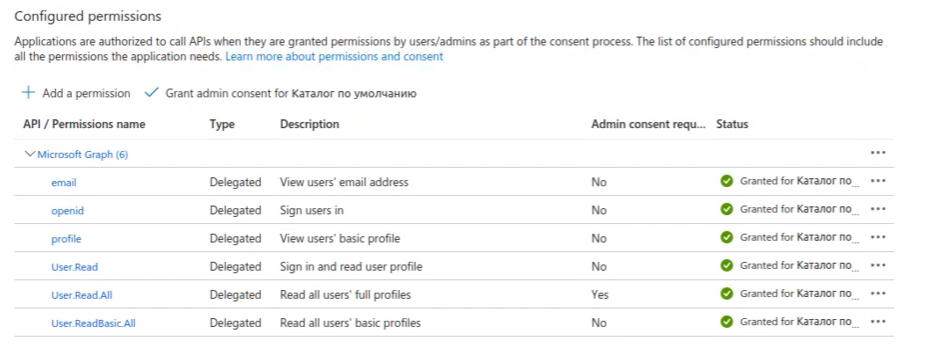
Click on "Add permission" and choose "Microsoft Graph" -> "Delegated permissions."
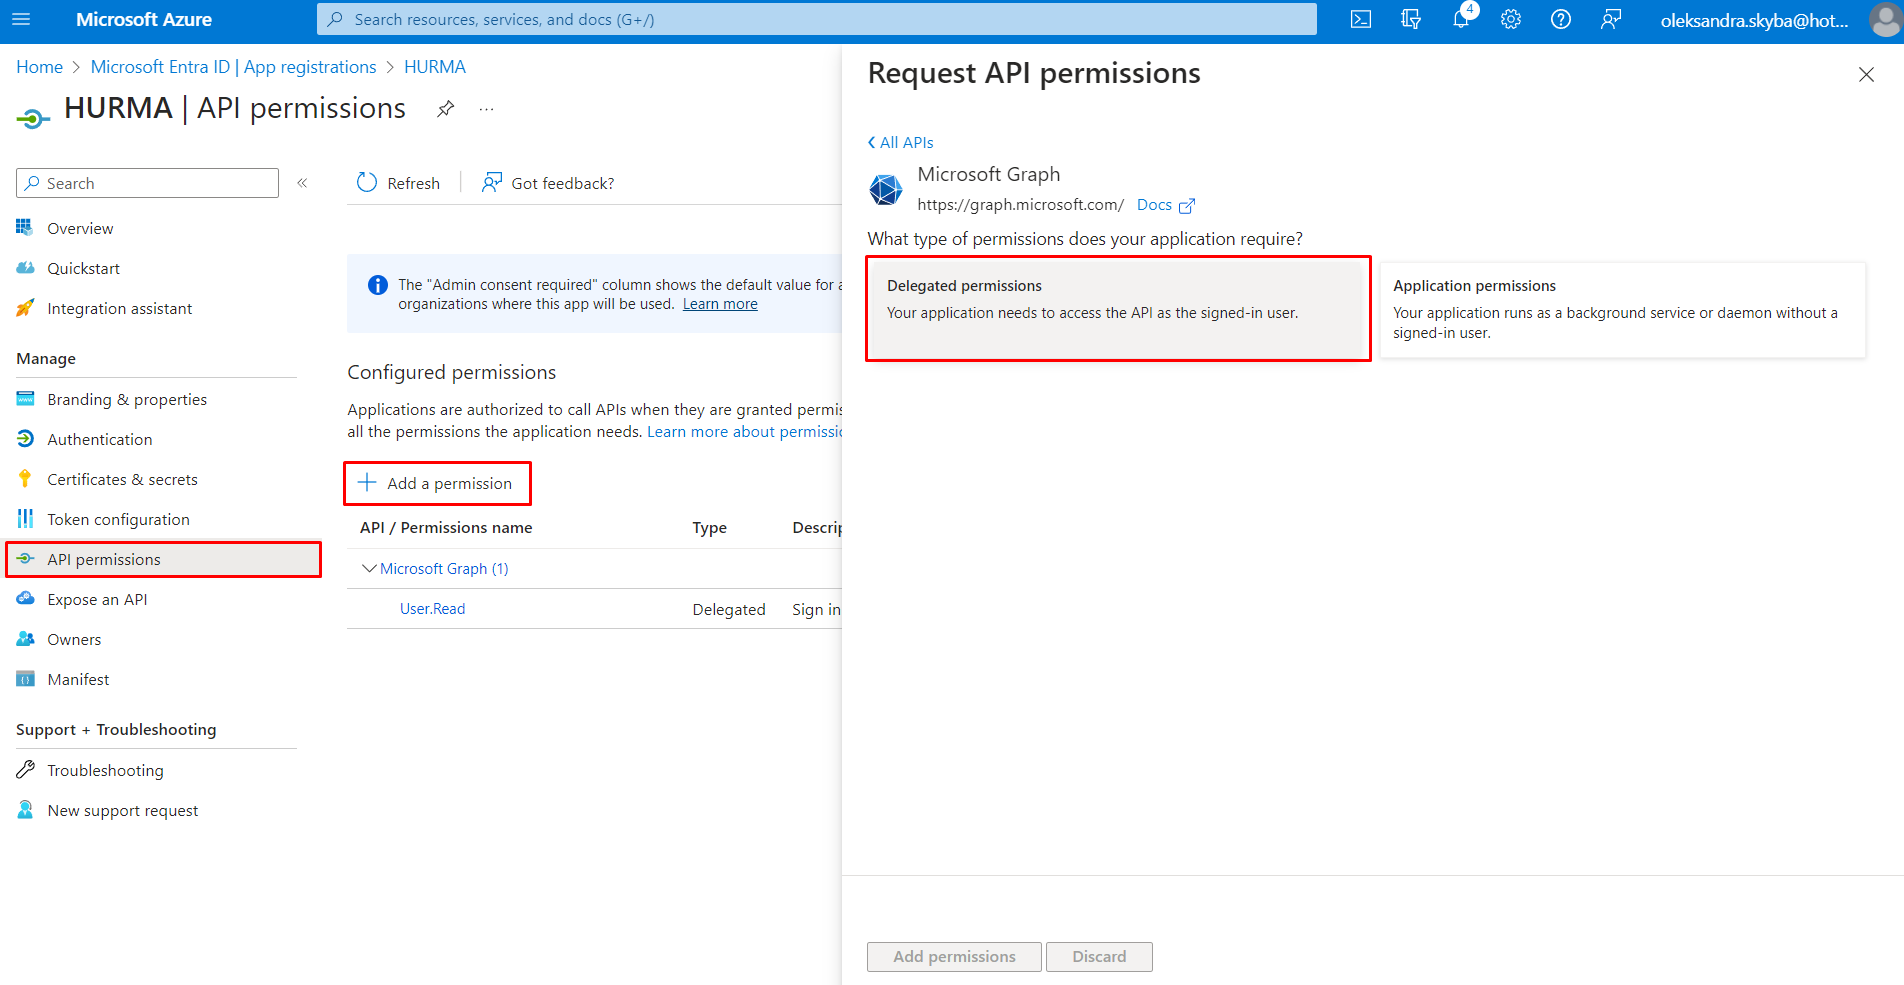
In the list, you need to select the following items: "email," "openid," "profile," "User.Read," "User.Read.All," "User.ReadBasic.All."
Then, click on the "Add permissions" button.
The next step is to go to the "Certificates & secrets" section, open the "Client secrets" tab, and follow these steps:
Click on the "New client secret" button;
Fill in the "Description" and "Expires" fields, then click "Add";

Copy the value from the "Value" field and add it to the Entra client secret field in HURMA;


Go to the "Overview" page;
Copy the value from the "Directory (tenant) ID" field and add it to the Entra tenant ID field in HURMA;


Copy the value from the "Application (client) ID" field and add it to the Entra client ID field in HURMA;


Click on the "Save" button, after which you should see the message "SSO connected".

Activation of the option occurs in the section "Settings" - "SSO".

To activate, you need to choose one of the options:
"SAML2" and fill in the corresponding fields (taken from the Microsoft Enta portal) - Metadata Url or Metadata XML, then Callback method, and click on the "Save" button.

"SAML2 (Custom)" and fill in the corresponding fields (taken from the Microsoft Entra portal) - Login URL, Identifier, upload the certificate, Callback method, and click on the "Save" button.

After this, system users will have access to Single Sign-On (SSO) authentication on the login page.

To connect the option on the Microsoft Entra portal, you need to go to the "Enterprise applications" section and click on "New registrations."


After that, you need to:
click on "Create your own application";

enter the name of the new application, for example, "HURMA", choose "Integrate any other application you don't find in the gallery (Non-gallery)", and save;

After that, on the "Overview" page, you need to select "Single sign-on" and then "SAML";


On the next page, you need to go to edit mode for block №1;

In the form, we add information to the fields "Identifier (Entity ID)," "Reply URL (Assertion Consumer Service URL)," and "Sign-on URL," using the data from the corresponding fields in the HURMA system, and then save it;


The next step is to proceed to edit block №2;

After that, in the form, set the specified correspondences in the "Additional claims" block;
email - user.userprincipalname
first_name - user.givenname
user.name - user.userprincipalname
second_name - user.surname
phone - user.mobilephone
phone_second - user.telephonenumber
display_name - user.displayname

The next step is to configure the list of users who will have access to this application, using the instructions below from the section "Grant access to a limited list of users to HURMA";
After that, return to the "SAML-based Sign-on" page;
The final step is to complete the connection in HURMA, depending on the chosen metadata or method.
On the "SAML-based Sign-on" page in Microsoft Entra, copy the value from the "App Federation Metadata Url" field and paste it into the "Metadata Url" field in HURMA, then save the changes.


On the "SAML-based Sign-on" page in Microsoft Entra, download the file from the "Federation Metadata XML" field and upload it to HURMA, then save the changes.


On the "SAML-based Sign-on" page in Microsoft Entra, copy the values from the "Login URL" and "Microsoft Entra Identifier" fields, and paste them into the corresponding fields in HURMA.


The last step is to download the file from the "Certificate (Base64)" field and upload it to HURMA. After that, save the changes.


After enabling SSO and redirecting users to the login page, they will only have access to authorization through SSO.

If a user authenticating in HURMA is an existing employee, their profile in HURMA remains unchanged, and their HURMA account becomes linked to the Microsoft user.
If the user authenticating in HURMA is a new employee, and there was no existing record in the system, a new profile with the role of "Employee" is created in HURMA.
To restrict access to the application, follow these steps:
Go to Microsoft Entra -> Enterprise applications;

select the desired application from the list;

open the "Properties" menu and activate the "Assignment required?" option;

add users or groups of users who will have access to the application on this page under "Users and groups".

If an employee is terminated or removed in HURMA but remains active in Active Directory, their authorization will result in the creation of a new profile with the "Employee" role.
If the user does not have access to the HURMA application in Active Directory but their profile exists in HURMA, attempting to authenticate will result in an error indicating that access to the system is prohibited.
